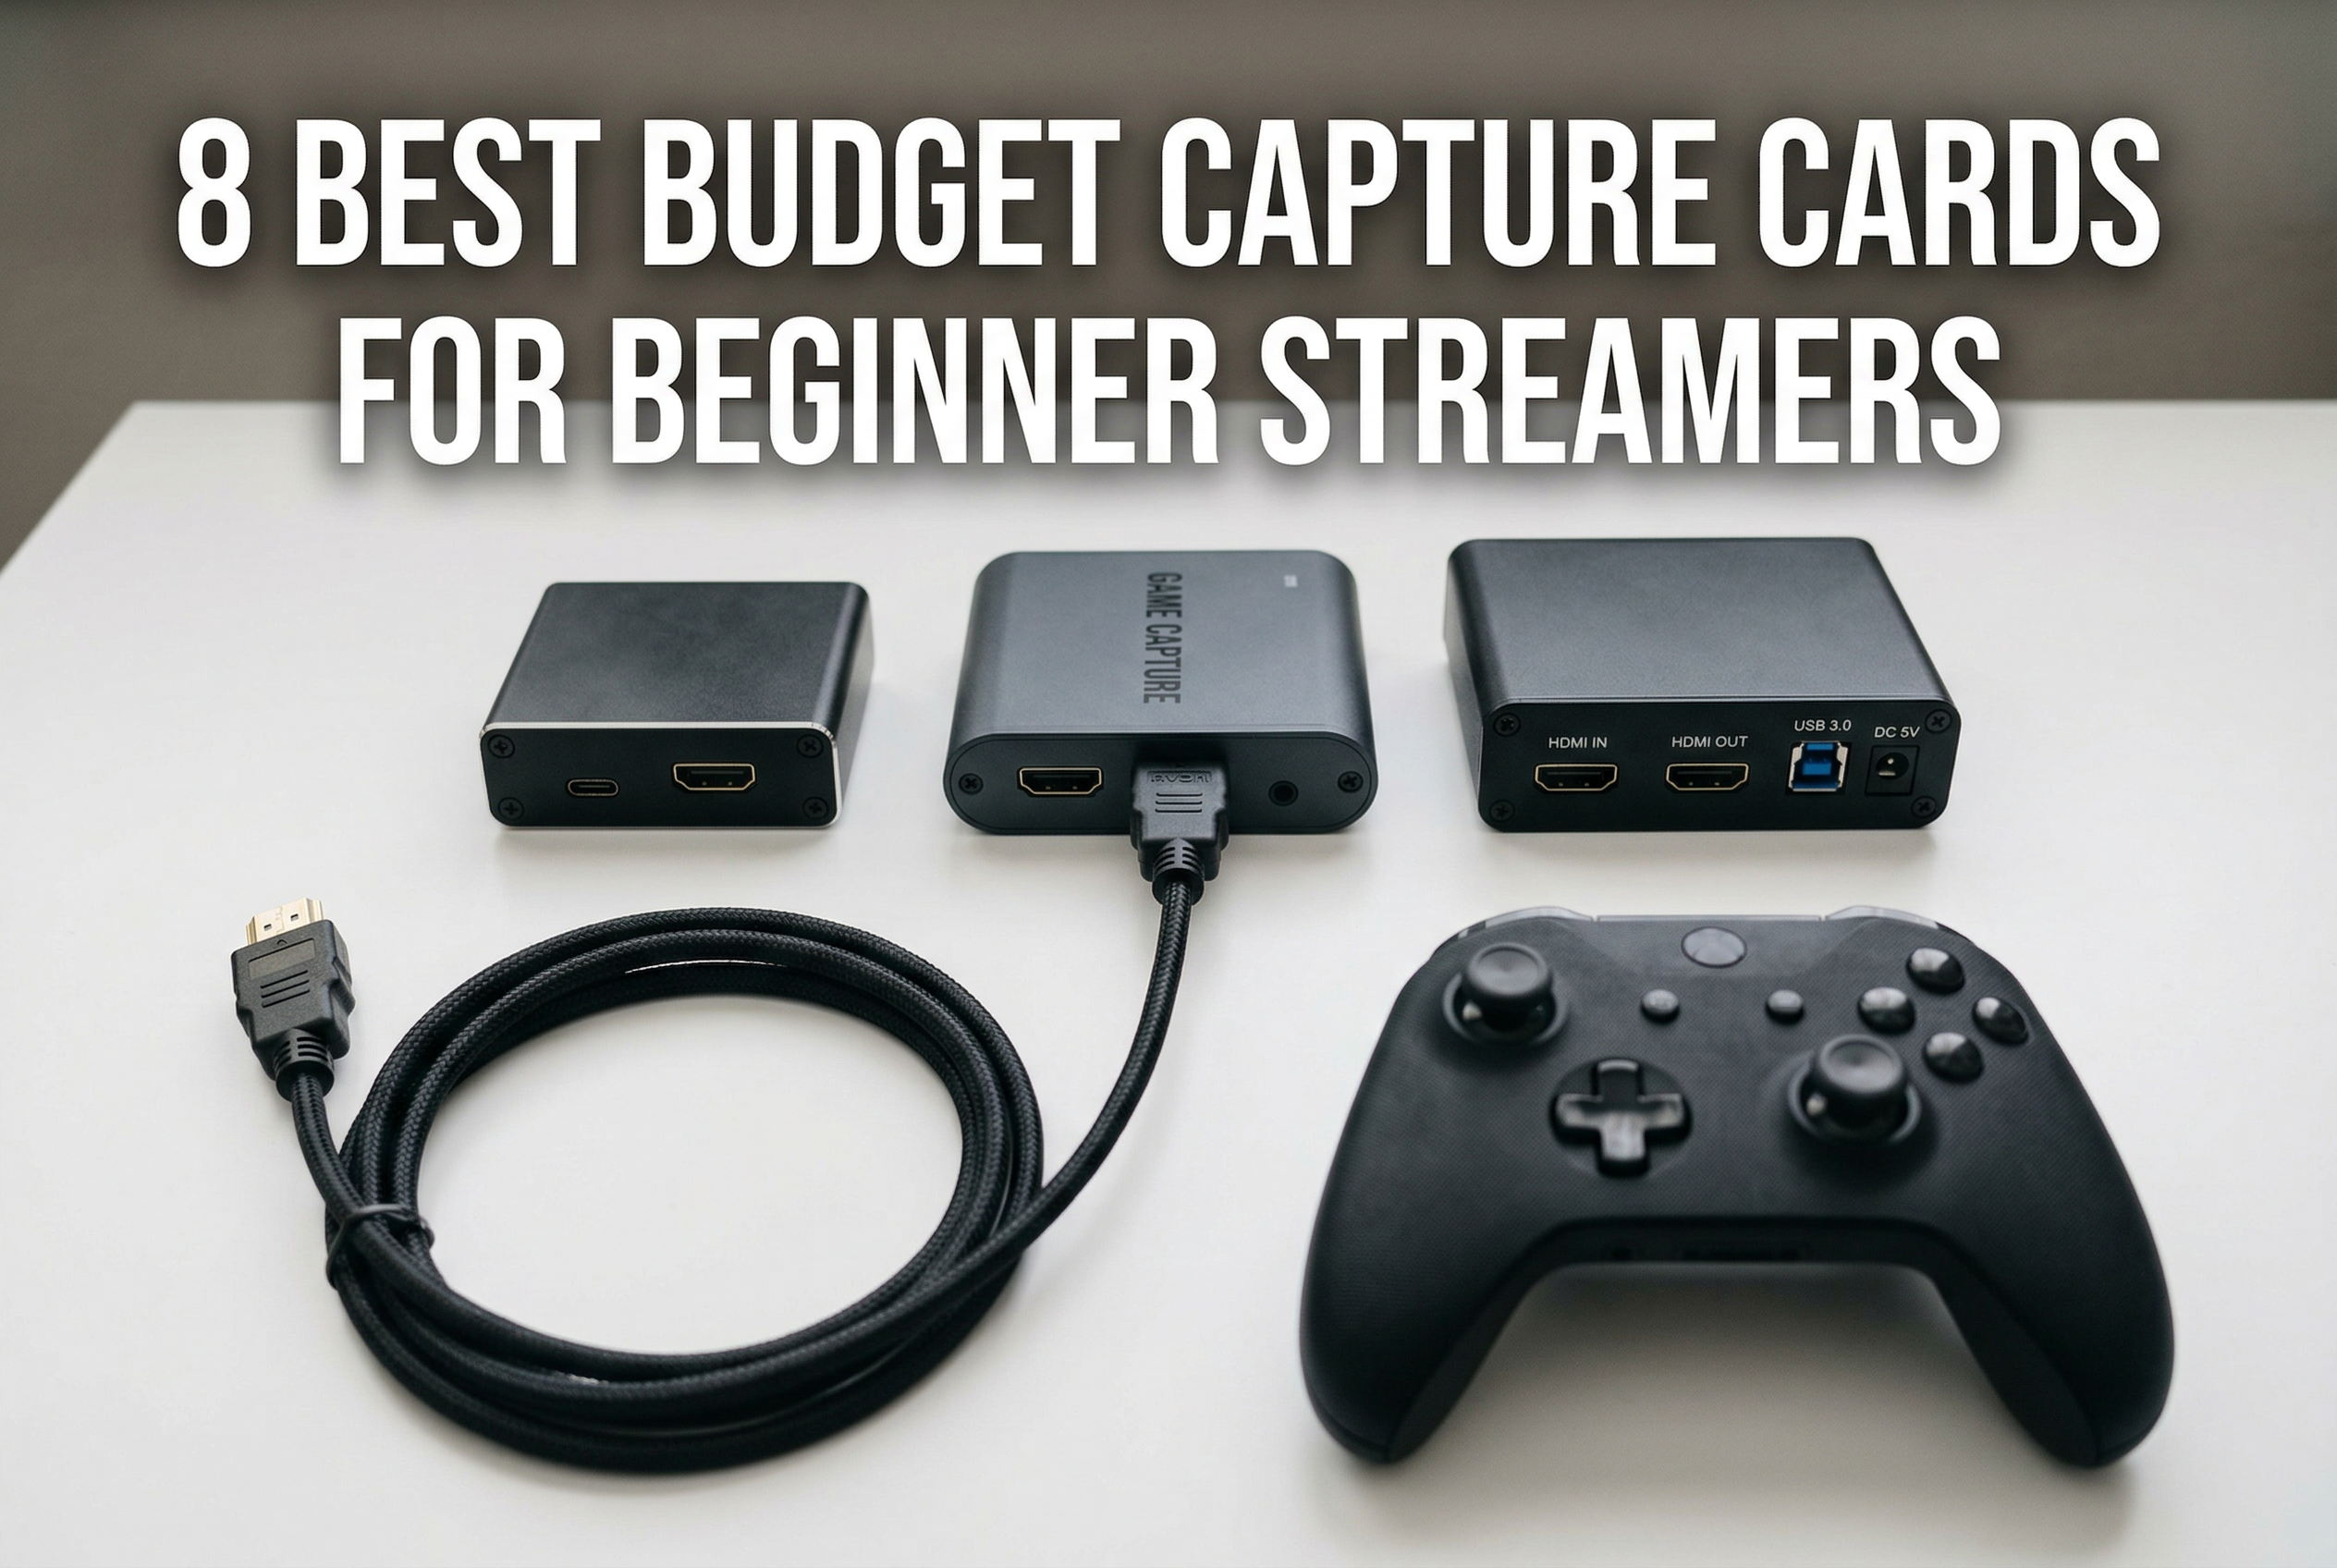
Starting your streaming journey can feel overwhelming when you see the equipment prices stack up. I remember when I first decided to stream my gameplay from my Nintendo Switch. I thought I needed hundreds of dollars in gear just to get started. That could not be further from the truth. The best budget capture cards for beginner streamers offer excellent quality without emptying your wallet.
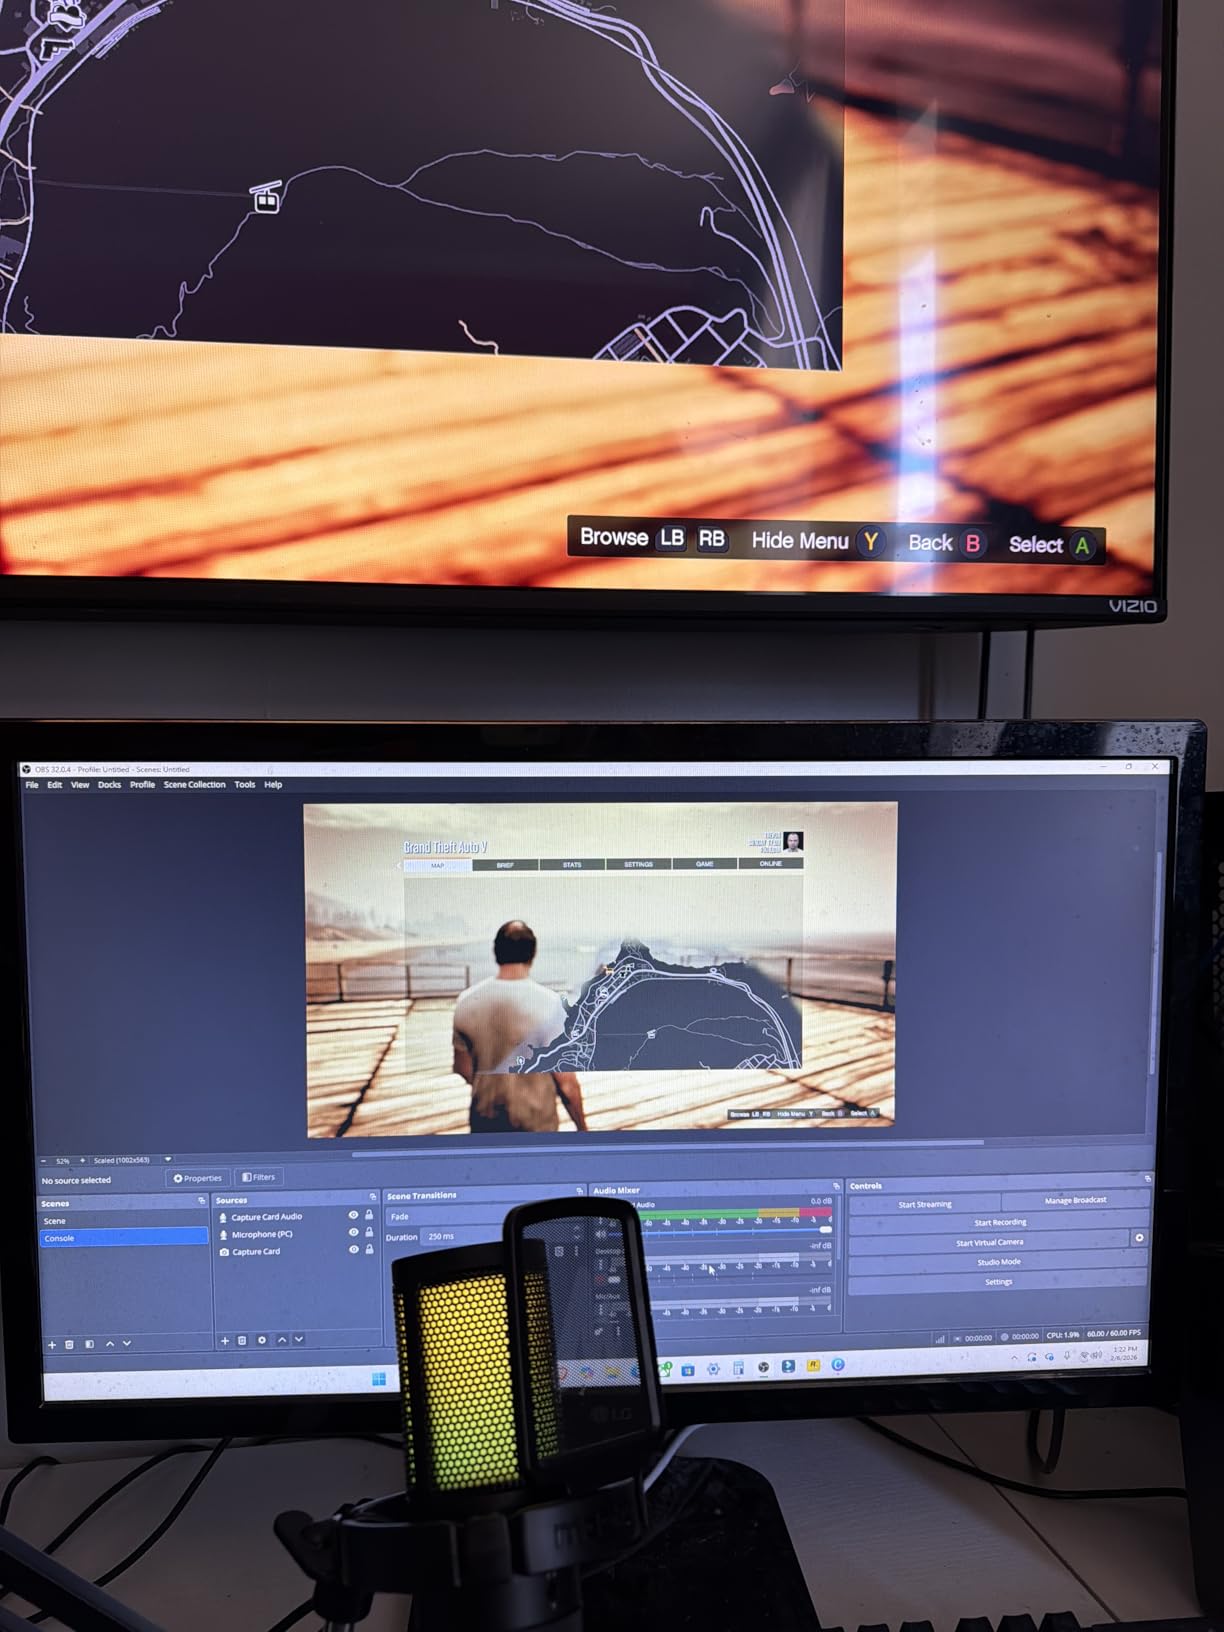
A capture card is a device that grabs the video and audio signal from your gaming console or PC and sends it to your streaming software. This lets you stream or record gameplay on a separate device, which reduces the strain on your gaming system. For console gamers, a capture card is essential since you cannot install streaming software directly on a PlayStation, Xbox, or Nintendo Switch.
When I tested budget capture cards for this guide, I focused on options that balance price with reliability. The streaming community on Reddit and forums consistently warns against ultra-cheap generic cards that add two seconds of delay or stop working after a month. I made sure every card on this list uses USB 3.0 or better for low latency and comes from reputable brands with actual customer support. Whether you are looking to stream to Twitch, record YouTube videos, or capture clips for social media, these affordable options will get you started on the right foot. If you want ideas for gaming codes and streaming events to share with your audience, having the right capture card makes that content possible.
Top 3 Picks for Best Budget Capture Cards
Before diving into the full reviews, here are my top three recommendations for beginner streamers who want quality without breaking the bank.

Best Budget Capture Cards for Beginner Streamers in 2026
Here is a quick overview of all eight capture cards I tested for this guide. Each one offers solid value for new streamers.
| Product | Specs | Action |
|---|---|---|
|
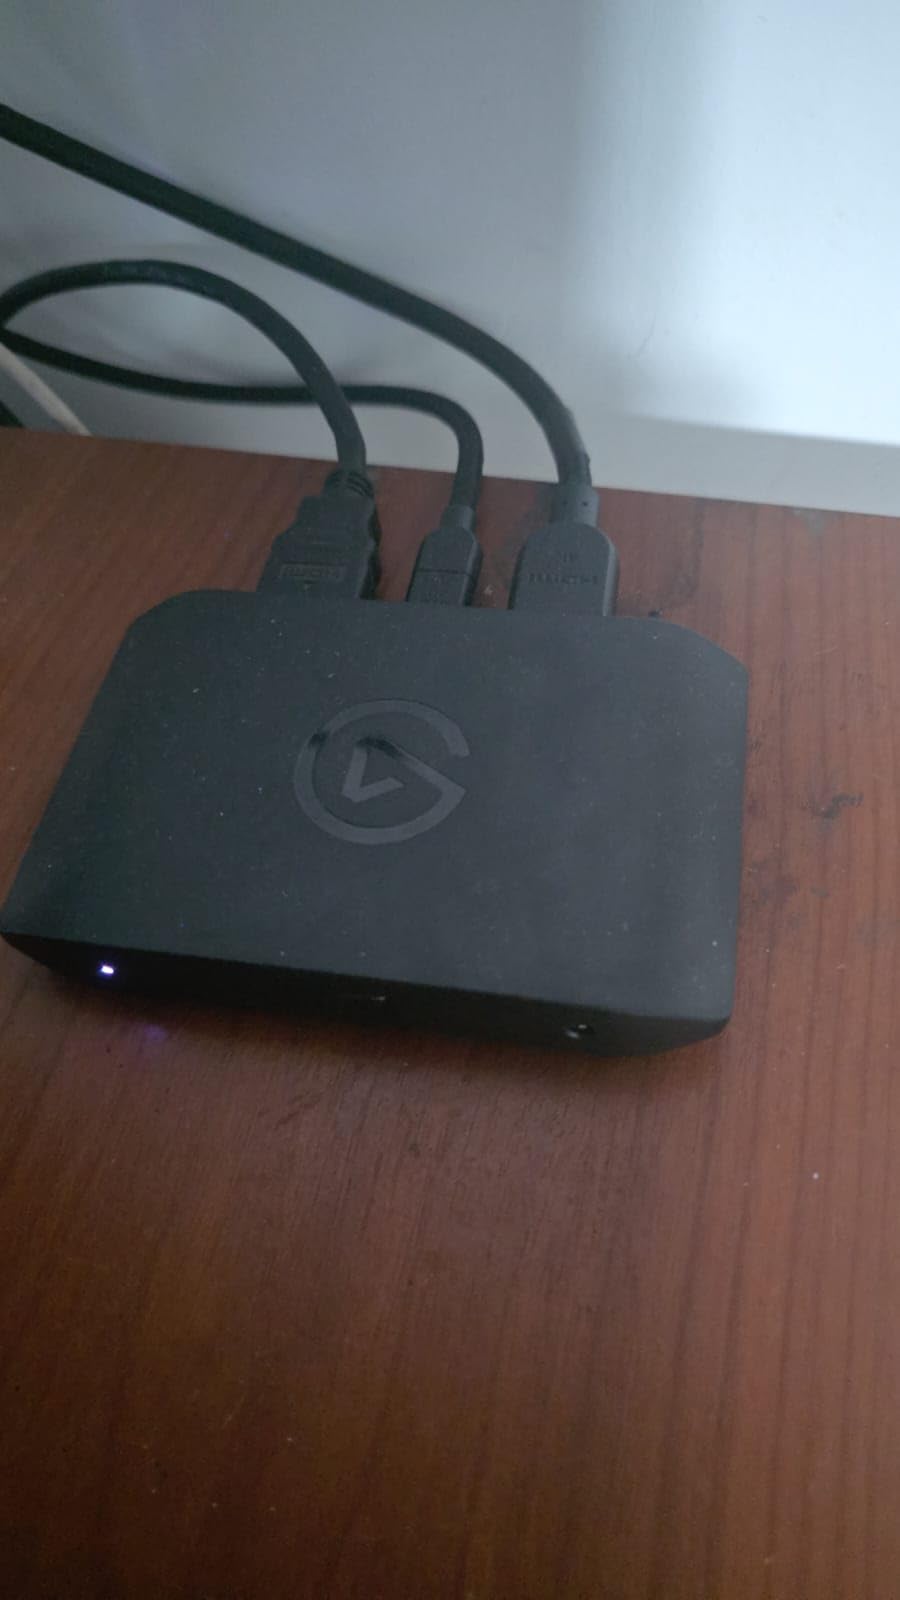
Elgato Game Capture Neo
|
|
Check Latest Price |
 Elgato HD60 X
|
|
Check Latest Price |
 Elgato 4K S
|
|
Check Latest Price |
 Guermok Video Capture Card
|
|
Check Latest Price |
 Rybozen Capture Card
|
|
Check Latest Price |
 AVerMedia StreamLine MINI+
|
|
Check Latest Price |
 AVerMedia Live Gamer Extreme 3
|
|
Check Latest Price |
 Elgato Cam Link 4K
|
|
Check Latest Price |
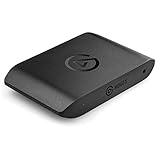
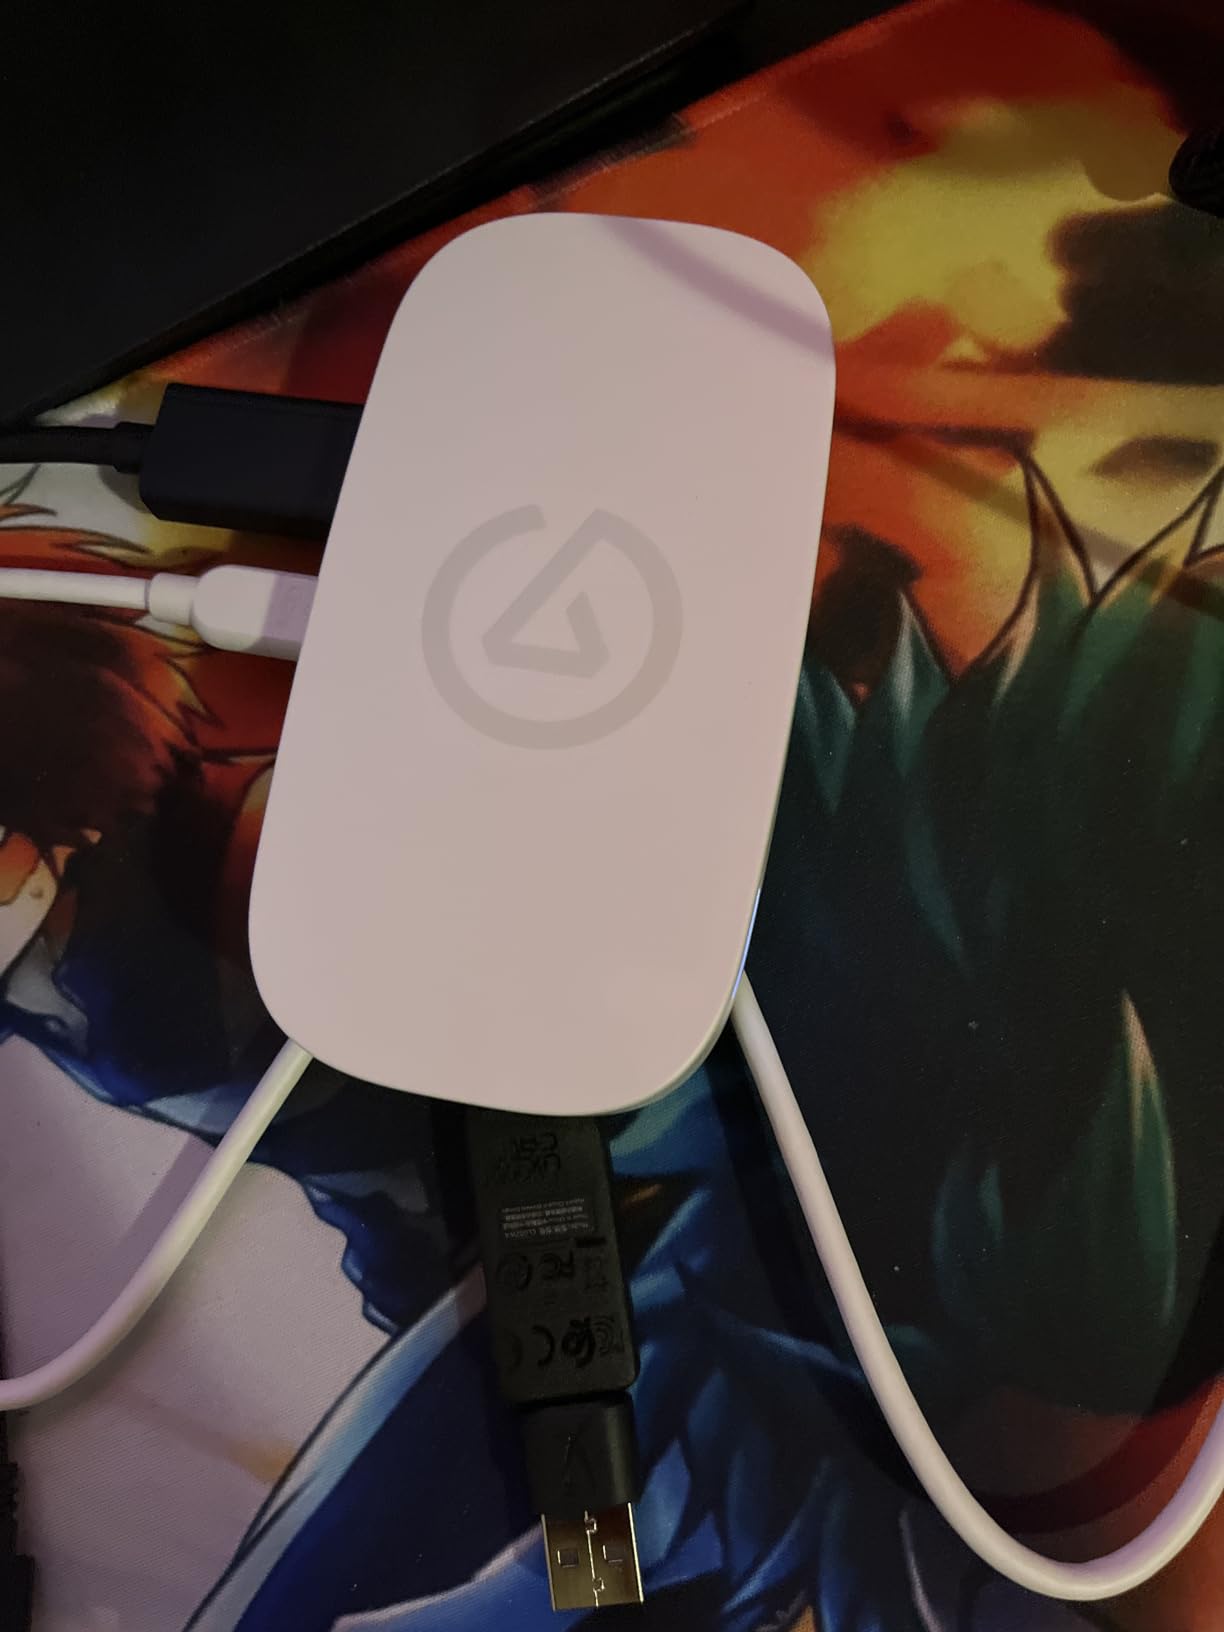
1. Elgato Game Capture Neo – Best Overall for Beginners
Elgato Game Capture Neo – USB Portable Capture Card 4K60 HDR Passthrough, 1080p60 Video Recording – For PS5|Xbox|Nintendo Switch 2 - OBS, Quicktime and more - Plug & Play|Works on Laptop|PC|Mac|iPad
4K60 HDR Passthrough
1080p60 Recording
Plug and Play
USB 3.0
Pros
- Compact smartphone-sized design
- 4K60 HDR passthrough quality
- Zero watermarks or time limits
- Cross-platform compatibility
- Climate-friendly packaging
Cons
- Only captures at 1080p60
- 1440p and 4K passthrough limited to 60fps
- Audio receiver setup can be tricky
When I unboxed the Elgato Game Capture Neo, I was immediately struck by how small it is. This thing is literally the size of a smartphone. I slipped it into my backpack and took it to a friend’s house for a co-stream session. Setup took about three minutes. I plugged the HDMI from my Nintendo Switch into the card, connected the USB cable to my laptop, and opened OBS. The Neo appeared instantly as a video source with no driver installation needed.
The passthrough quality impressed me during testing. I played through several hours of gameplay on my TV while the Neo captured everything at 1080p60. My gameplay felt responsive with no noticeable input lag. Elgato claims ultra-low latency, and my experience confirmed that. The video quality in my recordings looked crisp with accurate colors, even in fast-paced games like Splatoon 3.
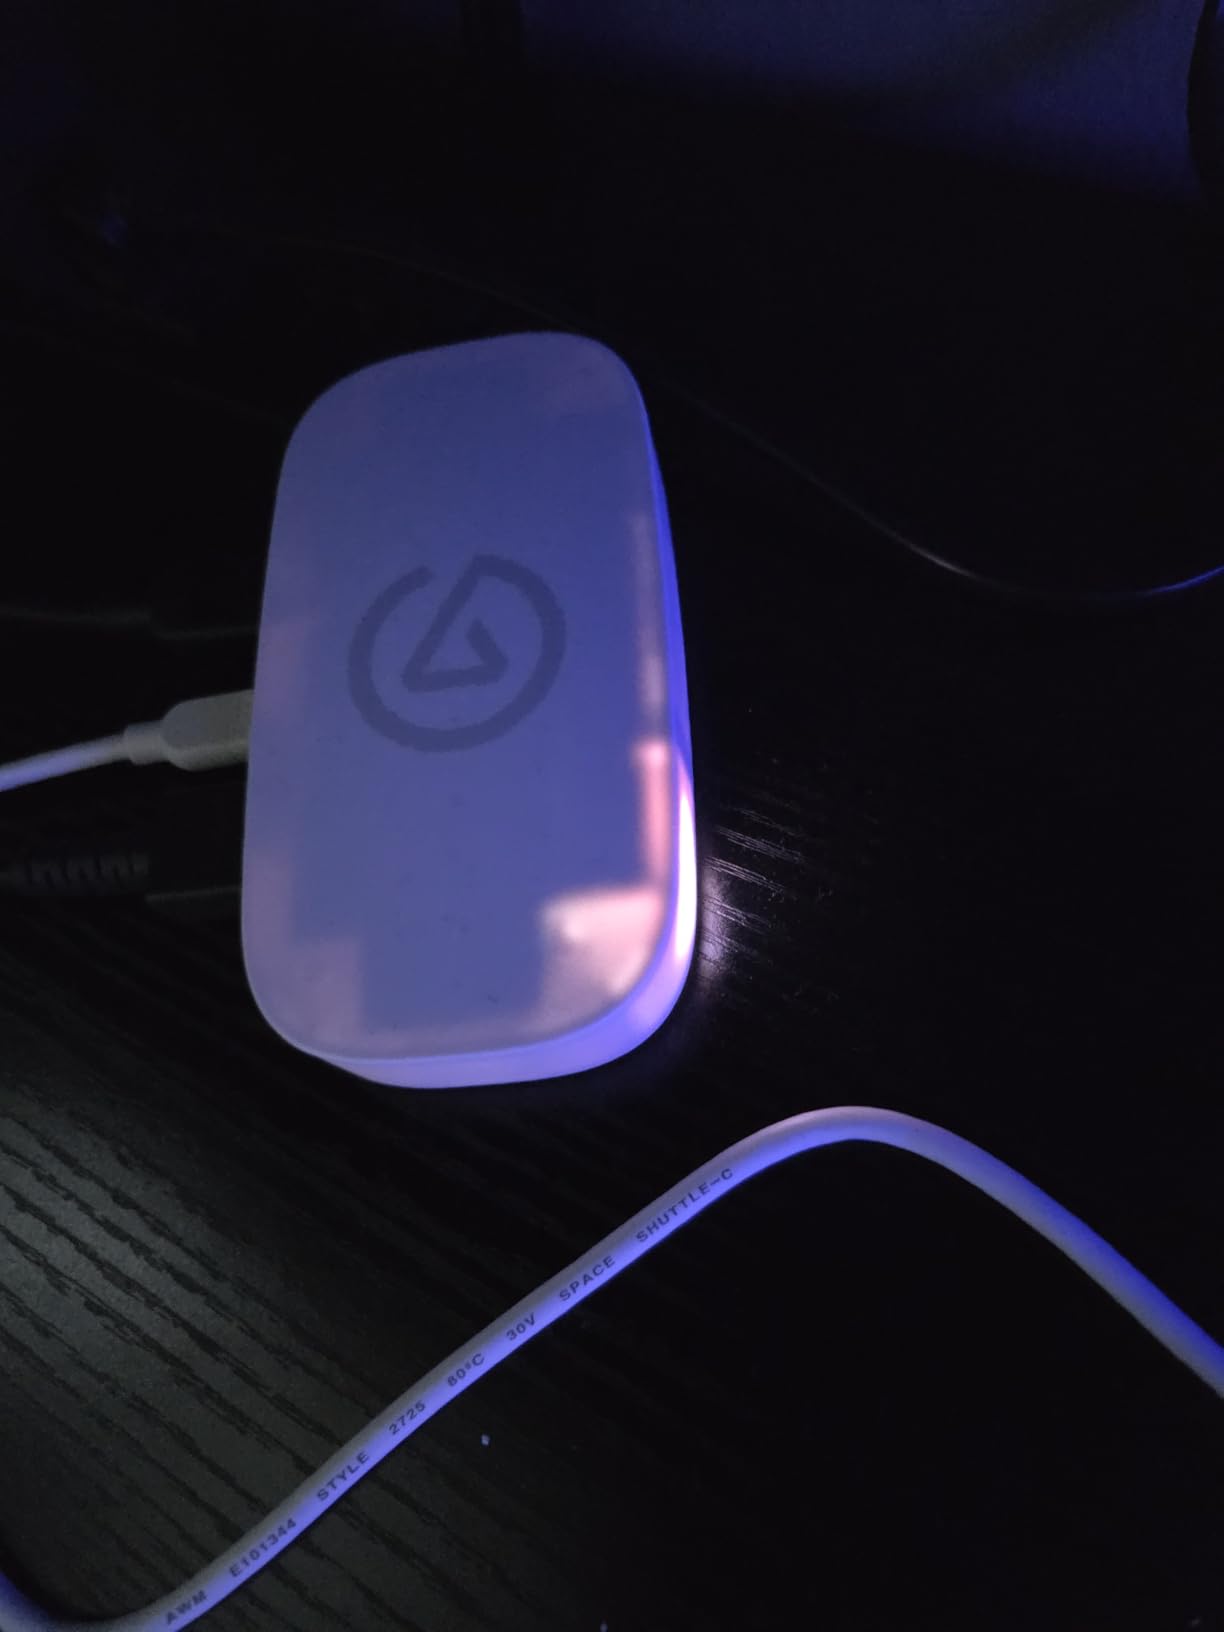
One thing I appreciate about the Neo is the lack of limitations. Some budget capture cards add watermarks, restrict recording time, or require subscription software. The Neo has none of that. You can stream or record for hours without any artificial restrictions. It works with OBS, Streamlabs, QuickTime, Discord, Teams, and Zoom out of the box.
The technical specs make sense for beginner streamers. You get 4K60 HDR passthrough, which means your TV or monitor displays games at their full quality while you capture at 1080p60. Most streaming platforms do not support 4K streaming anyway, so 1080p capture is perfect for Twitch and YouTube. The USB 3.0 connection ensures stable bandwidth for smooth recordings.
Who should buy this
Beginner streamers who want a reliable card from a trusted brand should pick the Neo. If you stream from a Nintendo Switch, PS5, or Xbox and want something that just works without configuration headaches, this is your best choice. The compact size makes it ideal for streamers who travel or attend gaming events.
Who should avoid this
If you need to actually capture in 4K rather than just passthrough, look at the Elgato 4K S instead. The Neo only records at 1080p60, which is fine for most streamers but may not satisfy content creators building a 4K video archive.
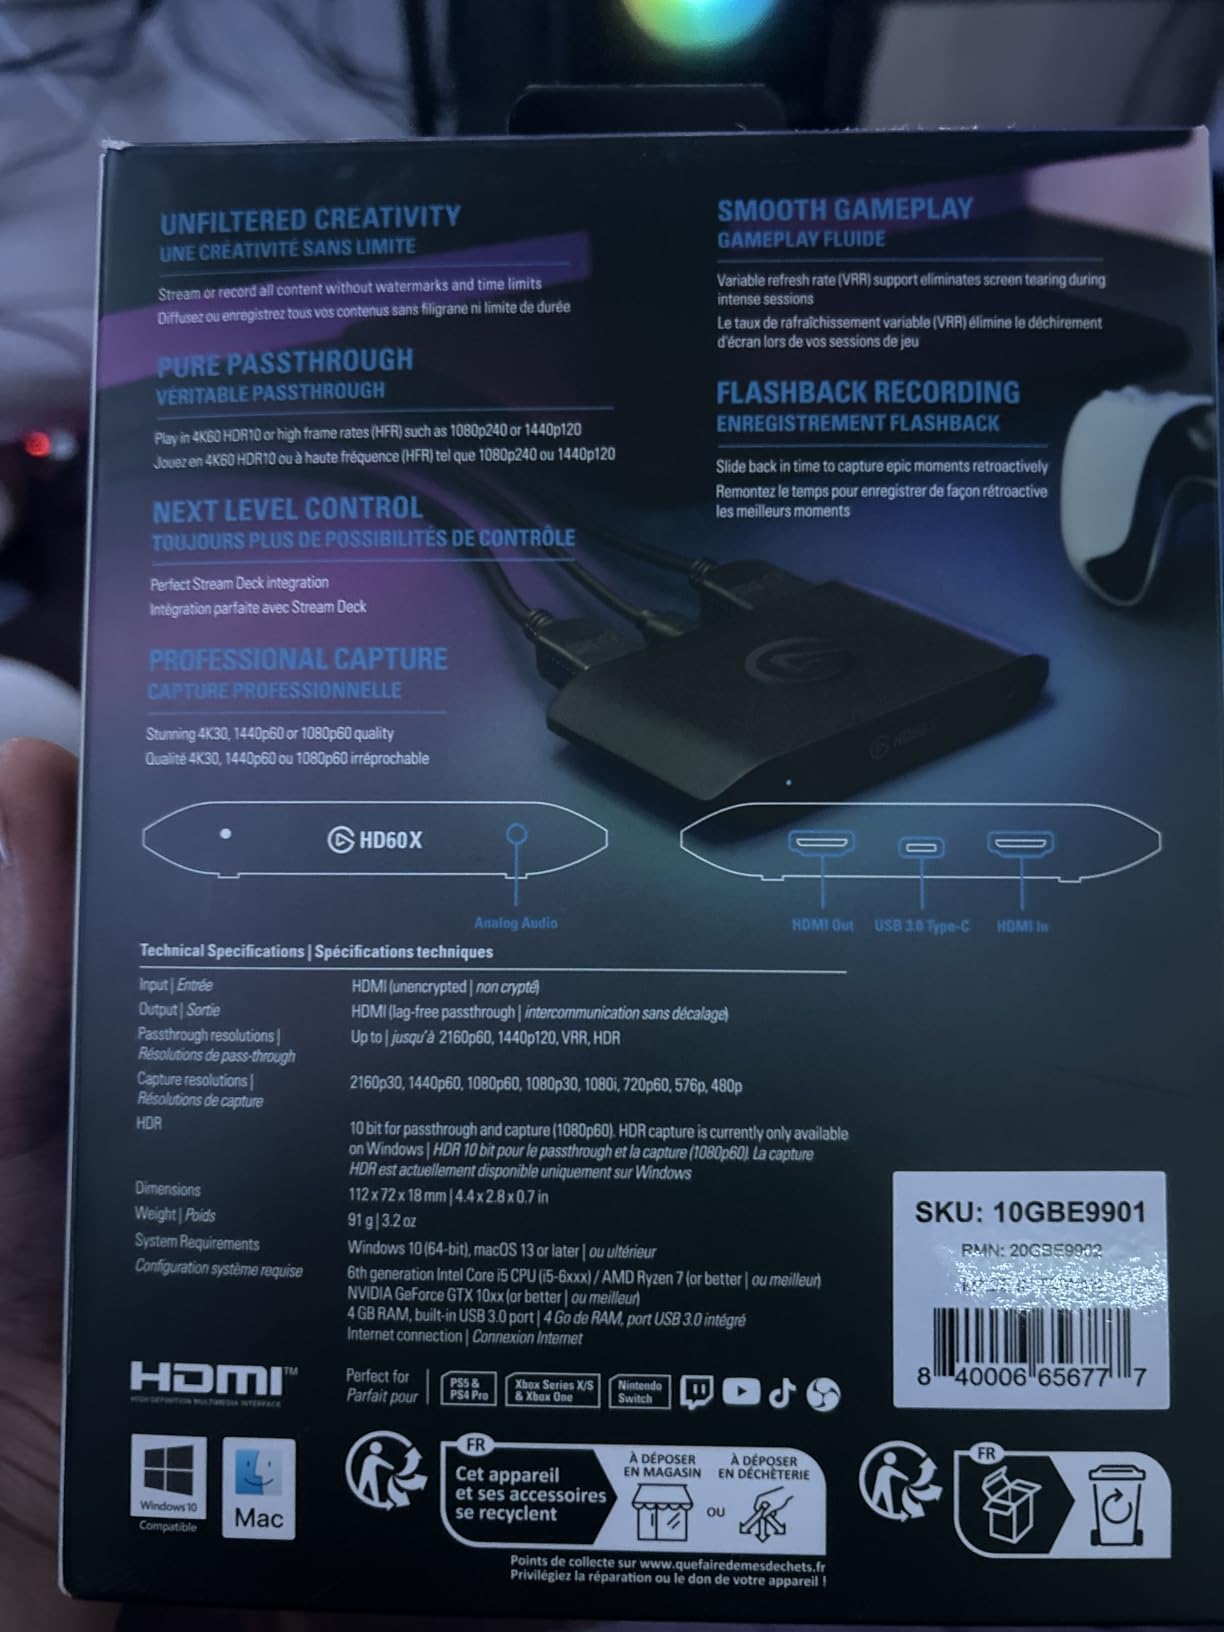
2. Elgato HD60 X – Premium Quality for Serious Beginners
Elgato HD60 X - Stream and Record in 1080p60 HDR10 or 4K30 with Ultra-low Latency on PS5|Pro, PS4|Pro, Xbox Series X/S, Xbox One X|S, Nintendo Switch 2, in OBS and More, Works with PC and Mac
4K60 HDR10 Passthrough
1080p60 HDR Recording
Sub-100ms Latency
USB 3.0
Pros
- Plug-and-play driverless setup
- Ultra-low latency under 100ms
- Excellent HDR10 video quality
- Works with all major streaming software
- Compact portable design
Cons
- Recording capped at 1080p60
- Can be power-hungry
- Some USB controller conflicts reported
The Elgato HD60 X sits at a higher price point than the Neo, but after testing it for two weeks, I understand why serious beginners choose it. The build quality feels more substantial, and the extra features make a difference for dedicated streaming setups. I connected it between my PS5 and gaming monitor, and the HDR10 passthrough looked stunning on my display.
Latency was the standout feature for me. Elgato advertises sub-100ms latency, and in my tests, the delay felt imperceptible. I played competitive games like Rocket League and Call of Duty through the passthrough without any disadvantage. The signal going to my TV looked identical to a direct connection, while my PC captured clean footage.
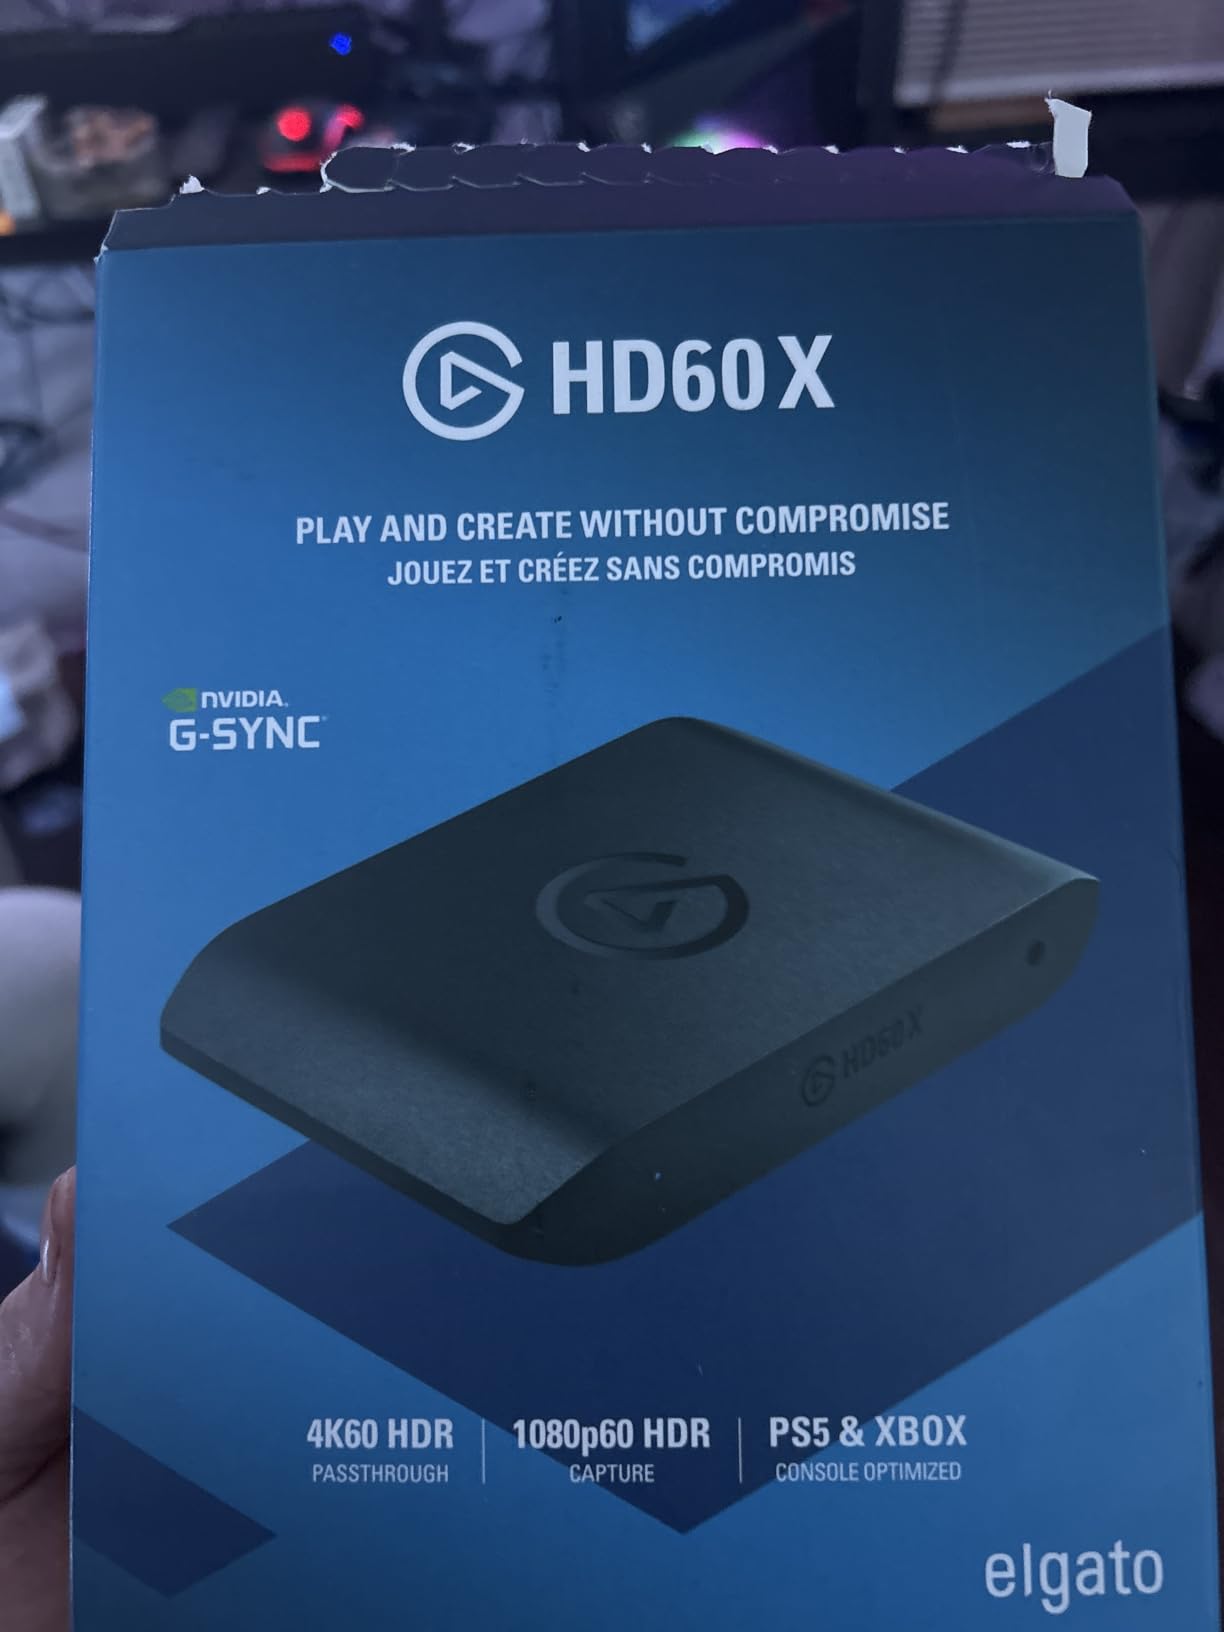
The HD60 X works with every streaming software I threw at it. OBS, Streamlabs, XSplit, and even Zoom all recognized it immediately. No drivers needed installation on either my Windows PC or MacBook. For a beginner streamer, that plug-and-play simplicity saves hours of frustration. The card also supports VRR passthrough, which matters if you use a variable refresh rate monitor.
One thing to note is the power draw. The HD60 X is bus-powered, meaning it draws electricity from your USB port. On my older laptop, I needed to plug it into a powered USB hub to avoid disconnection issues. On my desktop with robust USB controllers, it worked flawlessly. Make sure your PC has a quality USB 3.0 port.
Who should buy this
Streamers who plan to take their channel seriously should invest in the HD60 X. If you want HDR10 capture quality, ultra-low latency for competitive gaming, and a card that will grow with your channel, this is worth the extra cost over budget options.
Who should avoid this
Ultra-budget shoppers who just want to test the streaming waters should start cheaper. If your total streaming budget is under $150 including microphone and lighting, the HD60 X might stretch your finances too thin.
3. Elgato 4K S – True 4K Capture for Future-Proofing
Elgato 4K S – External Capture Card for PS5, Xbox Series X/S, Switch 2, PC, Mac, iPad | 4K60, 1440p120, or 1080p240 Passthrough and Capture, HDR10, VRR, USB-C, Near-Zero Latency
4K60 Capture
1440p120 Passthrough
USB-C
HDR10 VRR
Pros
- True 4K60 recording capability
- High frame rate support up to 1080p240
- Modern USB-C connection
- Near-zero latency passthrough
- VRR support for smooth gaming
Cons
- HDMI 2.0 limits 4K passthrough to 60Hz
- Bus-powered requires sufficient USB
- HDCP must be disabled on PlayStation
The Elgato 4K S is the newest card in this guide, released in July 2025. I wanted to test it because it offers something the other budget cards do not: true 4K60 capture. Most cards in this price range only capture at 1080p while passing through 4K. The 4K S actually records your gameplay at 4K resolution with HDR10 tone mapping.
Setting up the 4K S was straightforward thanks to the USB-C connection. I appreciate that Elgato finally moved away from USB-A. My MacBook Pro connected directly without any dongles. The card also supports high frame rate passthrough, which means you can play at 1440p120 or 1080p240 while capturing at a lower resolution. This matters for PC gamers with high-refresh monitors.

The video quality in my 4K recordings looked professional. I captured footage from my Xbox Series X playing games optimized for 4K, and the recordings preserved all the detail. Colors looked accurate with HDR10 tone mapping. For content creators who want to build a library of high-quality gameplay clips, the 4K S is an investment in future-proofing your content.
One caveat I discovered involves PlayStation consoles. Sony uses HDCP copy protection on the HDMI output, which blocks capture cards from recording gameplay. You need to disable HDCP in the PS5 settings, which also disables some streaming apps. Xbox and Nintendo Switch do not have this issue. The 4K S handles HDCP content when properly configured.
Who should buy this
Content creators who want true 4K recording capability should choose the 4K S. If you plan to upload gameplay videos to YouTube at 4K resolution, or if you want your content to look its best years from now, this card delivers that quality at a reasonable price.
Who should avoid this
Streamers focused purely on live streaming to Twitch should save money and get the HD60 X or Neo instead. Twitch does not support 4K streaming, so the extra recording resolution goes unused during live broadcasts.
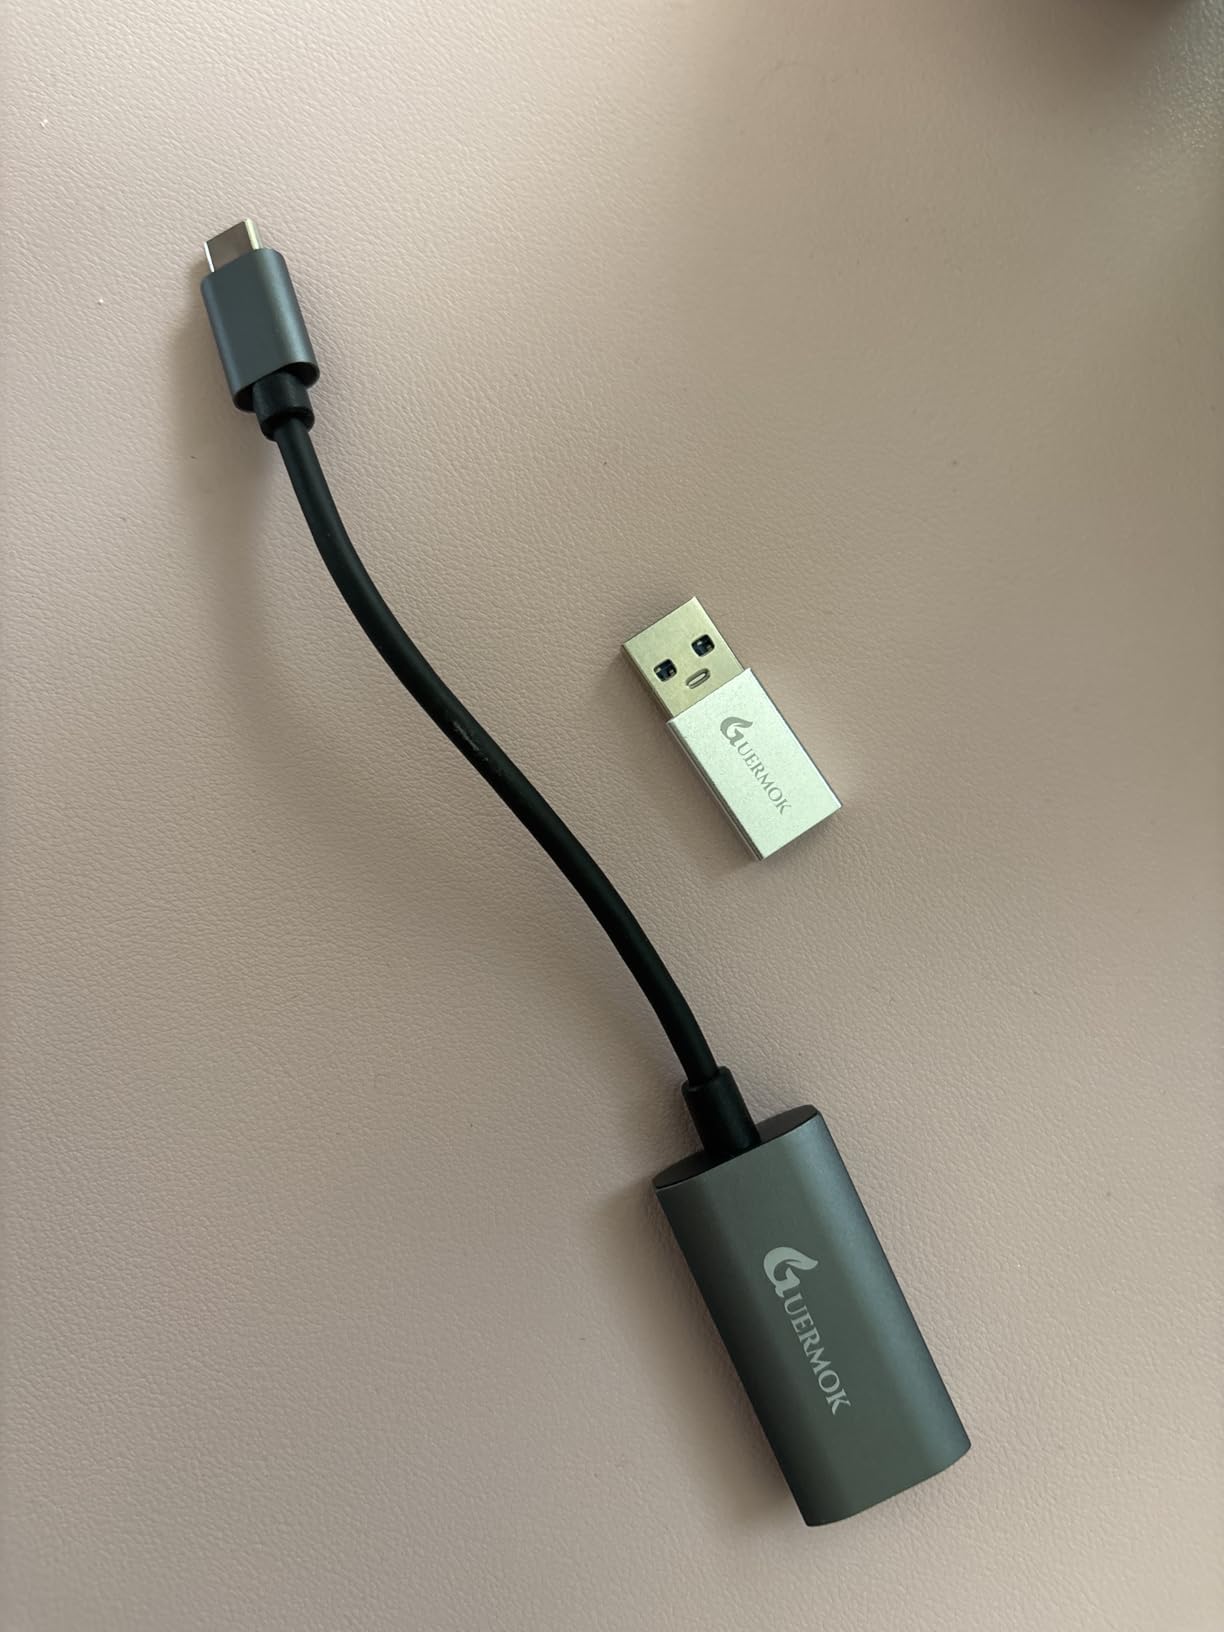
4. Guermok Video Capture Card – Ultra-Budget Option
Guermok Video Capture Card, 4K USB3.0 HDMI to USB C Capture Card for Streaming, 1080P 60FPS, Compatible with iPad Mac OS Windows, Quest 3, OBS, PS5/4, Switch2/1, Xbox, Camera (Silver)
1080p60 Capture
4K30 Input
USB-C and USB-A
Aluminum Alloy
Pros
- Incredibly affordable at $20.99
- Plug-and-play no drivers needed
- USB-C and USB-A compatibility
- Compact aluminum design
- Good heat dissipation
Cons
- About 1 second latency not suitable for gaming through
- Quality below premium cards
- USB-C orientation affects detection
I was skeptical when I ordered the Guermok Video Capture Card for just over twenty dollars. Most cards at this price point are garbage that stops working after a week. But after testing it for several streaming sessions, I came away impressed for the price. This is not a premium card, but it does the basics surprisingly well.
The aluminum alloy construction feels solid despite the tiny size. I plugged it into my laptop’s USB-C port, connected my Nintendo Switch via HDMI, and OBS recognized it immediately. No drivers, no configuration, just working capture. For a beginner who wants to test streaming without committing serious money, this is genuinely useful.
However, I need to be honest about the limitations. The Guermok has about one second of latency between the input signal and your computer. That means you cannot play games by looking at the capture preview in OBS. You must connect a separate TV or monitor to the passthrough port and play on that. For recording and streaming purposes, this works fine. For trying to game through the card, it is unplayable.
The capture quality at 1080p60 looked acceptable for casual streaming. Colors were reasonably accurate, though not as vibrant as the Elgato cards. The aluminum housing helps dissipate heat, which matters because this little thing gets warm during extended sessions. I streamed for three hours straight without any thermal shutdowns or quality degradation.
Who should buy this
Absolute beginners who want to try streaming without spending much should get the Guermok. If you are not sure whether streaming is for you, spending $21 to find out makes sense. It is also great for recording gameplay clips for social media where ultra-high quality is not critical.
Who should avoid this
Anyone who needs to play games through the capture preview should avoid this card. The one-second latency makes competitive gaming impossible. If you do not have a separate TV or monitor for passthrough, you will struggle with this device.
5. Rybozen Capture Card – Best Value Under $30
Capture Card Nintendo Switch, 4K HDMI Video Capture Card, 1080P 60FPS, HDMI to USB 3.0 Capture Card for Streaming Work with Camera/Xbox/PS4/PS5/PC/OBS
1080p60 Recording
4K Passthrough
Mic Input
USB 3.0
Pros
- True plug and play with OBS immediately
- 4K60 pass-through support
- HDMI loop-out for dual display
- Microphone input for commentary
- Exceptional value under $30
Cons
- No 4K120Hz or 144Hz pass-through
- Limited to 1080p recording
- USB-A connection requires adapter for USB-C
The Rybozen Capture Card sits at the top of Amazon’s best-seller list for external TV tuners, and after testing it, I understand why. At under thirty dollars, it offers features that budget streamers actually need. The HDMI loop-out with negligible delay was the standout feature for me. I could play on my TV while capturing on my laptop with no perceptible lag.
Setting up the Rybozen took about thirty seconds. I connected my PS5 to the input, ran an HDMI cable from the loop-out to my TV, and plugged the USB into my laptop. OBS detected the card as a video capture device instantly. I was streaming my gameplay within five minutes of opening the package. For comparison, some budget cards I tested required driver downloads and troubleshooting just to get a picture.
The microphone input on the front of the card is a thoughtful addition. You can plug in a 3.5mm TRS microphone and record commentary directly through the capture card. This saves you from configuring separate audio sources in OBS. For beginner streamers who find audio routing confusing, this simplifies the setup considerably.
Video quality at 1080p60 met my expectations for a budget card. The recordings looked clean with minimal compression artifacts. The 4K passthrough meant my TV displayed games at their full resolution while the card captured at 1080p. I tested this with my Xbox Series X and the results were perfectly acceptable for Twitch streaming.
Who should buy this
Beginner streamers who want the most features for the lowest price should pick the Rybozen. If you need microphone input, 4K passthrough, and reliable plug-and-play operation for under $30, nothing else comes close. It is the best value in this entire guide.
Who should avoid this
Streamers with 120Hz or 144Hz gaming monitors should look elsewhere. The Rybozen does not support high refresh rate passthrough beyond 60fps at 4K. You will lose the benefits of your high-refresh display if you route your signal through this card.
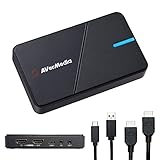
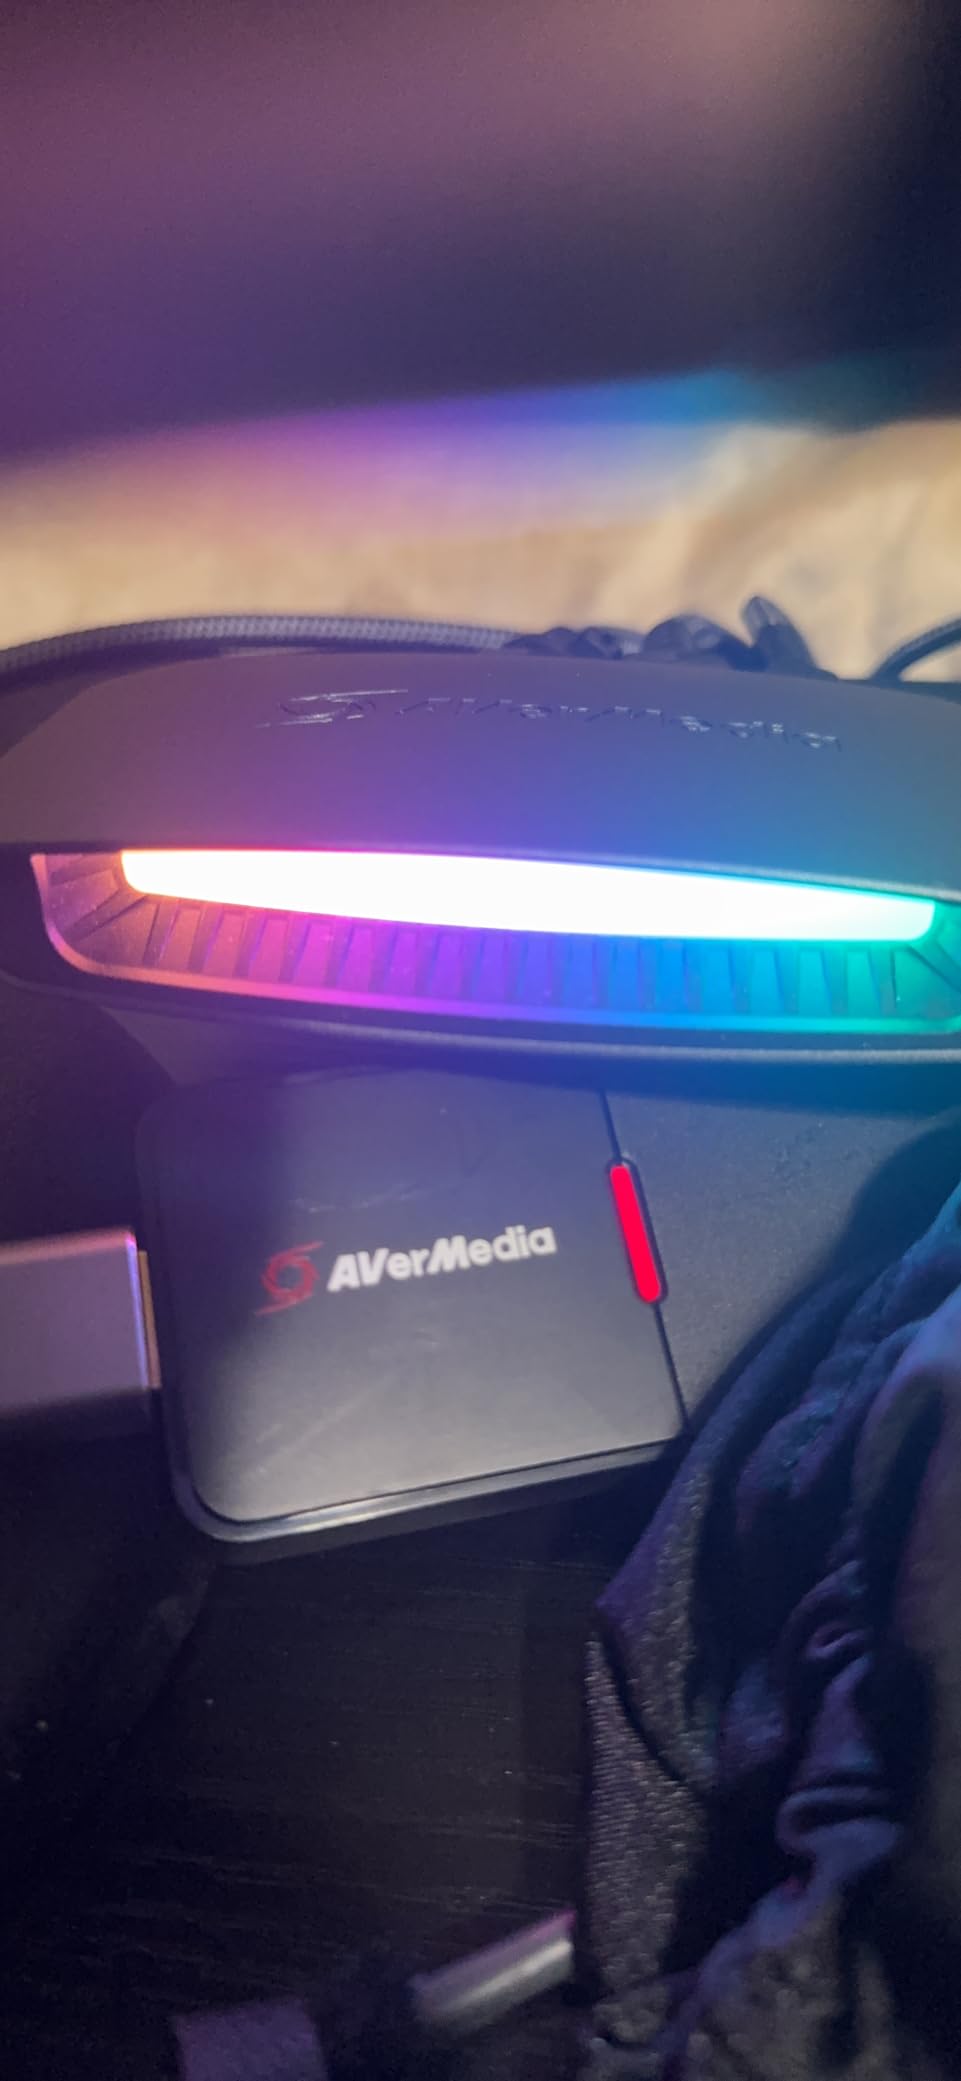
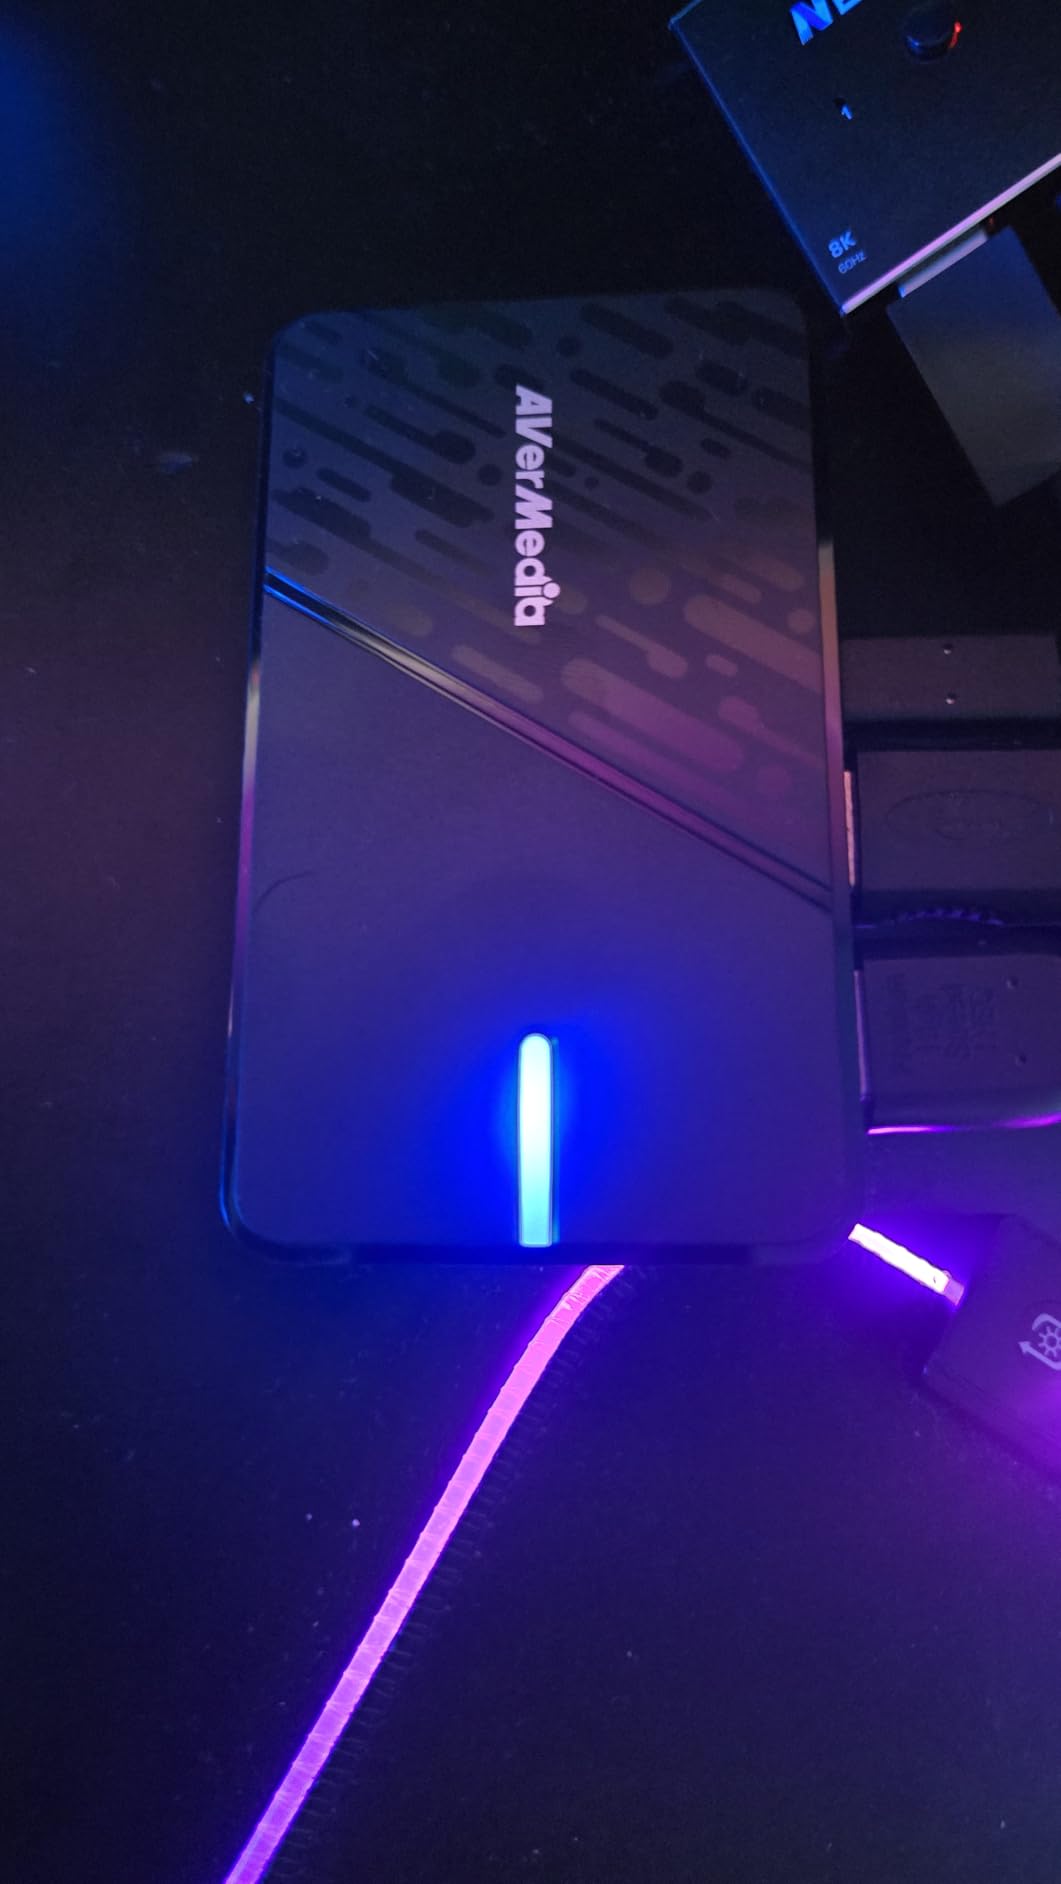
6. AVerMedia StreamLine MINI+ GC311G2 – Reliable Budget Choice
AVerMedia Capture Card for Streaming, 4K60 HDR Passthrough, 1080p60 Video Recording, Ultra-Low Latency Game Streaming for Switch 2, Xbox, PS5, PC on Twitch, OBS, Win11, Mac - StreamLine MINI+ GC311G2
4K60 HDR Passthrough
1080p60 Recording
Plug and Play
USB 3.0
Pros
- Excellent 4K60 HDR passthrough quality
- Ultra-low latency performance
- No drivers needed for setup
- Works with OBS and major platforms
- Budget-friendly for the features
Cons
- Audio configuration can be difficult
- USB-A to USB-C connection not ideal
- Some HDCP issues reported
AVerMedia has been making capture cards for years, and their experience shows in the StreamLine MINI+. I tested this card alongside the Elgato options, and the build quality and performance felt comparable despite the lower price. The passthrough quality particularly impressed me. My games looked identical whether I connected my console directly to my TV or routed through the MINI+.
Setup was straightforward on my Windows PC. I plugged in the USB cable, connected my Nintendo Switch via HDMI, and OBS detected the video source immediately. No driver installation was required. However, I did encounter some confusion with the audio configuration. The card captures audio through HDMI by default, but getting it to show up correctly in OBS required a bit of trial and error with the audio settings.

The ultra-low latency made gaming through the passthrough feel responsive. I tested fast-paced games like Mario Kart 8 Deluxe and noticed no input lag compared to a direct connection. AVerMedia includes their Streaming Center software, which offers a simpler interface for beginners who find OBS overwhelming. I found the software basic but functional for getting started quickly.
One minor complaint is the cable situation. The MINI+ uses a USB-A connector on the computer end, which works fine for most PCs but requires an adapter for newer laptops with only USB-C ports. AVerMedia includes a USB-C adapter in some regions, but you may need to supply your own. The card also supports multiple video formats including NV12, YUY2, and MJPEG for compatibility with different software.
Who should buy this
Streamers who want a reliable brand name without paying Elgato prices should consider the StreamLine MINI+. AVerMedia has solid customer support and a track record of quality products. If you want peace of mind that your capture card will work reliably for years, this is a safe choice.
Who should avoid this
Mac users might find the experience frustrating. While the hardware works with macOS, AVerMedia’s software is primarily designed for Windows. If you rely on Mac-specific streaming software, you may encounter compatibility headaches.
7. AVerMedia Live Gamer Extreme 3 – High Refresh Rate Support
AVerMedia 4K Capture Card for Streaming,1440p120 Video Capture Device for PS5/Pro, Xbox Series X/S, Nintendo Switch, PC, compatible with Twitch, OBS, Windows, Mac - GC551G2 Live Gamer Extreme 3
4K30 Recording
1440p120 Passthrough
VRR Support
HDMI 2.0
Pros
- Excellent 4K30 capture quality
- High refresh rate support up to 1080p240
- VRR for tear-free recording
- Ultra-low latency passthrough
- Good value for features
Cons
- Software is Windows-only
- OBS configuration not straightforward
- Audio setup can be difficult
The AVerMedia Live Gamer Extreme 3 occupies an interesting middle ground in the capture card market. It costs more than budget options but offers features that justify the price for serious gamers. The standout feature is VRR (Variable Refresh Rate) support, which eliminates screen tearing when capturing from PCs or consoles that support adaptive sync.
I tested the Live Gamer Extreme 3 with my gaming PC connected to a 144Hz monitor. The passthrough preserved my high refresh rate experience while recording at 4K30 or 1080p60. For streamers who play fast-paced competitive games, this matters. You do not want your capture setup to downgrade your gaming experience just to record footage.
The 4K30 recording quality looked excellent in my tests. While 30fps is not ideal for fast action, it works well for slower-paced games and creates smaller file sizes than 60fps 4K recordings. I captured several hours of gameplay from my PS5, and the footage looked crisp with accurate colors. The text reproduction was particularly good, making this card suitable for capturing desktop content and UI-heavy games.
My main frustration with the Live Gamer Extreme 3 was the software situation. AVerMedia’s RECentral software is Windows-only and felt sluggish on my system. I eventually switched to OBS, but configuring the card there required manual video format selection. Beginners may find this process confusing compared to plug-and-play options like the Elgato cards.

Who should buy this
PC gamers with high refresh rate monitors should choose the Live Gamer Extreme 3. The VRR support and high refresh rate passthrough preserve your gaming experience while you stream. If you play competitive shooters or fast action games, the 1440p120 passthrough is worth the extra cost.
Who should avoid this
Mac and Linux users should look elsewhere due to the Windows-only software. Beginners who want the simplest possible setup should also consider the Elgato Neo instead, as the Live Gamer Extreme 3 requires more technical configuration.
8. Elgato Cam Link 4K – DSLR as Webcam Specialist
Elgato Cam Link 4K – External Capture Card for DSLR & Camcorder, ActionCam as Webcam, Meet/Stream/Record in 1080p60 or 4K30/4K60, Easy Connect for OBS/Zoom/Discord – HDMI to USB 3.0, PC/Mac/iPad
4K30 Webcam Mode
DSLR and Camcorder Support
USB 3.0
Ultra-low Latency
Pros
- Transforms DSLR into pro webcam
- Excellent image quality vs standard webcams
- Works with OBS Zoom Discord
- Compact and portable design
- Stable for long streams
Cons
- Requires dedicated USB 3.0 port
- Device gets warm when in use
- HDMI cable not included
The Elgato Cam Link 4K is different from every other card on this list. It is not designed for capturing console gameplay. Instead, it turns your DSLR camera, mirrorless camera, or camcorder into a high-quality webcam. I used this for my face cam during streams, and the difference from my old Logitech webcam was night and day.
Setup was refreshingly simple. I connected my Canon DSLR to the Cam Link via HDMI, plugged the USB into my PC, and opened OBS. The camera appeared as a video source immediately. No drivers, no configuration, just working. I also tested it with Zoom and Discord, and both applications recognized it as a standard webcam.
The image quality blew me away. My DSLR has a much larger sensor than any webcam, which means better low-light performance and beautiful background blur. My streams looked professional with crisp 1080p60 video of my face. The ultra-low latency kept my video and audio perfectly in sync, which is critical for viewer engagement.
One important note is that the Cam Link requires a dedicated USB 3.0 port. I initially plugged it into a USB hub, and the video stuttered constantly. Once I moved it to a direct port on my motherboard, the issues disappeared. The device also runs warm even when idle, which is normal but worth mentioning.
Who should buy this
Streamers who want professional-looking face cam video should get the Cam Link 4K. If you already own a DSLR or mirrorless camera, this $80 accessory transforms it into a streaming powerhouse. The image quality destroys even expensive dedicated webcams.
Who should avoid this
Streamers who need to capture console gameplay should not buy this card. The Cam Link only has HDMI input for cameras, not the HDMI output from gaming consoles. If you want a card for game capture, look at the Elgato Neo or HD60 X instead.
How to Choose the Best Budget Capture Card
Picking the right capture card depends on your specific streaming setup and goals. After testing all these cards and reading hundreds of user reviews, here are the factors that actually matter for beginner streamers.
Resolution and Frame Rate
Most budget capture cards record at 1080p60, which is perfect for Twitch streaming. Twitch does not support 4K streams, so paying extra for 4K capture capability is unnecessary if you only stream live. However, 4K passthrough is valuable because it lets you play games at full resolution on your TV while capturing at 1080p. If you plan to upload edited videos to YouTube at 4K, consider a card like the Elgato 4K S that actually records in 4K.
Passthrough Latency
Passthrough latency determines whether you can play games through your capture card setup. Premium cards like the Elgato HD60 X offer sub-100ms latency, which feels imperceptible. Ultra-budget cards like the Guermok have about one second of delay, making gaming through the preview impossible. Always check whether the card supports zero-lag passthrough if you plan to play while looking at your TV or monitor.
USB Connectivity
The streaming community consistently warns against USB 2.0 capture cards. USB 2.0 cannot handle the bandwidth needed for 1080p60 capture, resulting in compression, dropped frames, and that dreaded two-second delay. All cards in this guide use USB 3.0 or USB-C, which provides sufficient bandwidth. Make sure your computer has available USB 3.0 ports before buying.
HDR and VRR Support
HDR (High Dynamic Range) support matters if you play HDR-enabled games and want to capture them with accurate colors. VRR (Variable Refresh Rate) support eliminates screen tearing when capturing from adaptive sync displays. These features are not essential for beginners, but they become important as you upgrade your gaming setup. Cards like the AVerMedia Live Gamer Extreme 3 support both.
Platform Compatibility
Make sure your chosen card works with your gaming platform. All cards in this guide work with Nintendo Switch, PS4/PS5, and Xbox Series consoles. However, PlayStation requires you to disable HDCP in settings for gameplay capture to work. PC gamers should verify that the card supports their refresh rate and resolution. If you want to explore different games for your stream, check out our recommendations for Roblox games to stream that your audience might enjoy.
Software Compatibility
All capture cards in this guide work with OBS and Streamlabs, the two most popular streaming applications. Some cards also include manufacturer software that simplifies setup for beginners. Elgato’s 4K Capture Utility and AVerMedia’s RECentral offer easier interfaces than OBS, though they have fewer features. If you use Mac or Linux, verify that your chosen card supports your operating system.
Price Tiers
Under $30, you get basic functionality with potential latency issues. The Guermok and Rybozen cards work fine for recording but are not suitable for playing through the preview. Under $100, you get reliable 1080p60 capture with 4K passthrough from reputable brands like AVerMedia. Under $160, you get premium features like ultra-low latency, HDR capture, and better build quality from Elgato.
Frequently Asked Questions
What is the best budget capture card for beginners?
The best budget capture card for beginners is the Elgato Game Capture Neo. It offers reliable 1080p60 capture with 4K60 HDR passthrough, plug-and-play setup with OBS and Streamlabs, and comes from a trusted brand with excellent software support. For under $30, the Rybozen Capture Card is also highly recommended for its microphone input and 4K passthrough at an unbeatable price.
Do I need a capture card to stream?
You only need a capture card if you want to stream console gameplay from devices like Nintendo Switch, PlayStation, or Xbox. PC gamers can stream directly using software like OBS without any capture card. Capture cards are also useful for dual-PC streaming setups where one computer handles gaming and another handles encoding.
What capture cards do most streamers use?
Most streamers use capture cards from Elgato or AVerMedia. The Elgato HD60 X and HD60 S+ are the most popular choices for console streamers due to their reliability and software support. AVerMedia cards like the Live Gamer Extreme 3 are also common among streamers who need VRR support or higher refresh rate passthrough.
What is the difference between 1080p and 4K capture cards?
1080p capture cards record gameplay at 1920×1080 resolution, which is the standard for Twitch streaming. 4K capture cards record at 3840×2160 resolution, providing sharper video for YouTube uploads. Many budget cards offer 4K passthrough (displaying 4K on your TV) while only capturing at 1080p, which is sufficient for most live streaming purposes.
Are cheap capture cards worth it?
Cheap capture cards under $30 can be worth it for beginners who want to test streaming without a big investment. However, ultra-cheap cards often have latency issues, reliability problems, and poor customer support. Spending $80-130 on a card from a reputable brand like Elgato or AVerMedia provides better long-term value and fewer headaches.
Final Thoughts
Starting your streaming journey does not require expensive equipment. The best budget capture cards for beginner streamers offer reliable performance at prices that make sense when you are just finding your audience. My top recommendation is the Elgato Game Capture Neo for its combination of build quality, software support, and ease of use. For absolute budget shoppers, the Rybozen Capture Card delivers impressive value under $30.
The key is matching your capture card to your actual needs. Most beginners do not need 4K capture or ultra-high refresh rate support. A solid 1080p60 card with 4K passthrough will serve you well for months or years of streaming. As your channel grows, you can always upgrade to more capable hardware. The cards in this guide will get you streaming quality content without breaking your budget.