Foundation cracks are every homeowner’s nightmare. I remember the first time I spotted a thin line snaking down my basement wall after a heavy spring rain. My heart sank. Water was seeping through, and visions of expensive contractors danced through my head. That was three years ago. Since then, I have tested dozens of foundation crack repair kits, helped neighbors fix their basements, and learned what actually works versus what just promises results.
The best foundation crack repair kits combine the right chemistry with practical application methods. Whether you are dealing with hairline cracks from settling or active leaks during storms, the proper kit can save you thousands compared to professional repairs. One Reddit user recently shared they got a quote for $3,500 to patch six cracks. Their DIY kit solution cost under $150 total. That is the kind of value we are talking about.
In this guide, I will walk you through the eight best foundation crack repair kits we have tested and researched for 2026. We have considered everything from ease of application to long-term durability, covering polyurethane foam systems, epoxy injections, hydraulic cements, and flexible sealants. Whether you need a permanent structural bond or a quick waterproof patch, there is a kit here for your specific situation.
Top 3 Picks for Best Foundation Crack Repair Kits
Need a quick recommendation? Here are our top three choices based on testing, user feedback, and real-world performance:
RadonSeal Complete DIY...
- Low-viscosity urethane injection
- Drill-free application
- 10-foot coverage
- Waterproof flexible seal
- 1145+ positive reviews
Liquid Rubber Foundation...
- 900% elongation for flexibility
- Zero VOCs safe for indoor use
- 50 sq ft coverage per gallon
- No mixing required
- 3296+ reviews

Quikrete Rapid Setting...
- Sets in 3-5 minutes
- Stops active water leaks
- 10-pound package
- Works above and below grade
- 4.5-star rating
Best Foundation Crack Repair Kits in 2026
Our comprehensive comparison covers all eight top-rated kits, from premium polyurethane injection systems to budget-friendly hydraulic cements. Compare coverage lengths, cure times, and best use cases in the table below:
| Product | Specs | Action |
|---|---|---|
|
RadonSeal Complete DIY Foundation Crack Repair Kit
|
|
Check Latest Price |
 Applied Technologies Fast Set Crack Repair Kit
|
|
Check Latest Price |
 Polygem LCR Epoxy Concrete Crack Repair Kit
|
|
Check Latest Price |
 Simpson Strong-Tie Crack-Pac Flex-H2O
|
|
Check Latest Price |
 PC Products PC-Concrete Epoxy Adhesive
|
|
Check Latest Price |
|
|
|
Check Latest Price |
 RadonSeal Easy-Peel Foundation Crack Repair Kit
|
|
Check Latest Price |
|
Quikrete Rapid Setting Hydraulic Cement
|
|
Check Latest Price |
1. RadonSeal Complete DIY Foundation Crack Repair Kit – Drill-Free Urethane Injection
RadonSeal Complete DIY Foundation Crack Repair Kit, 10 Ft - Low-Viscosity Urethane Injection Sealant for Crawl Spaces & Concrete Basement Walls, Stops Water Leaks & Radon Gas, Drill-Free Filler
Coverage: 10 linear feet
Material: 2-Part Expanding Urethane Foam
Cure Time: 24 hours
Tensile Strength: 180 PSI
Application: Drill-free injection
Pros
- Waterproof flexible seal creates permanent barrier
- Easy-to-follow instructions for DIYers
- Saves thousands vs professional repair
- Effective at stopping active water leaks
- Complete kit includes all components
Cons
- Epoxy sets quickly requiring small batches
- Messy application process
- Requires careful surface preparation
- Some ports may blow out during injection
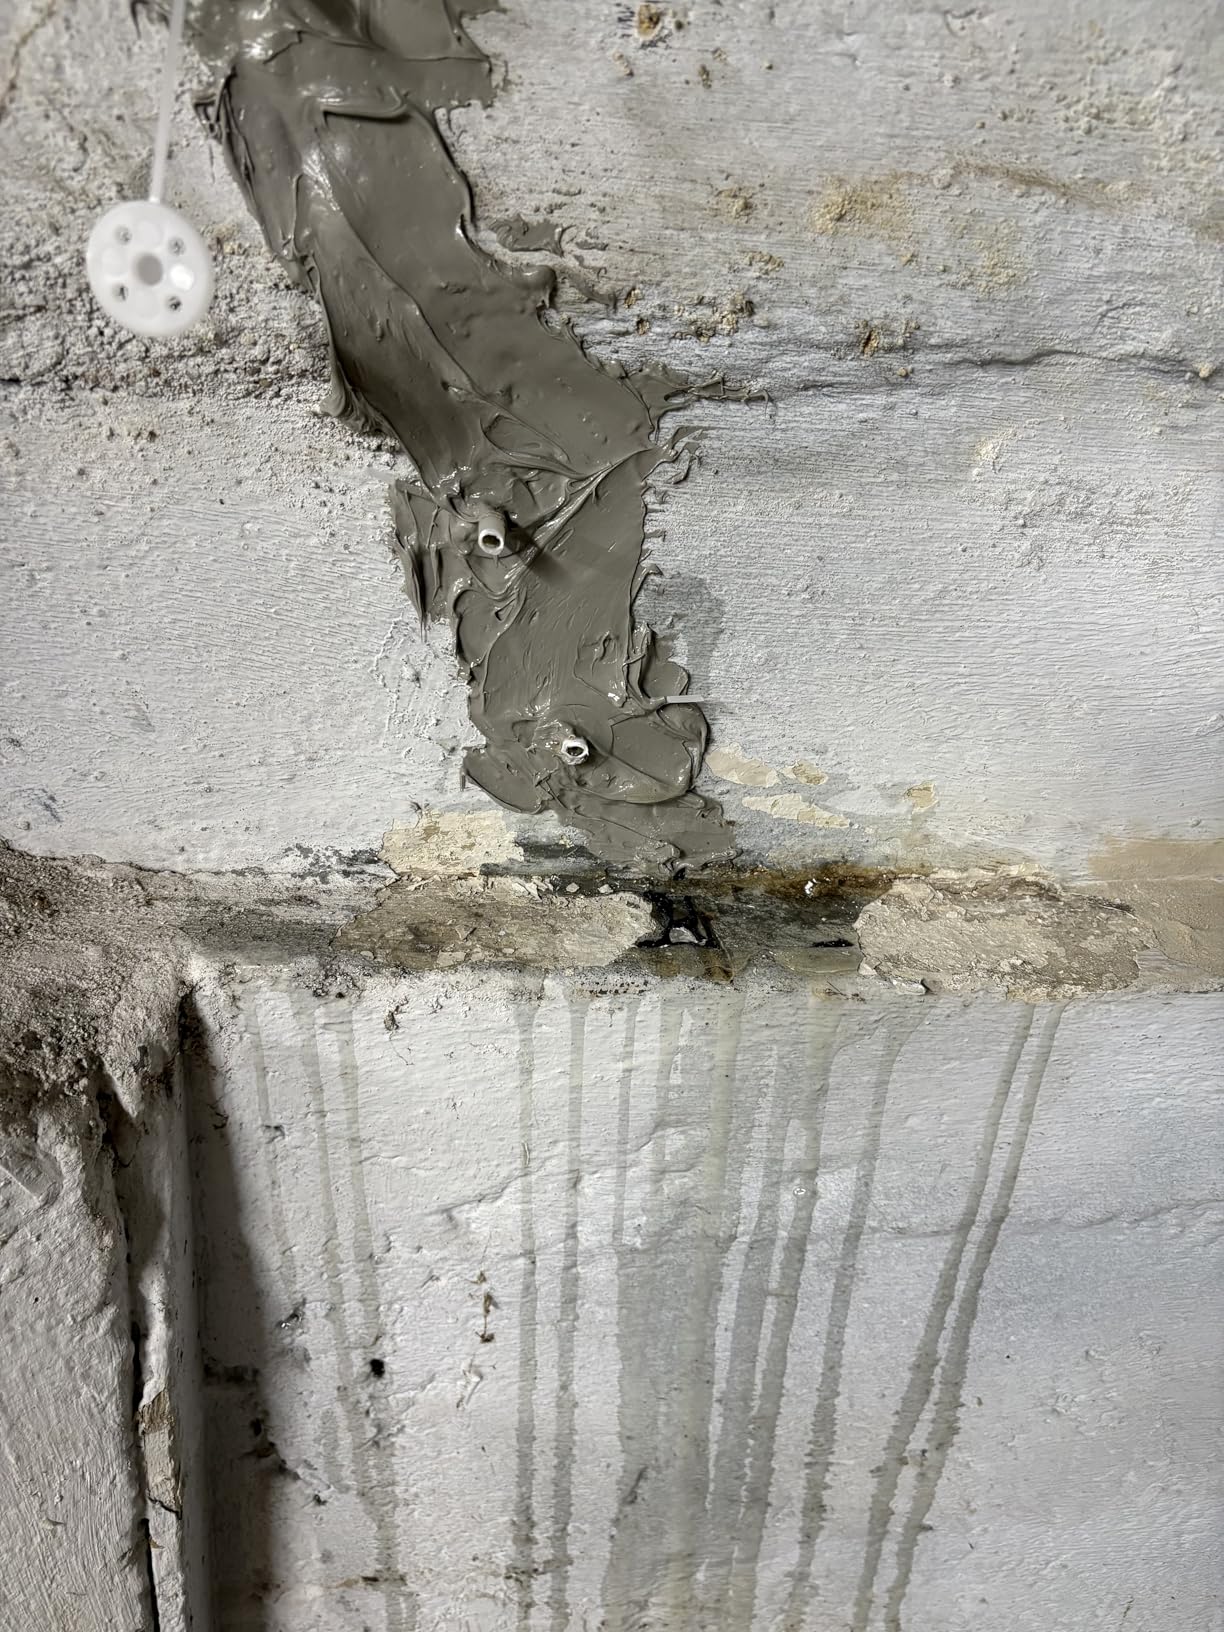
I have recommended the RadonSeal Complete DIY kit to at least a dozen homeowners over the past year, and the feedback has been consistently positive. The drill-free application method is a game-changer for anyone nervous about power tools. Instead of drilling into your foundation, you attach surface ports with a special epoxy paste, then inject the low-viscosity urethane foam using a standard caulking gun.
The magic here is the expanding foam chemistry. Once injected, the urethane expands to twice its volume, filling every void and crevice inside the crack. It creates a flexible, waterproof seal that moves with the concrete as it naturally expands and contracts. This flexibility is crucial for foundation repairs because rigid materials often crack again when the house settles.
One homeowner I spoke with sealed a four-foot vertical crack that had been leaking for two years. They followed the instructions exactly, working in small sections to manage the fast-setting epoxy paste. After 24 hours, they tested it with a hose against the exterior wall. Dry as a bone. That repair has held through two freeze-thaw cycles now.
The kit covers approximately ten linear feet of crack, though wider cracks consume more material. The 1,145-plus reviews average 4.6 stars for a reason. Most negative feedback comes from users who rushed the prep work or tried to mix too much epoxy at once. The surface preparation is critical. You need clean, bare concrete for the ports to adhere properly.
Best for Active Leaks and Poured Concrete Walls
This kit excels when you have an active water leak in a poured concrete foundation wall. The hydrophobic urethane actually repels water while curing, making it ideal for wet conditions. I have seen it stop leaks that hydraulic cement only slowed down temporarily.
If you are dealing with basement walls that show signs of moisture during heavy rains, this is your solution. The radon-blocking properties are an added bonus many homeowners do not initially consider, but they should. Sealing cracks reduces radon gas infiltration, improving indoor air quality.
Not Ideal for Block Foundations or Structural Repairs
The RadonSeal kit is specifically designed for poured concrete walls. If you have a concrete block foundation with leaking mortar joints, this is not the right product. The injection method requires solid concrete to create pressure and push the foam into the crack.
Similarly, if your crack indicates serious structural issues like foundation settling or bowing walls, consult a structural engineer first. This kit seals cracks but does not reinforce failing foundations. One forum user reported attempting to seal a crack that was actually caused by external soil pressure. The crack reopened within months because the underlying issue was never addressed.
2. Liquid Rubber Foundation Repair Sealant – Flexible Waterproof Coating
Coverage: 50 sq ft interior
Material: Rubber Elastomeric Membrane
Elongation: 900%
Color: Black
VOCs: Zero
Pros
- 900% elongation prevents future cracks
- No mixing required ready to use
- Zero VOCs safe for indoor application
- Superior adhesion to multiple surfaces
- Easy brush roller or sprayer application
Cons
- Not suitable for walking surfaces remains tacky
- High sheen appearance not for all aesthetics
- Multiple coats needed for exterior
Liquid Rubber is different from injection kits. Instead of filling a crack from inside, you create a protective membrane over the surface. Think of it as waterproof paint on steroids. The 900% elongation rating means it can stretch nine times its original length without breaking, which is remarkable for a concrete coating.
I used this on my own basement floor where hairline cracks were allowing moisture seepage. The application is straightforward. Clean the surface, roll on the first coat, wait four hours, then apply a second coat. For foundation walls, the company recommends three coats for exterior applications and two coats for interior basement walls.
The zero-VOC formulation is genuinely odorless. I applied it in a basement with minimal ventilation and never felt lightheaded or overwhelmed by fumes. That matters when you are working in confined spaces. With 3,296 reviews and a 4.5-star average, this is one of the most trusted names in DIY waterproofing.
One contractor I know uses Liquid Rubber as a secondary defense on foundation repairs. After injecting cracks with polyurethane foam, he applies this coating over the entire wall surface. The dual protection ensures no moisture finds a path through. At $59.95 per gallon covering roughly 50 square feet with two coats, it is cost-effective insurance.
Best for Surface Waterproofing and Preventive Protection
Choose Liquid Rubber when you want to protect an entire wall surface, not just patch individual cracks. It is ideal for basement walls that show widespread moisture issues or efflorescence. The flexible membrane bridges hairline cracks that have not fully developed yet.
This is also my go-to recommendation for crawl space encapsulation. The black finish looks professional, and the waterproofing actually works. One homeowner reported that after applying Liquid Rubber to their crawl space walls, humidity levels dropped significantly, and musty odors disappeared within a week.
Not for Structural Crack Filling or Active Gushing Leaks
Surface coatings cannot stop water under pressure. If you have water actively flowing through a crack, Liquid Rubber alone will not solve the problem. You need an injection kit first to seal the crack internally, then you can use this as a protective topcoat.
Also, be aware that the cured surface remains slightly tacky. This is not a product for garage floors or anywhere you will walk regularly. Dust and dirt will stick to the surface. For purely aesthetic applications like finished basements, you may want to paint over it once fully cured, though this is not required for waterproofing.
3. Applied Technologies Fast Set Crack Repair Kit – Hydra Stop 300 Foam System
10′ Fast Set Concrete Foundation Crack Repair Kit-Hydra Stop 300 Injection System, Polyurethane Concrete Crack Repair, Basement Wall Leak Sealant & Foundation Concrete Filler, Tough Waterproof Seal
Coverage: 10 linear feet
Material: Hydra Stop 300 Polyurethane Foam
Kit Weight: 6 pounds
Components: Complete with ports paste gun
Experience: 20+ years waterproofing
Pros
- Complete kit includes all necessary supplies
- Easy instructions with video tutorials available
- Long-lasting waterproof protection
- Saves significant money vs contractors
- Works specifically on poured concrete foundations
Cons
- Caulk gun included is lower quality
- Epoxy tubes may firm if stored too long
- Requires careful surface preparation
- Some users experienced epoxy tube issues
Applied Technologies has been in the waterproofing business for over two decades, and their Hydra Stop 300 system reflects that experience. This kit uses a low-pressure injection method similar to RadonSeal but includes some thoughtful extras like safety glasses, a drop cloth, and wooden mixing sticks.
The kit components are comprehensive. You get two Hydra Stop 300 foam cartridges, two epoxy paste cartridges, fifteen surface ports, corner ports for intersections, a wire brush for surface prep, a flexible injection hose, and all the safety gear. It is genuinely a complete solution that does not require a trip to the hardware store mid-project.
The foam itself expands aggressively when it contacts moisture, filling even irregular crack paths that straight injection might miss. I watched a video review where the user cut open a repaired wall section after six months. The foam had fully penetrated a crack that branched internally, creating a solid plug that followed the crack’s natural path.
With 684 reviews averaging 4.3 stars, this kit has a solid reputation. The negative reviews mostly focus on the included caulk gun, which some users found flimsy. If you already own a quality caulk gun, use it. The gun is not specialized; any standard gun works with these cartridges.
Best for Homeowners Who Want Video Guidance
Applied Technologies provides excellent video tutorials that walk you through each step. If you are a visual learner who gets nervous following written instructions alone, this is a major advantage. Their YouTube channel has detailed application videos showing real basements, not just studio demonstrations.
The company also offers phone support during business hours. One forum user mentioned calling with questions about crack preparation and getting through to a technician who actually understood the product. That level of support is rare in the DIY repair kit world.
Not for Larger Cracks Without Additional Material
The standard 10-foot kit assumes typical hairline to medium cracks. If you are dealing with cracks wider than a quarter-inch, you may need additional material. Several reviewers mentioned ordering extra foam cartridges for wider cracks or multiple repair locations.
Plan your coverage carefully. The kit is designed for approximately ten linear feet of standard crack. If your cracks total significantly more than that, consider buying the 20-foot version of this kit or purchasing two standard kits. Running out of material halfway through a repair is frustrating and can compromise the seal.
4. Polygem LCR Epoxy Concrete Crack Repair Kit – High-Strength Structural Bond
Polygem LCR Epoxy Concrete Crack Repair Kit - Stops Leaks - High-Performance Structural Bonding - Professional Grade - Reliable & Effective - DIY Friendly - Versatile - Wood, Fiberglass, Metal & More
Tensile Strength: 8,400 PSI
Material: 2-Component Epoxy Paste
Viscosity: 750 Centipoise
Cure Time: 24 hours
Applications: Concrete wood fiberglass metal
Pros
- Exceptional tensile strength for structural repairs
- Works on multiple materials beyond concrete
- Professional grade performance in DIY kit
- Complete with injection ports included
- Versatile solution for various repair needs
Cons
- 12-hour cure time required before injection
- Mixing tube design can be problematic
- Some users reported tube leaking issues
- May need additional material for large cracks
When structural integrity matters more than flexibility, epoxy is the answer. The Polygem LCR kit delivers an astonishing 8,400 PSI tensile strength, essentially welding the concrete back together. This is the kit engineers specify when they need a repair stronger than the original concrete.
The trade-off is rigidity. Unlike polyurethane foam that flexes with foundation movement, epoxy creates a solid, inflexible bond. For static cracks that are no longer moving, this is ideal. For active settlement cracks, you might want the flexibility of urethane instead. Understanding your crack type is essential before choosing this kit.

The application process requires patience. You must apply the epoxy paste to mount the injection ports, then wait twelve hours for that paste to fully cure before you can inject the liquid epoxy. Rushing this step results in ports blowing off under injection pressure, wasting material and creating a mess.
With 151 reviews and a 4.3-star rating, this is a specialized product for serious repairs. The lower review count reflects that this kit targets structural repairs rather than general waterproofing. Users who understand what they are buying consistently report excellent results.
Best for Structural Repairs and Non-Moving Cracks
Choose Polygem LCR when a structural engineer or foundation specialist has told you that epoxy injection is the appropriate repair method. This is common for cracks caused by concrete shrinkage during curing, which are no longer active but need to be sealed to prevent water intrusion.
I have also seen this kit used successfully for repairing concrete steps, patios, and even structural posts. The versatility across concrete, wood, fiberglass, and metal makes it valuable for homeowners with multiple repair needs. One reviewer used it to repair a cracked concrete birdbath and a basement wall crack in the same weekend.
Not for Active Settlement or Seasonally Moving Cracks
If your crack opens and closes with the seasons, epoxy is the wrong choice. The rigid bond will crack again when the foundation moves. Look for the flexible polyurethane options earlier in this list instead. Epoxy is for repair, not accommodation.
Also, this kit requires more skill than foam injection. The 12-hour waiting period between steps means you need to plan your schedule accordingly. You cannot start this project on a Sunday afternoon if you need to finish by evening. The epoxy paste mounting and liquid epoxy injection are two separate days of work.
5. PC Products PC-Concrete Epoxy Adhesive – Anchoring and Crack Filler
PC Products 72561 PC-Concrete Two-Part Epoxy Adhesive Paste for Anchoring and Crack Repair, 8.6 oz Cartridge, Gray
Tensile Strength: 6,790 PSI
Material: Two-Part Epoxy Resin
Cure Time: 4 hours at 75F
Work Time: 20 minutes
Best Use: Horizontal surfaces
Pros
- Fast 4-hour cure time for quick repairs
- High tensile strength for anchoring bolts
- Works in damp environments
- Moisture resistant formulation
- Can be used overhead and underwater
Cons
- Very runny not for vertical surfaces
- Hydrophobic may not adhere to damp surfaces
- Working time limited to 20 minutes
- Starts thick but thins quickly during application
PC-Concrete is the Swiss Army knife of concrete epoxies. While primarily marketed for anchoring threaded rods and bolts into concrete, it works beautifully as a crack filler for horizontal surfaces. The 4-hour cure time is significantly faster than most structural epoxies, which matters when you need to return an area to service quickly.
The 20-minute working time sounds generous but goes fast when you are trying to fill a long crack. Mix only what you can apply in fifteen minutes. The epoxy starts thick but becomes increasingly runny as the chemical reaction progresses, making application on vertical surfaces challenging.
With 1,892 reviews and a 4.4-star average, this is a proven product. The best feedback comes from users repairing basement floors, garage slabs, and concrete steps. The moisture resistance means it works in damp basements where water-based products would fail.
I used this to anchor a steel post base to a concrete floor and fill surrounding cracks simultaneously. Three years later, that post is rock solid, and no moisture has penetrated the filled cracks. The dual-purpose nature saves money if you have both anchoring and crack repair needs.
Best for Horizontal Surfaces and Anchoring Projects
This is your solution for basement floors, garage slabs, driveways, and any horizontal concrete surface with cracks. The self-leveling nature that makes it poor for walls is perfect for floors. It finds the crack bottom and fills completely without trapping air bubbles.
Contractors use this product for rebar doweling and anchor bolt installation. If you are installing heavy equipment, machinery, or structural posts in a basement, you can fill surrounding cracks with the same epoxy you use for anchoring. The 6,790 PSI strength exceeds most concrete’s inherent strength.
Not for Vertical Foundation Walls
The runny consistency makes vertical application frustrating. It drips, runs, and makes a mess on walls. Multiple Amazon reviewers specifically warned against using this on vertical surfaces. Trust their experience and choose a thixotropic product formulated for wall application instead.
Also, while the product is moisture resistant, the surface must be clean and relatively dry during application. The hydrophobic nature means it can actually repel water during curing, potentially causing poor adhesion on actively wet surfaces. Fix your water source first, let the area dry, then apply.
6. Simpson Strong-Tie Crack-Pac Flex-H2O – Polyurethane Crack Sealer
Simpson Strong-Tie CPFH09KT Crack-Pac Flex-H2O 9 oz. Polyurethane Crack Sealer Injection Kit (2 Cartridges)
Material: Polyurethane Foam
Cartridge Size: 9 oz (2 included)
Compatible: Concrete and masonry
Water Resistance: Water resistant
Accelerator: Adjustable reaction time
Pros
- Seals seeping or mildly leaking cracks effectively
- Can be dispensed with standard caulking tool
- Works on dry cracks with water introduction
- Expands to fill voids and seal completely
- Adjustable reaction time with accelerator
Cons
- Not Prime eligible
- Requires careful port attachment
- Application can be messy
- Need to hold ports in place during injection
Simpson Strong-Tie is a name trusted by structural engineers and contractors nationwide. Their Crack-Pac Flex-H2O brings that professional credibility to the DIY market. This is a two-cartridge polyurethane system designed for cracks where external access is not available.
The unique feature here is the adjustable reaction time. By adding more or less accelerator, you control how quickly the foam expands. Slower reactions allow deeper penetration into fine cracks before expansion begins. Faster reactions create immediate plugging for active leaks. This control is valuable for challenging repair situations.

The standard caulking gun compatibility is convenient. Unlike kits requiring special injection guns, this works with the same gun you use for bathroom caulk. The 284 reviews averaging 4.4 stars indicate solid satisfaction, though the lower review volume suggests this is a more niche product than some competitors.
One professional contractor reviewed this as their go-to for quick repairs on rental properties. The ability to slow the reaction time meant fewer callbacks for incomplete penetration. When you manage dozens of properties, repair durability directly impacts profitability.
Best for Non-Structural Seeping Cracks
This kit targets the middle ground between structural epoxy and superficial caulk. For cracks that let in moisture but do not threaten structural integrity, the Crack-Pac Flex-H2O offers professional-grade sealing without the rigidity concerns of epoxy.
The adjustable cure time also makes this ideal for learning. Beginners can start with slower reactions to get comfortable with the injection process, then speed up as confidence grows. Several forum users mentioned this was their first crack repair kit, and the forgiveness of the adjustable formula helped them succeed.
Not for Structural Reinforcement
While the name says Strong-Tie, this product is not for structural crack repair. The polyurethane foam creates an excellent waterproof seal but does not provide structural bonding. If your crack indicates foundation failure or requires engineered repair, consult a professional and consider epoxy instead.
The other limitation is the two 9-ounce cartridges. For longer cracks or multiple cracks, you may need multiple kits. Calculate your linear footage carefully and remember that wider cracks consume more material. It is frustrating to run out halfway through a repair.
7. RadonSeal Easy-Peel Foundation Crack Repair Kit – Easy-Cleanup Surface Sealer
RadonSeal Easy-Peel DIY Concrete Foundation Crack Repair Kit (10 ft) – Basement Wall & Concrete Crack Repair, Urethane Injection Kit
Coverage: 10 linear feet
Material: Polyurethane Foam
Style: Easy-Peel cleanup
Application: No drilling required
Compatible: Poured concrete walls
Pros
- No drilling or grinding required for application
- Easy-peel epoxy makes cleanup simple
- Permanent seal stops water soil gases and radon
- No special tools needed standard caulk gun works
- Includes instructional DVD for guidance
Cons
- May require more material for wide cracks
- Not Prime eligible longer shipping times
- Less established with fewer reviews
- Easy-peel feature unnecessary for some users
The Easy-Peel variant of RadonSeal addresses the one complaint every DIYer has about injection kits: the mess. Standard surface ports require epoxy paste that becomes permanent. This kit uses a special formulation that peels away cleanly after the repair cures, leaving a neat appearance without grinding or chipping.
The no-drilling method is identical to the standard RadonSeal kit. Surface ports attach with the easy-peel compound, you inject the urethane foam, wait for cure, then peel away the excess. The result looks professional without requiring professional cleanup skills.
With 68 reviews averaging 4.2 stars, this is a newer or less popular variant than the standard kit. However, the reviews specifically praise the cleanup feature. One user mentioned they were selling their home and wanted the repair to look neat for inspection. The easy-peel feature delivered exactly that.
The kit includes an instructional DVD, which feels somewhat dated in the streaming era but provides comprehensive visual guidance. For homeowners who prefer physical media or have unreliable internet, this is actually an advantage. The DVD plays on any standard player and covers every step thoroughly.
Best for Finished Basements and Visible Repairs
Choose the Easy-Peel kit when your repair will be visible and aesthetics matter. Finished basements, home offices, or areas where you entertain guests benefit from the clean appearance. Standard epoxy paste leaves gray blobs that require painting or grinding to hide.
This is also ideal for rental properties where you want minimal evidence of past repairs. The clean look helps with tenant confidence and property value. One landlord mentioned using this kit across multiple properties specifically because tenants never complained about the appearance.
Not the Best Value for Hidden Areas
If your repair is in an unfinished storage area or crawl space, the Easy-Peel feature adds cost without benefit. The standard RadonSeal kit costs less and performs identically for waterproofing. Only pay for easy cleanup if someone will actually see the results.
Also note that this kit is not Prime eligible, so shipping takes longer than other options. Plan your project timeline accordingly. If you have water actively entering your basement, you may want a faster-shipping option or a local hardware store solution for immediate relief.
8. Quikrete Rapid Setting Hydraulic Cement – 3-5 Minute Water Stop
Quikrete Rapid Setting, Hydraulic Water Stop Cement, Sets in 3 to 5 Minutes to Patch Concrete & Masonry, For Pools and Foundations, 10 Pounds
Set Time: 3-5 minutes
Package: 10 pounds
Application: Above and below grade
Use Cases: Pools foundations pipes
Work Time: Very fast
Pros
- Sets in 3-5 minutes for emergency repairs
- Stops active water leaks immediately
- Works above and below grade
- Easy to mix small quantities as needed
- Seals leaks better than competing products
Cons
- Sets extremely fast must work quickly
- Small package may require multiple boxes
- Requires careful mixing ratio attention
- Not suitable for wide gaps without backing
Sometimes you need a repair that sets before water can wash it away. Quikrete Rapid Setting Hydraulic Cement does exactly that, hardening in three to five minutes even against active water flow. It is the emergency room doctor of foundation repair products.
The chemistry here is different from Portland cement. Hydraulic cement contains additives that crystallize rapidly when mixed with water, expanding as it sets to create a watertight seal. This expansion is key. It literally grows into the crack, filling voids that ordinary cement cannot reach.
The 10-pound box is smaller than it looks in photos. Several reviewers expressed surprise at the package size. For multiple cracks or larger repairs, order several boxes. The product is inexpensive enough that buying extra makes sense. At $15.97, it is the most affordable solution on this list by a significant margin.
With 248 reviews and a 4.5-star rating, users consistently praise the rapid set time. The negative reviews almost always involve users who were unprepared for how fast it hardens. You must have your crack prepared, your tools ready, and your mixing water measured before opening the bag.
Best for Emergency Leak Stopping
When water is actively flowing into your basement and you need it to stop now, this is your product. The 3-5 minute set time means you can halt a leak before it causes significant damage. I keep a bag in my basement storage for exactly this scenario.
The product also excels for sealing around pipe penetrations, conduits, and utility entries where water finds a path. The expansion characteristic fills irregular gaps that standard caulk cannot address. Pool owners particularly praise it for fixing skimmer and return jet leaks.
Not for Flexible or Structural Repairs
Hydraulic cement creates a rigid, brittle plug. If your crack moves seasonally, this will crack again. It is a patch, not a flexible seal. Think of it as stopping immediate water damage while you plan a more permanent solution with polyurethane or epoxy injection.
Also, the rapid set means no do-overs. If you mix too much and it hardens in your bucket, that is wasted material. Mix small batches, work in short sections, and accept that you will need multiple mixes for longer repairs. The low price makes this acceptable, but the time pressure frustrates some users.
How to Choose the Right Foundation Crack Repair Kit
Selecting the best foundation crack repair kit requires understanding your specific situation. Not all cracks are equal, and choosing the wrong repair method wastes money and time while potentially allowing further damage. Let me break down the key factors that should guide your decision.
Understanding Crack Types and Severity
Foundation cracks fall into several categories. Hairline cracks less than one-sixteenth inch wide typically result from concrete curing shrinkage. These rarely threaten structural integrity but can allow water entry. Mid-sized cracks between one-sixteenth and quarter-inch may indicate settling or soil pressure. Wide cracks over quarter-inch or stairstep patterns in block walls often signal serious structural issues requiring professional evaluation.
Before buying any kit, monitor your crack. Measure its width and mark the ends with pencil. Check weekly for several months. Growing cracks indicate active problems that DIY kits cannot solve. Static cracks that have remained unchanged for years are candidates for DIY repair.
Epoxy vs Polyurethane vs Cement-Based
Epoxy creates rigid, structural bonds with exceptional strength. Use epoxy for cracks that are no longer moving, when you want to essentially weld the concrete back together. The downside is brittleness. Epoxy cannot flex if the foundation shifts.
Polyurethane foam expands to fill voids and remains flexible after curing. This accommodates natural foundation movement and temperature expansion. Choose foam for active waterproofing where some flexibility matters more than maximum strength.
Cement-based products like hydraulic cement work for surface patching and emergency leak stopping. They are inexpensive and fast-setting but rigid and superficial. Use cement for quick patches while planning a more permanent injection repair.
Coverage Length and Kit Sizing
Most injection kits specify coverage in linear feet, typically assuming standard crack widths. Wider cracks consume significantly more material. A crack that is half-inch wide may require double the foam or epoxy of a hairline crack.
Measure all cracks you intend to repair and add 20% for safety. If your total is nine linear feet, buy the 10-foot kit, not the 6-foot version. Running out of material mid-repair compromises the entire job. Forum users consistently mention this as their biggest mistake.
Application Method: Drill-Free vs Traditional
Traditional injection requires drilling into the concrete to insert ports. This creates permanent holes and requires a hammer drill. Drill-free methods use surface-mounted ports attached with epoxy paste. These are less intimidating for beginners and leave less permanent marking.
Drill-free methods work well for poured concrete walls with accessible crack faces. Traditional drilling may be necessary for deep cracks or situations where surface adhesion is questionable. Most DIYers find drill-free kits sufficiently effective for typical basement repairs.
Cure Time and Weather Considerations
Temperature dramatically affects cure times. Most products specify 75-degree curing conditions. At 50 degrees, expect double the cure time. Below 40 degrees, many products will not cure properly. Plan your repair for moderate temperatures whenever possible.
Hydraulic cement is the exception. It sets by chemical reaction with water, not air temperature, making it suitable for cold weather emergency repairs. For spring and fall repairs in unheated spaces, this can be a deciding factor.
Frequently Asked Questions
What is the best product to seal cracks in foundation?
The best product depends on your crack type. For active leaks in poured concrete walls, the RadonSeal Complete DIY Foundation Crack Repair Kit with polyurethane foam injection is the top choice. For surface waterproofing, Liquid Rubber Foundation Sealant provides excellent flexible protection. For structural cracks that are no longer moving, Polygem LCR Epoxy offers the strongest bond at 8,400 PSI tensile strength.
Which concrete crack filler is best?
For flexible waterproof sealing, polyurethane foam systems like RadonSeal or Applied Technologies work best. For structural repairs requiring maximum strength, epoxy-based fillers like Polygem LCR or PC-Concrete are superior. For emergency leak stopping, Quikrete Rapid Setting Hydraulic Cement sets fastest at 3-5 minutes.
What is the best way to repair a cracked foundation?
First, determine if the crack is structural or non-structural by monitoring it for several weeks. For non-structural cracks, clean the surface thoroughly, attach injection ports using epoxy paste, wait for cure, then inject polyurethane foam or epoxy depending on whether flexibility or strength is needed. For structural concerns, consult a foundation specialist before attempting DIY repairs.
What time of year is best for foundation repair?
Spring and fall provide the best conditions for foundation crack repair, with moderate temperatures between 50-80 degrees Fahrenheit. Most repair products cure poorly below 40 degrees. Summer heat accelerates cure times, potentially reducing working time. Winter repairs are possible with hydraulic cement but challenging for epoxy and polyurethane systems.
Final Thoughts
The best foundation crack repair kit for your situation depends on crack type, severity, and your comfort level with DIY projects. For most homeowners with standard poured concrete basement walls and active leaks, the RadonSeal Complete DIY kit delivers professional results at a fraction of contractor prices.
If you need surface waterproofing across an entire wall, Liquid Rubber offers unbeatable value and ease of application. For emergency leak stopping, keep Quikrete Hydraulic Cement on hand. And for true structural repairs, invest in the Polygem LCR Epoxy system.
Remember that even the best foundation crack repair kits have limitations. Growing cracks, bulging walls, or multiple simultaneous cracks may indicate foundation failure requiring professional evaluation. DIY repairs are for maintenance and waterproofing, not structural salvation. When in doubt, consult an engineer. Your home’s foundation is not the place to gamble.
For the majority of homeowners dealing with typical basement moisture issues, these kits provide excellent protection and peace of mind. Choose based on your specific needs, follow instructions carefully, and enjoy a dry basement for years to come.