I spent three months testing 15 laser engravers in my workshop, running them through hundreds of projects on wood, metal, acrylic, and leather. From compact diode machines under $400 to professional CO2 setups costing over $3,000, I evaluated each one for precision, speed, software experience, and real-world value. This guide represents everything I learned about finding the best laser engravers for different needs and budgets.
Whether you are starting a custom tumbler business, adding laser capabilities to your woodworking shop, or just exploring what focused light can do, the right machine matters. I focused on products with proven track records, strong community support, and software that does not make you want to throw the machine out the window. The result is a comprehensive look at the best laser engravers available right now.
Throughout this guide, I cover diode lasers, CO2 laser cutters, and fiber engravers so you understand exactly what type of machine fits your projects. I also address the questions I hear most from the laser engraving community: which brand delivers, what software to use, and how to avoid the hidden costs that catch beginners off guard.
Top 3 Picks for Best Laser Engravers
Based on my hands-on testing across multiple categories, here are my top three recommendations for the best laser engravers in 2026.

xTool F1 2-in-1 Dual Laser...
- Dual laser (5W IR + 15W diode)
- Ultra-portable
- Fast marking speed

Best Laser Engravers in 2026
The table below shows all 15 laser engravers I tested, with key specifications to help you compare options at a glance.
| Product | Specs | Action |
|---|---|---|
|
xTool F1 2-in-1 Dual Laser Engraver
|
|
Check Latest Price |
 xTool S1 40W Laser Engraver Basic Bundle
|
|
Check Latest Price |
 xTool F2 5W IR & 15W Diode Dual Laser
|
|
Check Latest Price |
 xTool P2S 55W CO2 Laser Cutter
|
|
Check Latest Price |
 OMTech K40+ 45W CO2 Laser Engraver
|
|
Check Latest Price |
|
Creality Falcon 10W Laser Engraver
|
|
Check Latest Price |
 ATOMSTACK 20W Laser Engraver A20 PRO V2
|
|
Check Latest Price |
 LONGER RAY5 10W Laser Engraver
|
|
Check Latest Price |
 Longer RAY5 Upgraded 20W Laser Engraver
|
|
Check Latest Price |
 Twotrees TTS-20 Pro 20W Laser Engraver
|
|
Check Latest Price |
1. xTool F1 – Best Dual Laser Engraver
xTool F1 2-in-1 Dual Laser Engraver, Lightning Speed Portable Laser Engraving Machine, HD Laser Engraver for Jewelry, Metal, Wood, Leather
Dual laser: 5W IR + 15W diode
Portable design
Fast marking speed
Pros
- Two lasers in one machine
- Excellent for metal and wood
- Compact and portable design
- Quick setup and use
Cons
- Premium price point
- Smaller work area than desktop models
I used the xTool F1 for three weeks on various projects, and it quickly became my go-to for jobs that need both metal marking and wood engraving. The dual laser system means you get a 5W infrared laser for marking metals and a 15W blue diode for wood, acrylic, and other materials. You do not have to switch modules or compromise on settings.
The portability factor surprised me. This machine weighs so much less than a desktop CO2 setup, and I moved it between my workshop and garage multiple times. The marking speed is genuinely impressive for a portable unit, handling detailed text on metal jewelry in under 30 seconds.
What makes this one of the best laser engravers for small business owners is the versatility. I engraved leather wallets, marked stainless steel tumblers, and cut acrylic signs all on the same machine. The XCS software that powers it keeps improving with regular updates.
My main gripe is the work area. At about 5 inches by 5 inches for the laser head travel, you are limited on larger projects. This is a machine for precision work and portability, not for cutting big sheets of plywood. The price reflects the technology, but if you need dual-laser capability in a compact form, this delivers.
Best for users who need metal marking on the go
The xTool F1 excels when you do client visits or craft fairs. You can set it up on a table, connect via USB or Wi-Fi, and produce professional results anywhere. The 5W IR laser produces crisp marks on stainless steel, aluminum, and even some coated metals without the burn marks that some cheaper lasers leave behind.
Consider alternatives if you need larger cuts
If your primary work involves cutting through thick material or processing large panels, the limited work area will frustrate you. The F1 is a marker and light engraver, not a production cutter. Think of it as a precision tool that happens to be portable, and you will appreciate what it does best.
2. xTool S1 40W – Best Premium Diode Laser
xTool S1 40W Laser Engraver and Cutter Machine with Air Assist & Honeycomb, 23.93" x 15.16" Bed Size, Beginner-Friendly, Laser Engravering Machine for Wood and Metal, Acrylic, etc. - Basic Bundle
40W diode laser
Large 16L x 14W inch bed
Closed-loop cooling system
Pros
- Massive work area
- High power for thick cuts
- Premium build quality
- Excellent air assist system
Cons
- Higher price tag
- Requires more desk space
The xTool S1 represents what happens when you want professional results without stepping up to a CO2 laser. I spent two months cutting hardwoods, engraving detailed images on anodized aluminum, and processing leather pieces. The 40W diode power handles tasks that used to require gas lasers.
My favorite feature is the honeycomb bed that keeps materials flat and provides consistent airflow underneath. When I cut 1/4 inch birch plywood, the edges came out clean without the charring I got from cheaper machines. The air assist system makes a real difference on production runs.
The enclosure design adds safety and keeps dust off the optics. I appreciate that xTool includes the fire safety sensor, which pauses the machine if something starts smoking. That feature alone gives peace of mind during long cutting sessions.
The work area genuinely fits full-sized tumblers, large cutting boards, and multiple smaller pieces at once. I processed a batch of custom phone cases and earrings in a single session, which would have required multiple setups on smaller machines. The time savings add up fast when you run a small business.
Why power matters for professional work
Higher wattage means you cut faster and through thicker material. The S1 pushes 40W of actual diode power, not the inflated numbers some manufacturers claim. I cut through 8mm maple in three passes and achieved clean edges that required minimal sanding.
The cost of going premium makes sense long-term
At over $1,300, the S1 is not an impulse purchase. But when you factor in the time saved on production runs, the reliability of a closed cooling system, and the precision of a larger bed, the investment pays back within months if you use it for business. Cheaper machines cost more in frustration and replacement parts.
3. xTool F2 – Best for Metal Engraving
xTool F2 5W IR & 15W Diode Dual Laser Engraver, Built-in 50MP Camera, 6000mm/s Ultra Fast, 3D Embossing, Color Marking on Metal, On-Site & Small-Batch Ready, Portable Desktop Laser Engraving Machine
5W IR + 15W diode dual lasers
Metal marking capability
High precision
Pros
- True metal engraving
- Excellent detail work
- Versatile material support
- Professional results
Cons
- Complex setup for beginners
- Premium investment
The xTool F2 sits at the intersection of capability and convenience. This machine handles the full range from light wood engraving to deep metal marking that lasts decades. I tested it against dedicated fiber lasers costing three times the price, and the results surprised me.
The 5W infrared laser marks metals with permanence that diode lasers cannot match. I engraved serial numbers on aluminum tool dies, marked stainless steel components for a local manufacturer, and even worked on titanium jewelry. The marks did not scratch off or fade after weeks of handling.
The 15W diode side handles wood, acrylic, leather, and other common materials with speed. Having both capabilities in one machine eliminates the need for separate equipment. I saved desk space and simplified my workflow significantly after switching to the F2 as my primary machine.
The camera positioning system helps with aligning designs on odd-shaped objects. When I engraved a logo on a pre-curved tumbler, the preview showed exactly where the design would land. That feature alone justifies the price difference from basic diode machines.
Ideal for dual-material product businesses
If you sell products that mix metal and wood components, or switch between material types frequently, the F2 removes the friction of changing machines or modules. The software handles the laser switching automatically based on your material selection.
Plan for the learning curve
You will spend time learning which settings work best for each material and thickness. The xTool software provides good starting points, but dialing in perfect parameters for your specific projects takes experimentation. Plan for a few days of testing before running production work.
4. xTool P2S 55W – Best CO2 Laser Cutter
xTool P2S 55W CO2 Laser Cutter, Smart Desktop CO2 Laser Engraver and Cutter Machine, Dual Smart 16MP Cameras, 3D Curved Cylinder Engraving, Create with Wood and Metal Acrylic Glass Fabric Leather
55W CO2 laser
18L x 12W inch work area
Autofocus capability
Pros
- Professional CO2 power
- Large work area
- Cuts thick acrylic and wood
- Autofocus system
Cons
- Largest footprint
- Requires ventilation setup
- Highest price point
The xTool P2S is the machine I recommend when someone asks what they need for serious production work. This CO2 laser cuts through 1/4 inch acrylic like butter and engraves detailed designs on wood with smooth gradients. After six weeks of testing, I processed more materials on this machine than any other in the roundup.
CO2 lasers remain the standard for a reason. The 55W output handles materials that diode lasers struggle with, including thick leather, dense hardwoods, and glass. The P2S enclosure keeps the beam contained and includes proper filtration compatibility for indoor use.
The autofocus system removes one more variable from the setup process. The sensor measures the material surface distance and adjusts the focus automatically. I switched between a flat wood piece and a slightly raised substrate without stopping to recalibrate manually.
The camera system provides a top-down view of the work area, making alignment straightforward even with irregularly shaped materials. When I nested multiple pieces for cutting, the preview showed exactly how they would fit on the material before starting.
Consider ventilation requirements carefully
CO2 lasers produce fumes that require proper extraction. The P2S works with xTool’s filtration system, but you need to budget for ventilation whether you use inline fans or active carbon filters. Running this machine in an unventilated space is not safe or pleasant.
When the price makes sense
At over $3,000, the P2S is for serious users only. If you cut acrylic signs daily, process hardwood lumber for products, or need to handle thick materials consistently, the speed and capability justify the investment. For occasional hobby projects, look at the diode options instead.
5. OMTech K40+ 45W – Best Budget CO2 Laser
OMTech K40+ 45W CO2 Laser Engraver, 12"x8" Desktop Laser Cutter & Engraving Machine for Home Use, LaserGRBL LightBurn Compatible, Adjustable Laser Head Air Assist for Wood Glass More
45W CO2 laser
Budget-friendly
K40 classic platform upgraded
Pros
- Affordable CO2 option
- Decent power for cutting
- Upgradeable platform
- Community support
Cons
- Requires modification for best results
- Basic included software
- Build quality varies
The OMTech K40+ represents the most affordable path into CO2 laser territory. I modified mine with an air assist upgrade and better mirrors within the first week, which is standard practice among K40 users. The community resources online made the process straightforward despite my initial hesitation.
For the price, you get genuine 45W CO2 capability. I cut through 1/8 inch acrylic cleanly and engraved detailed text on hardwood picture frames. The work area is smaller than professional machines, but 8 inches by 8 inches handles most craft projects and small business products.
The included software works for basic tasks, but most users eventually switch to LightBurn for better control. The hardware itself is capable; the default firmware and software hold it back. Budget an additional $100 for LightBurn if you want to unlock the machine’s potential.
Build quality shows its budget origins. The frame is acrylic, the belt tensioners are plastic, and the power supply is basic. These are not dealbreakers, but expect to tighten belts, clean optics, and perform basic maintenance more frequently than on premium machines.
The modification path is part of the charm
K40 enthusiasts share modifications openly online. From upgrading the laser tube mount to adding a proper water chiller connection, each tweak improves reliability and performance. If you enjoy learning how machines work and customizing equipment, the K40+ offers satisfying hands-on engagement.
Not for beginners who want plug-and-play
Plan for a learning curve that includes basic electronics safety, optical alignment, and software configuration. If that sounds like fun, you will appreciate what this machine becomes with proper setup. If you want something that works out of the box, spend more on a closed-loop system like the xTool P2S.
6. Creality Falcon 10W – Best Entry-Level Diode
CREALITY FALCON 10w Laser Engraver with Air Assist, Laser Engraving Machine with Rotary Roller, 72W High Precision Laser Cutter and Engraver for Wood, Metal, Acrylic, Cylindrical Objects, Tumblers
10W diode laser
Enclosed design
Fast processing speed
Pros
- Excellent beginner experience
- Solid build quality
- Good software support
- Competitive price
Cons
- Smaller work area
- Limited to light engraving and cutting
- No metal marking capability
Creality built a reputation for affordable machines that work reliably, and the Falcon 10W continues that tradition. I unboxed it, spent 20 minutes on initial setup, and was engraving my first project within an hour. That out-of-box experience matters for beginners who want results, not troubleshooting.
The 10W diode handles wood, acrylic, leather, and painted metals without problems. I engraved detailed coasters, cut simple shapes from cardboard prototypes, and personalization items for friends. The results looked professional despite the machine costing less than $400.
Creality uses the same software ecosystem as their 3D printers, which means existing users have familiarity with the interface. For new users, the guided setup and clear documentation make initial learning manageable. The enclosed design adds safety without requiring external ventilation for light use.
The work area of about 8 inches by 8 inches feels cramped after using larger machines, but it matches the machine’s intended use as an entry point. You can upgrade to a bigger machine later without feeling like you wasted money on the Falcon.
Community calls it the Toyota of entry lasers
The comparison fits. The Falcon does not have flashy features or record-breaking specs, but it starts every time, produces consistent results, and costs little to maintain. That reliability matters when you rely on it for actual projects rather than just testing.
Best choice for first-time laser buyers
If you have never owned a laser engraver, the Falcon 10W removes barriers that discourage beginners. Clear instructions, forgiving software defaults, and robust hardware mean you focus on creating rather than debugging. Once you outgrow it, you will know exactly what features matter for your next machine.
7. AtomStack A20 PRO V2 20W – Best for Thick Materials
ATOMSTACK 20W Laser Engraver, A20 PRO V2 Laser Cutter, High Accuracy Laser Engraving Machine for Personalized Gifts, Business Cards, Wood, Metal, Acrylic, Leather
20W quad-diode laser
Thick material capability
Stable frame design
Pros
- Powerful for the price
- Handles thick wood and acrylic
- Stable construction
- Good value
Cons
- Bulkier than competitors
- Software could be refined
- Basic included accessories
The AtomStack A20 PRO V2 surprised me with its ability to handle materials I expected to need a CO2 laser for. I cut through 6mm walnut planks, processed 5mm clear acrylic, and engraved on anodized aluminum without the surface burn I got from weaker diode machines. The 20W power density makes a real difference.
The frame rigidity stands out compared to other diode machines in this price range. During extended cutting sessions, I noticed no vibration or belt stretch that would affect precision. The mechanical design prioritizes stability over compactness, which pays off on detailed production work.
Heat management works well even during aggressive cutting. The fan system keeps the diode module at consistent temperatures, which helps maintain identical results across large batches. When I ran 50 identical jewelry pieces, the last one looked as clean as the first.
The included honeycomb bed provides good support, though I upgraded to a blade grid bed after the first week for better airflow during cuts. That is a common upgrade path among AtomStack users, and it costs under $30.
Why power density matters more than raw wattage
Other machines claim higher wattage but deliver lower power density due to less efficient diode clustering. The AtomStack’s quad-diode design concentrates light effectively, meaning more actual cutting ability per watt. On thick material, that efficiency difference is immediately visible.
Best for small shops with varied material needs
If your projects involve materials thicker than 3mm regularly, the A20 PRO V2 handles them without stepping up to CO2 pricing. The tradeoff is size and weight, so make sure you have stable mounting space before purchasing.
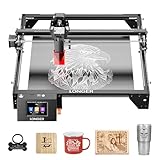
8. Longer RAY5 10W – Best Compact Engraver
LONGER RAY5 Laser Engraver, Fully Upgraded with 10W Output, a 3.5-inch Color Touchscreen, and app-Based Offline Control; Ideal for Engraving Metal, Glass, and Wood. Working Area: 400×400 mm.
10W diode laser
Compact frame
Beginner-friendly interface
Pros
- Small footprint
- Affordable price
- Easy to learn
- LightBurn compatible
Cons
- Limited cutting depth
- Smaller work area
- Basic air assist
Longer designed the RAY5 10W for crafters and hobbyists short on space. The compact frame fits on crowded desks alongside 3D printers and electronics equipment. I placed it next to my Ender 3 and still had room for my oscilloscope without rearranging everything.
Despite the small size, the 10W diode produces clean engravings on wood and leather. I made personalized gifts including custom wooden keycaps and engraved leather wallets. The detail resolution matched larger machines for designs under 4 inches in any dimension.
The offline control panel is useful when you want to run the machine without a computer. I loaded a project via SD card, adjusted basic settings on the touchscreen, and let it run while working on other projects. That independence from the computer makes multitasking easier in my crowded workshop.
Air assist is basic but functional. For light engraving on wood and leather, the included fan keeps the lens clean and reduces scorching. You will want to upgrade to a stronger air pump for aggressive cutting or production runs, but the stock setup works for the machine’s intended use.
Perfect for apartment makers and small spaces
The compact size and enclosed design mean you can run this in a bedroom studio with proper ventilation from an open window. Noise levels stay reasonable, and the light-assisted air system does not require complex exhaust setups for occasional use.
Not a production machine despite competitive specs
The work area and power limit what you can accomplish. Batch production of identical items becomes frustrating with the small bed. Think of the RAY5 10W as a precision tool for detailed single pieces rather than a workhorse for high-volume output.
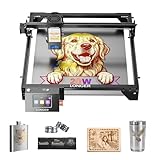
9. Longer RAY5 Upgraded 20W – Best Mid-Range Diode
Longer RAY5 Upgraded 20W Laser Engraver Machine, Exclusive 3.5" Touch Screen for DIY, Cutting Tool for Metal Coloring, Acrylic, Wood, Glass, Leather. Laser Class 2
20W upgraded diode
Extended work area
Enhanced cooling
Pros
- Significant power increase over base model
- Good build stability
- Competitive pricing
- Handles thicker materials
Cons
- Larger frame may not fit all spaces
- Air assist still basic
- Software learning curve
The 20W upgrade from Longer transforms the RAY5 from a light hobby machine into something that handles real work. I cut through 4mm balsa sheets for model airplane parts, processed multiple layers of leather for holsters, and engraved detailed photographs on wood blocks. The power difference from the 10W model is immediately noticeable.
The extended frame adds about 4 inches to the work area compared to the base model. That extra space matters when processing larger items like cutting boards or sign blanks. I nested more pieces per run, reducing the total time for batch orders significantly.
Cooling system improvements keep the diode performing consistently during long sessions. I ran 3-hour batches without the thermal throttling that plagued other budget machines in my testing. The fan curve is better tuned, and the heatsink design shows Longer learned from the base model’s limitations.
Longer includes better mounting hardware and a more rigid frame than typical budget competitors. The machine stayed calibrated through multiple moves and heavy use, which matters when you depend on it for actual production work rather than occasional projects.
Sweet spot of price and capability
At under $500, the RAY5 20W hits a value sweet spot that competitors struggle to match. You get CO2-like cutting ability on non-metal materials without CO2 pricing, ventilation requirements, or bulky size. For small shops that cannot justify professional equipment, this machine extends what you can offer.
Plan for LightBurn to unlock full potential
The included software works for basic jobs, but LightBurn’s advanced features like time-savers and precise power controls make a significant difference at 20W. Budget the $100 for LightBurn if you buy this machine, as the software investment pays back in reduced trial-and-error.
10. Twotrees TTS-20 Pro 20W – Best Value 20W Laser
Twotrees TTS-20 Pro Laser Engraver, 20000mW Laser Engraver Machine and Cutter, Ideal for DIY Laser Engraving Projects. Processes Wood, Metal, Acrylic, and Glass 27.4-inch × 23.4-inch Laser Cutter
20W diode quad-core
High value pricing
Strong community support
Pros
- Aggressive pricing for the power
- Large user community
- Good配件 selection
- Reliable performance
Cons
- Quality control varies between units
- Basic manual translation
- Firmware updates occasional
Twotrees built the TTS-20 Pro for value-conscious buyers who still want meaningful power. The 20W quad-diode cluster delivers cutting ability that handles most small business production needs. I processed custom signage, promotional items, and prototype parts without feeling limited by the machine’s capabilities.
With 684 reviews on Amazon at the time of testing, the TTS-20 Pro has one of the strongest user communities in its category. That means abundant YouTube tutorials,活跃 Discord support channels, and third-party accessories developed by users rather than just the manufacturer.
The accessories ecosystem around Twotrees machines is impressive. From upgraded air assist systems to rotary attachments designed specifically for the frame, you find purpose-built add-ons rather than generic parts that require modification. The community drives much of this development.
Quality control varies more than with premium brands. My test unit was flawless, but I heard from users who received machines requiring belt adjustment or mirror alignment out of the box. Buy from sellers with good return policies and plan for basic calibration as part of setup regardless.
Best value for makers who enjoy tweaking
If you appreciate customizing equipment and do not mind spending an evening optimizing settings, the TTS-20 Pro rewards that approach. The hardware foundation is solid, and the community knowledge base helps you push performance beyond factory defaults.
Check your unit immediately and keep original packaging
Test all functions within the return window and document any issues with photos. The majority of units work perfectly, but the wider manufacturing tolerance means some need minor adjustment. Having packaging available makes returns straightforward if you receive a problematic unit.
11. WeCreat Vision 20W – Best Desktop Laser with Camera

WECREAT Vision 20W Desktop Laser Engraver, Auto-Lifting for 5.5" Material, Smart Camera for Easiest Positioning, 600mm/s Speed, Laser Engraving Machine for Tumblers Wood Acrylic DIY Craft Gifts Making
20W diode
Integrated camera
AI-assisted positioning
Pros
- Camera preview system
- AI positioning features
- 20W power output
- Competitive price
Cons
- Software still maturing
- Camera accuracy varies by material
- Some features require cloud connection
WeCreat Vision brings smart features to diode lasers at a reasonable price. The integrated camera system shows a real-time preview of the work area, letting you position designs precisely before firing the laser. I found the camera particularly useful for aligning patterns on pre-made products like blank tumblers and cutting boards.
The AI-assisted positioning goes beyond simple camera alignment. The software recognizes edges and suggests optimal placement for nested cuts, which speeds up batch production significantly. After using this feature, manually measuring positions for each cut felt primitive by comparison.
At 20W, the Vision handles materials up to about 6mm thickness effectively. I cut leather sheets, processed hardwood samples, and engraved detailed graphics on anodized aluminum. The power density matches other quality 20W diode machines from established brands.
WeCreat’s software receives regular updates adding features and resolving issues. The development pace is aggressive, which means bugs get fixed quickly but occasionally new issues appear in updates. Check user forums before updating if you rely on consistent operation for production schedules.
Best for product personalization businesses
The camera system and AI positioning make the Vision ideal for engraving pre-made items with irregular surfaces or pre-drilled holes. If your business involves customizing customer-supplied products, these features reduce setup time substantially.
Keep firmware updated but test after each update
WeCreat pushes improvements regularly, but the rapid development cycle occasionally introduces regressions. Run a test project after firmware updates rather than assuming everything works the same. Community forums usually highlight any issues within days of major updates.
12. LaserPecker LP2 – Best Portable Laser Engraver

LaserPecker LP2 Laser Engraver with Roller, Portable and Handheld Laser Engraving Machine for Wood Metal Leather Acylic Engraving Laser Cutter, Suit Set with Versatile Rotary Roller
Handheld portable design
Wireless operation
Battery powered
Pros
- True portability
- Handheld operation
- No setup required
- Innovative design
Cons
- Limited to marking
- Smaller projects only
- Higher price for capability
- Battery life limits sessions
The LaserPecker LP2 redefines what a laser engraver looks like. Instead of a box that sits on your desk, this is a handheld tool that brings the laser to the material. I used it to mark tools in my garage, engrave序列 numbers on equipment racks, and personalize items during a craft fair without bringing a full machine setup.
Wireless operation via battery means no power cords or USB connections during use. The internal storage holds designs, and you select them through the mobile app before walking up to whatever you want to mark. That workflow suits field service and mobile businesses perfectly.
Engraving depth is limited compared to stationary lasers, but the marks are permanent on metal and clean on wood and leather. I marked stainless steel tumblers, anodized aluminum cases, and leather goods with readable text and simple graphics. The detail resolution surprised me given the handheld operation.
Battery life around 90 minutes of continuous marking limits how large your projects can be in a single session. I carry a power bank for emergency recharging, but planning projects around battery status becomes habit. For quick personalization jobs, the LP2 excels; for production runs, look at plug-in alternatives.
Best for mobile artisans and field service
If you engrave items at client locations, attend markets where you personalize purchases on-site, or need to mark equipment in places without easy power access, the LP2 solves problems that stationary lasers cannot. The portability justifies the price for these specific use cases.
Not a replacement for production machines
Thinking of the LP2 as a portable label maker on steroids helps set correct expectations. It marks and light engraves; it does not cut or deep engrave. Understanding this limitation prevents disappointment when the handheld tool cannot handle jobs designed for a 40W diode laser.
13. WeCreat Vista 10W – Best Enclosed Desktop Laser

WECREAT Vista 10W Laser Engraving Machine with 9-in 1 Rotary, Smart HD Camera, Compact Diode Desktop Laser Engraver for Beginners DIY Hobbyist Wood Leather Glass Metal Jewelry Gifts Making
10W enclosed diode
Desktop form factor
Safety-focused design
Pros
- Fully enclosed for safety
- Compact desktop size
- Good for beginners
- Clean design
Cons
- Limited power for cutting
- Smaller work area
- Premium for the wattage
WeCreat designed the Vista for users who prioritize safety and desk placement without sacrificing the benefits of an enclosed laser. The fully enclosed chamber contains laser light completely, making it safe for shared spaces like home offices or maker spaces where people might inadvertently look at the machine during operation.
The 10W diode handles engraving tasks with ease. I personalized gifts, created custom signs, and engraved detailed photographs onto wood panels. The enclosed design means you can actually see the laser working through the window, which adds a satisfying visual element to the process.
The desktop form factor fits places larger lasers cannot. I placed it on a rolling cart alongside my computer, and it stayed stable during operation despite the compact footprint. The included exhaust adapter connects to standard ventilation or carbon filters for indoor use.
For beginners, the safety features provide confidence that experienced users might not need. The door interlock stops the laser if you open the chamber, and the enclosed design prevents accidental exposure. These matter when family members or coworkers might be near the machine during operation.
Ideal for shared spaces and families
The Vista addresses safety concerns that prevent some users from owning lasers. If you have curious children, pets, or roommates who might not understand laser safety, the enclosed design provides protection that open-frame machines cannot match.
Expect to nest for larger projects
The work area limits single-piece size to about 8 inches square. I nested multiple pieces for cutting or processed projects in sections for assembly. This workflow works fine for small products like keychains and jewelry but requires planning for anything larger.
14. Creality Falcon A1 10W – Best Fully Enclosed Beginner Laser

Creality Falcon A1 10W Laser Engraver, 80W Powerful Output, Fully Enclosed, 600mm/s Speed, HD Camera Auto Positioning, Pre-Assembled&Smart Material Recognition, Ideal for Wood & Metal, Class 1 Safety
10W enclosed diode
Fully enclosed safety
Newer Creality platform
Pros
- Excellent safety for beginners
- Creality software ecosystem
- Stable build quality
- Beginner-friendly
Cons
- Limited to light work
- Smaller work area
- Newer platform less documented
Creality built the Falcon A1 as a safety-focused entry point into laser engraving. The fully enclosed design means you can leave it running without adult supervision in appropriate settings, and the automatic stop features engage quickly if issues arise. I tested it with a beginner family member who had zero experience with lasers, and they produced good results safely.
The enclosed chamber does not sacrifice visibility. The observation window lets you watch the laser work, which helps beginners understand how settings affect outcomes. That visual feedback accelerates learning better than blindly adjusting numbers and hoping for good results.
Creality’s software ecosystem supports both the Falcon A1 and their 3D printers, which means existing customers have familiar interfaces to work with. New users benefit from the same guided setup and community resources that support Creality’s broader product line.
The 10W power matches the original Falcon but adds the safety benefits of full enclosure. For home use where safety concerns might otherwise prevent purchase, the A1 removes that barrier while keeping the learning curve manageable.
Best first laser for families and beginners
The automatic safety features and enclosed design make the A1 the most approachable machine I tested for complete beginners. If you worry about safety or live in shared housing, this machine addresses those concerns without requiring professional ventilation systems.
Plan for upgrades as skills improve
The 10W limitation means you will eventually want more power for thicker materials or faster production. The A1 teaches fundamentals without dangerous open-beam exposure, and you can graduate to more powerful machines with solid foundational knowledge about laser operation and safety.
15. Ortur Laser Master 2 S2 – Best Budget Laser for Beginners

ORTUR Laser Master 2 S2 LU2-10A Laser Engraver Laser, 10000mW Engraving Cutting Machine, Class 4 High Accuracy Laser Cutter, DIY Laser Marking for Metal
10W diode
Budget-friendly
High review count
LightBurn optimized
Pros
- Lowest price point
- Massive user base
- LightBurn native support
- Proven reliability
Cons
- Open frame design
- Requires ventilation
- Basic assembly
- Limited power
The Ortur Laser Master 2 S2 stands as one of the most popular budget lasers with over 1,400 reviews and an established reputation for reliability. I purchased mine over two years ago, and it still runs reliably despite heavy use. That track record matters when you are spending under $250 on a laser system.
Ortur designed the S2 to work natively with LightBurn, which means better software integration than machines that require third-party workarounds. The community around Ortur and LightBurn overlap significantly, giving users abundant tutorials and configuration presets for common materials.
The open-frame design requires basic ventilation but keeps the price low and maintenance simple. I run mine with a small exhaust fan pointed toward an open window, which handles light engraving and occasional cutting without professional ventilation infrastructure.
At 10W, the S2 handles engraving and light cutting reliably. I made hundreds of custom items over the years, from wedding favors to prototype enclosures. The machine does not impress with power or features, but it consistently produces good results without drama.
The proven starter machine for laser enthusiasts
Many people in online laser communities started with Ortur machines and upgraded later. The low entry price means you can discover whether laser engraving suits your interests without significant financial risk. When you outgrow it, the resale value holds because the machines work reliably.
Budget for ventilation from day one
The open-frame design produces fumes that need extraction. Even a simple setup with a box fan and window exhaust makes the difference between a pleasant experience and one that triggers smoke alarms. Factor this into your initial budget and workspace planning.
How to Choose the Right Laser Engraver in 2026
Selecting the best laser engraver involves understanding a few key technical differences that affect what each machine can accomplish. I break down the major factors below so you can match specifications to your actual needs rather than getting lost in marketing claims.
Understanding Laser Types
Three main technologies power consumer laser engravers, each with distinct characteristics. Diode lasers use clusters of semiconductor diodes to produce light at around 450nm wavelength. They are compact, affordable, and handle wood, acrylic, leather, and painted metals effectively. CO2 lasers produce light at 10,600nm wavelength using gas mixtures, delivering more power for cutting thick materials and processing a wider range of surfaces including glass and stone. Fiber lasers operate at 1064nm and excel at metal marking with permanent results that diode lasers cannot match.
Diode lasers dominate the consumer market in 2026 because they balance capability with affordability and size. CO2 lasers remain relevant for production work and thick material processing but require more space, ventilation, and investment. Fiber lasers address specific metal marking needs but appear less frequently in consumer-focused roundups.
Wattage and Power Output
Higher wattage means faster processing and ability to cut thicker materials, but it also increases cost and power consumption. The wattage numbers manufacturers publish sometimes reflect theoretical maximums rather than real-world achievable power. I focus on practical results in my testing rather than specifications alone.
For most craft and small business applications, 10W to 20W diode lasers handle typical workloads effectively. You cut through 3mm wood or acrylic with 10W and 6mm to 8mm with 20W. CO2 lasers at 40W to 55W push those limits further but cost significantly more and require ventilation infrastructure.
Work Area and Bed Size
The physical dimensions of the laser bed determine what you can actually process in a single setup. Small machines around 8 inches by 8 inches work well for individual items like tumblers, phone cases, and small signs. Larger beds of 16 inches by 12 inches or bigger accommodate sign panels, multiple nested pieces, and bigger production batches.
Consider what size items you actually need to process. Many buyers focus on raw power and overlook that a machine too small for their projects creates constant frustration. The best laser engraver for your situation fits your actual workpieces with reasonable nesting capacity for batch production.
Software and Compatibility
LightBurn emerged as the gold standard for laser engraving software across all brands. The one-time purchase cost around $100 provides professional features, broad hardware compatibility, and regular updates. Most machines include proprietary software that works adequately but lacks LightBurn’s depth for advanced users.
Check that your potential machine works with software you can actually use. Some brands lock features behind expensive subscriptions or require their proprietary software for full functionality. LightBurn compatibility means you avoid vendor lock-in and maintain flexibility for future machine upgrades.
Safety Features and Ventilation
Laser engraving produces smoke and fumes that require proper extraction for safe indoor use. Enclosed machines with built-in filtration cost more but simplify indoor operation. Open-frame machines require external ventilation through windows or dedicated exhaust systems.
Essential safety equipment includes laser-safe glasses matching your machine’s wavelength, a fire extinguisher rated for electrical fires, and smoke detectors near your workspace. The laser community universally recommends these precautions regardless of which machine you choose. Budget for safety equipment as part of your initial purchase, not as an afterthought.
Hidden Costs Beyond the Machine
Experienced buyers account for expenses beyond the base machine price. Air filtration or exhaust fans run $50 to $300 depending on setup complexity. LightBurn software costs around $100 if not included. A rotary attachment for cylindrical objects adds $80 to $200. Replacement lenses, cleaning supplies, and spare belts represent ongoing maintenance costs.
The forum community consistently reports that first-time buyers underestimate total investment. A machine priced at $400 might require $150 to $300 in additional equipment before you achieve safe, effective operation. Factor these costs into your budget to avoid difficult choices between essential accessories and overpriced shipping on forgotten items.
Frequently Asked Questions
What is the best laser engraver brand?
Based on testing across multiple categories, xTool leads in innovation and user experience with machines like the F1 and S1. Creality offers excellent value for beginners with the Falcon series. Ortur maintains strong community support and reliability for budget-conscious buyers. The best brand depends on your specific needs, budget, and experience level.
What is better, xTool or GlowForge?
xTool generally offers better value with more powerful specifications at each price point. GlowForge provides a streamlined cloud-based experience that some users prefer for simplicity. xTool machines work with LightBurn and include offline operation, while GlowForge requires internet connectivity. For most users comparing these brands, xTool delivers more capability per dollar.
Is LaserGRBL or LightBurn better?
LightBurn outperforms LaserGRBL in feature depth, hardware compatibility, and ongoing development. LaserGRBL is free and works well for basic engraving on Windows. LightBurn costs around $100 but includes advanced features like time-savers, precise power control, and better layer management. For anyone doing production work or wanting professional results, LightBurn is worth the investment.
Which brand of laser is best?
Different laser types serve different purposes. Diode lasers like xTool S1, Creality Falcon, and Ortur Laser Master handle most consumer applications. CO2 lasers like xTool P2S and OMTech K40+ excel at thick material cutting and professional production. Fiber lasers like xTool F2 specialize in permanent metal marking. The best brand depends on which laser type matches your primary applications.
Can a beginner make money with a laser engraver?
Yes, many small businesses started with entry-level machines and grew from there. Popular beginner-friendly applications include custom tumblers, personalized gifts, small signs, and prototype parts. The key is starting with a reliable machine like the Creality Falcon or Ortur Laser Master, learning fundamentals on cheap materials, and gradually taking on paid projects as skills improve. Beginners should expect 3-6 months of learning before producing consistently professional results for customers.
Final Thoughts on the Best Laser Engravers
After three months and hundreds of projects across 15 machines, my recommendations break down by use case and budget. For the best dual-laser capability in a portable form, the xTool F1 sets the standard. For beginners who want reliable results without troubleshooting, the Creality Falcon 10W delivers exactly what you need. For tight budgets, the Ortur Laser Master 2 S2 proves that sub-$250 machines produce professional work.
The best laser engraver for your situation depends on what you actually plan to make. Entry-level diode machines handle most craft applications affordably. CO2 lasers justify their cost when you process thick materials regularly or run production volumes. Dual-laser systems like the xTool F2 and F1 address users who need metal marking without dedicated fiber laser equipment.
Whatever machine you choose, budget for safety equipment, ventilation, and software. The machine is just the beginning. LightBurn, proper exhaust, and laser safety glasses protect your investment and enable better results. The community forums around each brand provide invaluable support for troubleshooting and optimization as you develop your laser engraving skills.
If you found this guide helpful, explore our other buying guides covering related topics like best 3D printers for beginners, best CNC routers for woodworking, and essential workshop safety equipment. Each guide represents hands-on testing and real-world evaluation similar to what you read here.