
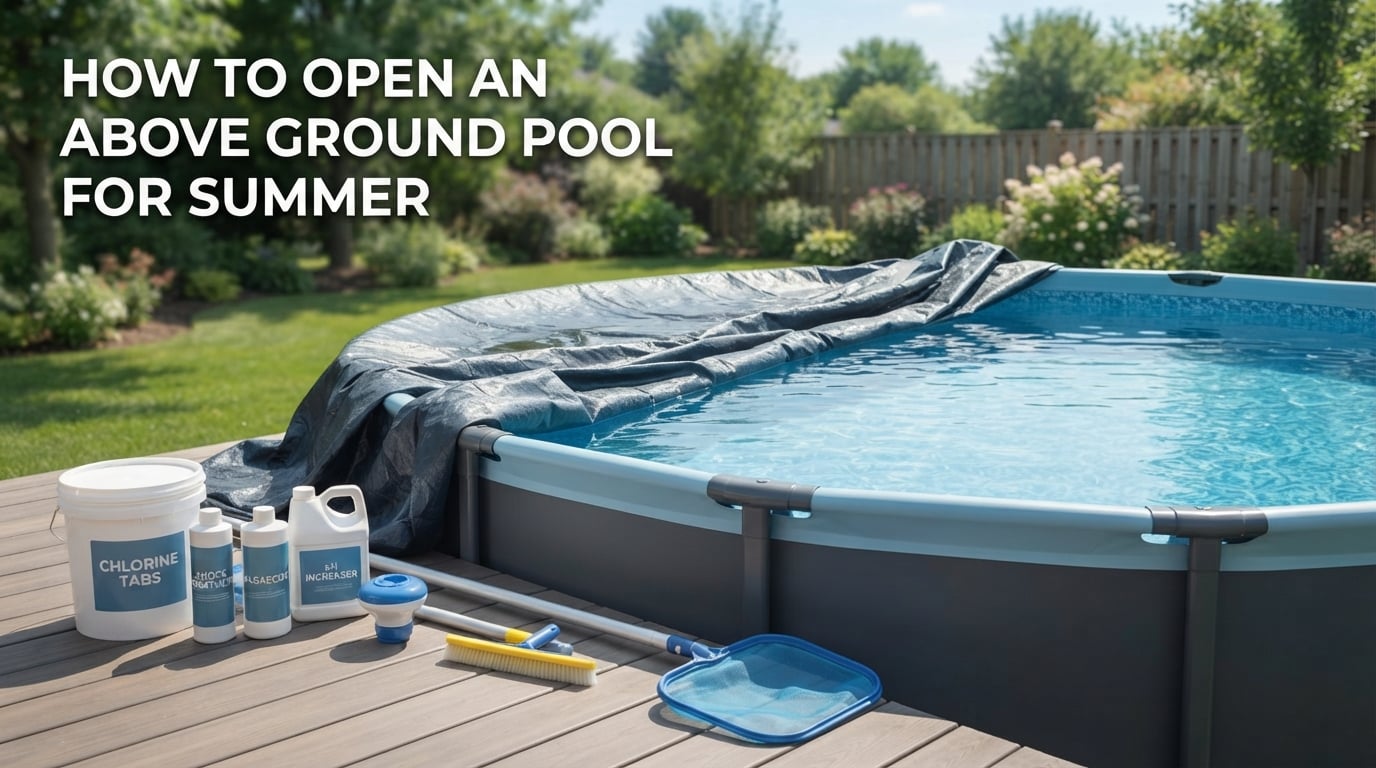
Every spring, thousands of above ground pool owners face the same ritual: pulling back that winter cover and bringing their pool back to life. If you are wondering how to open an above ground pool for summer without hiring a professional or spending days troubleshooting, you are in the right place.
Our team has spent years working through the pool opening process on different pool types, sizes, and setups. Along the way, we have made mistakes and learned from pool owners on forums like Trouble Free Pool and r/AboveGroundPools. This guide brings together everything that actually works.
The process comes down to seven main phases: removing the winter cover, reassembling your equipment, filling the pool to the right level, starting up the pump and filter, cleaning the pool, adding start-up chemicals, and balancing the water chemistry. Each step matters, and skipping one usually leads to green water or equipment problems down the line.
You can expect the entire process to take anywhere from a half day to a full weekend depending on your pool size and condition. First-time openers should plan for the longer end of that range. Once you have done it a couple of times, the routine becomes second nature.
Before you start, check the weather forecast. You want a stretch of dry days with temperatures consistently above 70 degrees Fahrenheit. Opening too early when nights are still cold wastes chemicals and runs your pump harder than necessary. Opening too late invites algae to take hold under that warm cover.
When Is the Right Time to Open Your Above Ground Pool?
The best time to open your above ground pool is when daytime temperatures consistently stay above 70 degrees Fahrenheit and nighttime temperatures no longer drop below 50. For most of the country, that falls somewhere between late April and late May.
Many pool owners wait until the water hits 65 degrees before opening. This matters because algae starts actively growing around 60 degrees. If you wait until the water is already warm and green under the cover, you will spend significantly more on chemicals and cleaning to recover.
In southern states with longer swimming seasons, opening in March or April is common. In northern states, late May to early June is more typical. The key is watching the sustained temperature trend, not a single warm week.
Forum users on Trouble Free Pool consistently recommend opening earlier rather than later. One experienced owner put it bluntly: every year they waited, the pool was green and required triple the chemicals. The years they opened early, the water was clear within 48 hours.
You also want to avoid opening during a rainy stretch. Rain introduces contaminants and dilutes chemicals before they can take effect. Pick a dry window of at least three to four days for the best results.
Tools and Supplies Checklist for Opening Your Pool
Having everything ready before you start saves you from making hardware store runs mid-process. Here is what you need to open your pool for summer.
Cover Removal Tools
You will need a pool cover pump or submersible sump pump to remove standing water from the winter cover. A soft broom or leaf blower helps clear dry leaves and debris without tearing the cover material. Have a pair of needle-nose pliers handy for removing cover clips and springs.
Cleaning Equipment
A telescoping pole is the backbone of your cleaning setup. Attach a skimmer net or leaf rake to the pole for surface debris removal. You will also need a pool brush for scrubbing walls and a vacuum head for cleaning the floor. Make sure your vacuum hose is in good condition with no cracks.
Equipment and Plumbing Parts
Gather your skimmer basket, return jet fittings, and any drain plugs you removed during winterization. Have replacement O-rings on hand along with a tube of silicone-based O-ring lubricant. Teflon tape is useful for threading connections that need resealing.
If you have a DE filter, you will need fresh diatomaceous earth powder. Sand filter owners should check whether their sand needs replacing (typically every 3 to 5 years). Have a multiport valve wrench ready if your valve has been stubborn.
Chemical Supplies
The essential chemicals for pool opening include chlorine shock (calcium hypochlorite or sodium dichlor), algaecide, pH increaser (soda ash) or pH decreaser (muriatic acid or sodium bisulfate), alkalinity increaser (baking soda), and a cyanuric acid stabilizer. A pool opening kit bundles most of these together and is a convenient option for first-timers.
Testing and Safety Gear
Get fresh test strips or a liquid test kit before opening. Expired test kits give inaccurate readings, and you will be adding chemicals based on those numbers. Wear rubber gloves and safety glasses when handling pool chemicals. Never mix different chemicals together directly.
How to Open an Above Ground Pool for Summer: Step 1 Remove the Winter Cover
This is where many pool owners get into trouble. If you yank the cover off without clearing debris first, you dump months of accumulated leaves, dirt, and stagnant water straight into your pool. Take your time with this step.
Clear Debris Off the Cover First
Start by removing all dry debris from the cover surface. Use a soft broom to sweep leaves, twigs, and dirt toward one edge where you can scoop them off. A leaf blower works well for dry leaves but avoid using it if the cover is wet, as it can blow dirty water into the pool.
For stubborn debris stuck to the cover, gently hose it off while the cover is still in place. The goal is to get the surface as clean as possible before you start removing water.
Pump Off Standing Water
Use a pool cover pump or sump pump to remove all standing water from the cover. This water is stagnant and full of contaminants, so direct it away from the pool and any landscaping you want to protect. Smaller covers might only need a few hours, while large covers can take a full day.
Many forum users on r/pools recommend buying a dedicated cover pump even if you already own a larger sump pump. The smaller cover pumps are automatic, turning on and off as water accumulates, which saves you from babysitting the process.
Remove the Cover Carefully
With debris cleared and water pumped off, loosen the cover cable or remove the cover clips and springs. Work with a partner if possible, since above ground pool covers are heavy and awkward to handle alone. Fold the cover accordion-style as you pull it off, keeping the dirty side facing inward so debris does not fall into the pool.
Small amounts of debris will still find their way into the water. That is normal and will be handled during the cleaning step.
Clean and Store the Winter Cover
Lay the cover out on a clean, flat surface and wash it thoroughly with a mild soap solution and soft brush. Let it dry completely before folding. Sprinkling talcum powder or a specialized cover cleaner between folds prevents mold and mildew during storage.
Store the cover in a sealed container or storage bag in a cool, dry place away from direct sunlight. Mice and other rodents love nesting in pool covers, so choose a secure storage location.
If your cover has small tears, patch them now with a vinyl repair kit before storing. Large tears or extensive mold growth may mean it is time to replace the cover entirely.
Step 2: Reassemble and Reconnect Pool Equipment
With the cover off, it is time to put everything back together. This step intimidates first-time pool owners the most, but it is straightforward once you understand what each component does.
Remove Winterizing Plugs and Ice Compensator
Start by removing all winterizing plugs from the return fittings, skimmer, and pump. Count the plugs as you remove them and keep them in a labeled bag for next fall. If you used an ice compensator or air pillow in the skimmer, pull that out now.
Replace the winterizing plugs with your normal return jet eyeball fittings. Hand-tighten them securely. If the threads feel rough or corroded, wrap them with Teflon tape for a better seal.
Reinstall the Skimmer Basket and Weir
Drop the skimmer basket back into the skimmer housing. Reinstall the weir door (the floating flap that regulates water flow into the skimmer). Make sure the weir moves freely and is not stuck in the up or down position.
Check the skimmer gasket or plate for cracks or wear. A damaged gasket lets air into the system, which prevents the pump from priming properly. Replace it if you see any signs of deterioration.
Reconnect Pump and Filter Hoses
Connect the hose from the skimmer to the pump inlet and from the pump outlet to the filter inlet. Then connect the return hose from the filter outlet back to the pool return fitting. Tighten all hose clamps with a screwdriver.
Inspect each hose for cracks, bulges, or soft spots. Hoses that have degraded over winter can burst when the pump pressurizes the system. Replace any questionable hoses before starting the pump.
Lubricate O-Rings
Remove the pump lid O-ring and coat it lightly with a silicone-based lubricant. Do the same for the O-ring on your filter’s multiport valve. Never use petroleum-based products like Vaseline, which degrades rubber over time.
This is one of those small steps that saves major headaches. A dry or cracked O-ring is the most common reason a pump will not prime after winter.
Sand Filter and DE Filter Specifics
If you have a sand filter, check the sand level and inspect the lateral assembly at the bottom of the tank for cracks. Broken laterals let sand back into the pool. Sand should be replaced every 3 to 5 years.
For DE filters, disassemble the filter and inspect the grids for tears or buildup. Hose the grids clean and reassemble. You will add fresh DE powder after the pump is running.
Electrical Safety Check
Before plugging in the pump, inspect the power cord for cracks or exposed wires. Verify that your pump is connected to a GFCI-protected outlet. Press the test button on the GFCI to confirm it trips properly. If it does not trip, do not use that outlet until an electrician has checked it.
Make sure the pump motor is properly grounded. The grounding wire should be securely connected to the pump’s grounding lug. This protects against electrical shock if a fault develops.
Step 3: Fill the Pool to the Proper Water Level
Check the current water level in your pool. The target level is at the midpoint of the skimmer opening, which allows the skimmer to function correctly without drawing air.
If the water level is low, fill it with a garden hose. For faster filling, use multiple hoses if your outdoor spigots allow it. A typical above ground pool may need several inches of water, which can take 4 to 12 hours depending on your water pressure and hose flow rate.
Consider attaching a hose filter to remove metals and minerals from your fill water. This is especially important if you have well water, which often contains iron that stains pool surfaces and turns cloudy when chlorine is added.
Do not start the pump until the water reaches the proper level. Running the pump with low water risks drawing air into the system and causing the pump to lose its prime or run dry and overheat.
Step 4: Start Up the Pump and Filter System
Starting the pump for the first time each season requires a manual priming process. Take your time with this step, because forcing a dry pump can damage the seal and impeller.
Prime the Pump
Open the pump lid and fill the pump housing with water from a bucket or hose. Replace the lid securely, making sure the O-ring is seated properly and lubricated. This water creates the initial suction needed to pull water from the pool.
Set the multiport valve to the “filter” position. Open any valves between the pool and the pump to allow water flow. Plug in the pump and turn it on.
Watch the pump sight glass or clear lid. You should see water flowing through within 30 to 60 seconds. If the pump does not prime after two minutes, turn it off and repeat the filling process. Never let a pump run dry for more than a couple of minutes.
Troubleshooting Pump Priming Issues
If the pump will not prime after multiple attempts, check for air leaks at the pump lid, hose connections, and drain plugs. Even a tiny air leak prevents suction. Tighten all connections and re-lubricate O-rings.
A clogged skimmer or pump basket can also block water flow. Remove and clean both baskets. Check that the skimmer weir is not stuck closed, which would prevent water from entering the skimmer.
Forum users report that the most common priming problem is a loose pump lid. The lid needs to be tight enough to create an airtight seal but not so tight that you cannot remove it later. Hand-tighten firmly and check for any debris on the sealing surface.
Set the Multiport Valve
For initial startup with a dirty pool, set the multiport valve to “filter” and let it run. If your pool is very dirty or green, you might start with the valve on “waste” to vacuum directly out of the pool, but this drains water and requires refilling.
Never change the multiport valve position while the pump is running. Always turn the pump off first to prevent damage to the valve seal.
Monitor Pressure and Backwash
Check the pressure gauge on your filter. Note the baseline reading when the filter is clean (typically 8 to 12 psi for sand filters, 10 to 15 psi for DE filters). When pressure rises 8 to 10 psi above baseline, it is time to backwash.
To backwash a sand or DE filter, turn off the pump, set the valve to “backwash,” and turn the pump back on. Run it for 2 to 3 minutes or until the sight glass shows clear water. Turn off the pump, set the valve to “rinse” for 30 seconds, then return to “filter” mode.
For DE filters, add fresh DE powder through the skimmer after backwashing. The standard amount is approximately 1 pound of DE per 10 square feet of filter area. Check your filter manual for the exact amount.
Step 5: Clean the Pool Thoroughly
Even a well-covered pool accumulates dust, pollen, and minor debris over winter. A thorough cleaning at this stage sets you up for clear water all season.
Brush the Walls and Floor
Attach a pool brush to your telescoping pole and scrub the walls from top to bottom. Pay extra attention to corners, seams, and the waterline where algae and biofilm tend to build up. Brushing loosens contaminants that chlorine and algaecide need to reach.
Brush the pool floor as well, working toward the main drain or lowest point. This pushes settled debris toward the vacuum or filter system for removal.
Skim the Surface
Use a skimmer net to remove any floating leaves, bugs, or debris from the surface. Work around the pool perimeter, scooping from the edge inward. Empty the skimmer basket after this step since it will fill up quickly.
Vacuum the Pool Floor
Attach your vacuum head to the telescoping pole and connect the vacuum hose. Fill the hose with water by holding it over a return jet until all air is expelled. Connect the other end to the skimmer vacuum plate or dedicated vacuum port.
Vacuum slowly across the pool floor, overlapping your passes to avoid missing spots. Move too fast and you will stir up debris instead of capturing it. Empty the pump basket periodically if the pool was particularly dirty.
Clean the Baskets
After vacuuming, turn off the pump and clean both the skimmer basket and the pump basket. Rinse them with a hose and check for cracks. Damaged baskets let debris through to the pump impeller, which can cause clogs and damage.
Step 6: Add Start-Up Chemicals
Chemicals are what transform your pool from a pond back into a swimming pool. The order in which you add them matters, so follow this sequence carefully.
Test the Water First
Before adding anything, test the water using your test strips or liquid kit. You need baseline readings for pH, total alkalinity, chlorine, and stabilizer levels. Write these numbers down so you can track your adjustments.
If you want the most accurate results, take a water sample to a local pool store for professional analysis. Many offer free testing and provide detailed recommendations based on your specific water chemistry.
Adjust Total Alkalinity First
Total alkalinity should be between 80 and 120 ppm. Alkalinity acts as a buffer for pH, so it must be balanced before you adjust pH. If alkalinity is low, add alkalinity increaser (sodium bicarbonate) at the rate of 1.5 pounds per 10,000 gallons to raise it 10 ppm. If it is high, add muriatic acid carefully according to the manufacturer’s dosage chart.
Wait at least 30 minutes to an hour after adding alkalinity adjusters before moving on. Run the pump continuously during this period to circulate the chemicals.
Balance pH Next
Your target pH range is 7.4 to 7.6. This range is slightly basic, which matches human tears and minimizes skin and eye irritation. If pH is low (below 7.2), add soda ash (sodium carbonate) at about 6 ounces per 10,000 gallons to raise it 0.2. If pH is high (above 7.8), add pH decreaser (sodium bisulfate) according to package directions.
Wait at least 30 minutes after adjusting pH before adding other chemicals. Retest to confirm you hit the target range.
Add Metal Sequestrant if Needed
If your fill water contains iron or copper (common with well water), add a metal sequestrant before shocking. This prevents metals from oxidizing and staining your pool surfaces when chlorine is added. Follow the dosage instructions on the product label.
Shock the Pool
Shocking means adding a large dose of chlorine to kill bacteria, algae, and contaminants that accumulated over winter. Use calcium hypochlorite (cal-hypo) shock at a rate of 1 pound per 10,000 gallons for a standard opening. For pools that sat dormant or show early signs of algae, double that amount.
Add shock in the evening so sunlight does not degrade the chlorine overnight. Pour it slowly into the pool near a return jet while the pump runs. Never pour shock directly into the skimmer, especially if you have a DE or cartridge filter, as concentrated chlorine can damage the internal components.
Keep the pump running for at least 8 hours after shocking. Do not swim until chlorine levels drop below 3 ppm, which typically takes 24 to 48 hours.
Add Algaecide
Once chlorine levels have settled (wait 24 hours after shocking), add a quality algaecide as a preventative measure. Use an algaecide with a concentration of 30% to 60% and follow the dosage on the label, typically 4 to 12 ounces per 10,000 gallons.
Algaecide is a preventative treatment, not a cure. It works by disrupting algae cell membranes, preventing growth before it starts. Apply it after shocking so the high chlorine levels do not break down the algaecide.
Add Cyanuric Acid (Stabilizer)
Cyanuric acid protects chlorine from UV degradation. The target level is 30 to 50 ppm. If your stabilizer level is at zero (common after a full drain and refill), add stabilizer at approximately 4 pounds per 10,000 gallons to reach 30 ppm. Dissolve it in a sock or cloth bag and place it in the skimmer basket rather than dumping it directly into the pool.
Stabilizer dissolves slowly, so it may take several days to fully register on test kits. Be patient and retest after a week.
Step 7: Balance Your Pool Water Chemistry
After adding start-up chemicals, give the pool 24 to 48 hours of continuous pump operation. Then retest the water and make final adjustments to get everything within range.
pH: 7.4 to 7.6
This is your most critical reading. pH that is too low (acidic) corrodes equipment and irritates skin. pH that is too high (basic) causes scaling, cloudy water, and reduces chlorine effectiveness. Test and adjust pH weekly throughout the season.
Total Alkalinity: 80 to 120 ppm
Alkalinity keeps pH stable. When alkalinity is in range, your pH will not bounce around dramatically. Check alkalinity every two weeks and adjust as needed.
Calcium Hardness: 150 to 250 ppm
Above ground pools with vinyl liners tolerate lower calcium levels than inground pools, but you still want it above 150 ppm. Low calcium causes foamy water and can damage the liner over time. Add calcium hardness increaser if levels are below 150 ppm.
Chlorine: 1 to 3 ppm
Maintain free chlorine between 1 and 3 ppm for safe swimming. After the initial shock wears off, transition to your normal chlorination method, whether that is tablets, a floater, or a salt chlorine generator.
Cyanuric Acid: 30 to 50 ppm
Keep stabilizer in the 30 to 50 ppm range. Too low and your chlorine burns off quickly in sunlight. Too high (above 100 ppm) and the stabilizer locks up chlorine, making it ineffective. The only way to lower cyanuric acid is partial draining and refilling.
Testing Methods
Test strips are convenient and give a quick snapshot of your water chemistry. For more precise readings, a liquid drop test kit (like a Taylor K-2005) measures each parameter with greater accuracy. Many experienced pool owners use strips for daily checks and liquid kits for the weekly full panel.
Always test water from at least 18 inches below the surface. Surface water gives inaccurate readings due to evaporation and chemical concentration at the top.
How to Handle a Green Pool After Opening?
If you open your pool cover and find green water, you are not alone. Forum data suggests roughly 60% of pool owners encounter some degree of green water at opening. The good news is that green pool recovery is entirely doable if you follow the right process.
Green water means algae has grown in your pool over winter. The severity ranges from a slight green tint to a swamp-like mess with visible growth on the walls. The approach is the same regardless of severity, but worse cases take longer.
Step 1: Brush Everything
Before adding chemicals, brush the walls and floor vigorously. This breaks up algae colonies attached to surfaces and puts them into suspension in the water where chlorine can kill them. Pay close attention to corners, steps, and behind ladders.
Step 2: Double or Triple Shock
For a standard green pool, add 2 pounds of calcium hypochlorite shock per 10,000 gallons (double the normal dose). For severely green pools, triple that amount to 3 pounds per 10,000 gallons. Add the shock in the evening and keep the pump running overnight.
Step 3: Run the Filter Continuously
Run your pump and filter 24 hours a day until the water clears. Backwash the filter daily during this process, because dead algae will clog the filter quickly. A sand filter may need backwashing twice a day during recovery. DE filters need backwashing and recoating when pressure rises 10 psi above baseline.
Step 4: Add Clarifier or Flocculant
After 24 to 48 hours of filtration, the algae should be dead but the water may still look cloudy. Add a pool clarifier to coagulate tiny particles so the filter can capture them more effectively. Alternatively, use a flocculant, which drops particles to the floor for vacuuming.
If you use flocculant, turn off the pump for 24 hours to let everything settle. Then vacuum carefully to waste (not through the filter) so you do not recirculate the debris.
Step 5: Retest and Rebalance
Once the water is clear, retest all chemical levels. The shock and algae treatment will have altered your pH, chlorine, and possibly alkalinity readings. Bring everything back into balance and resume your normal maintenance routine.
A typical green pool recovery takes 3 to 7 days. Severe cases can take up to two weeks. Patience and consistent filtration are the keys to success.
Common Pool Opening Problems and Solutions
Even with careful preparation, things can go wrong during the pool opening process. Here are the most common problems and how to fix them.
Pump Will Not Prime
This is the number one complaint at pool opening time. The cause is almost always air entering the system somewhere between the pool and the pump. Check the pump lid O-ring, hose connections, and drain plugs for leaks. Fill the pump housing with water before starting. If the pump still will not prime after three attempts, check for a clogged impeller by removing the pump basket and reaching into the impeller housing.
Low Filter Pressure
If your pressure gauge reads lower than normal, the problem is on the suction side of the system. Check for a clogged skimmer basket, closed valves, or a blocked suction line. Low pressure means water is not reaching the filter efficiently.
High Filter Pressure
Pressure that reads significantly higher than baseline means the filter is dirty or clogged. Backwash sand and DE filters immediately. For cartridge filters, remove and hose down the cartridge. If pressure stays high after cleaning, the filter media may need replacement.
Air in the System
Bubbles streaming from the return jets indicate air is entering the system. Common entry points are loose pump lid, damaged O-rings, cracked hoses, or a low water level. Eliminate air leaks promptly, because air reduces filtration efficiency and can damage the pump seal over time.
Cloudy Water After Opening
Cloudy water usually means fine particles are suspended in the water. Check your filter is running properly and backwash if needed. Add a clarifier to help the filter capture smaller particles. If cloudiness persists after 48 hours, test calcium hardness and pH, as imbalances in either can cause persistent cloudiness.
Chemical Readings Seem Wrong
If your test results look dramatically different than expected, check your testing equipment first. Expired test strips give false readings. Rinse your test vials with pool water before testing. If results still seem off, bring a sample to a pool store for professional analysis.
Common Mistakes to Avoid When Opening Your Pool
Learning from other people’s mistakes is faster than making them yourself. Here are the errors that trip up pool owners every spring.
Adding Chemicals Before Testing
Pouring in shock or pH adjusters without knowing your starting water chemistry wastes money and can create dangerous imbalances. Always test first and add chemicals based on actual readings, not guesses.
Starting the Pump Before Filling
Running the pump when the water level is below the skimmer draws air into the system. This can cause the pump to lose its prime, overheat, and damage the seal. Always fill to the proper level before starting equipment.
Skipping the Cover Cleaning
Storing a dirty, wet cover guarantees mold growth and a shorter cover lifespan. Take the extra 30 minutes to clean and dry the cover before storage. You will thank yourself next fall.
Mixing Chemicals Together
Never mix different pool chemicals directly. Adding shock and algaecide at the same time can neutralize both or produce dangerous fumes. Follow the proper sequence and wait between additions.
Forgetting to Lubricate O-Rings
Dry O-rings crack and let air into the system. Spend five minutes applying silicone lubricant to every O-ring during reassembly. It is one of the cheapest preventative steps you can take.
Opening Too Late
Waiting until the water is already warm under the cover means algae has had weeks to grow. Open early when the water is still cool and clear. The chemicals you save will pay for themselves quickly.
FAQs
What chemicals do I need to open my above ground pool for the first time?
For a first-time pool opening, you need chlorine shock (calcium hypochlorite), algaecide, pH increaser or decreaser, alkalinity increaser, cyanuric acid stabilizer, and a metal sequestrant if you have well water. A pool opening kit bundles these chemicals together with dosage instructions, making it the easiest option for first-timers.
What do I need to open my pool for the summer?
You need a cover pump, soft broom, telescoping pole, skimmer net, pool brush, vacuum head and hose, skimmer and pump baskets, return jet fittings, O-ring lubricant, Teflon tape, fresh test strips or liquid test kit, chlorine shock, algaecide, pH adjusters, alkalinity increaser, and safety gloves and glasses.
How long does it take to open a pool for summer?
Opening an above ground pool takes 4 to 8 hours of active work spread over 2 to 3 days. Day one involves cover removal, equipment reassembly, and filling. Day two includes pump startup, cleaning, and chemical addition. Water typically clears within 48 to 72 hours after shocking.
Can you keep an above ground pool open all year?
In climates where temperatures stay above freezing, you can keep an above ground pool open year-round by reducing chlorine output and running the pump during freezing periods. In regions with hard freezes, closing the pool is recommended to prevent damage to the pump, filter, and plumbing lines.
Wrapping Up Your Pool Opening
Knowing how to open an above ground pool for summer comes down to following seven phases in the right order: cover removal, equipment reassembly, filling, pump startup, cleaning, chemical treatment, and water balancing. Each step builds on the previous one, so resist the urge to rush or skip ahead.
Once your water is clear and balanced, the hard part is behind you. Maintain chlorine levels between 1 and 3 ppm, test your water weekly, and brush and vacuum regularly. A well-opened pool that gets consistent maintenance will stay clean and swimmable all season long.