
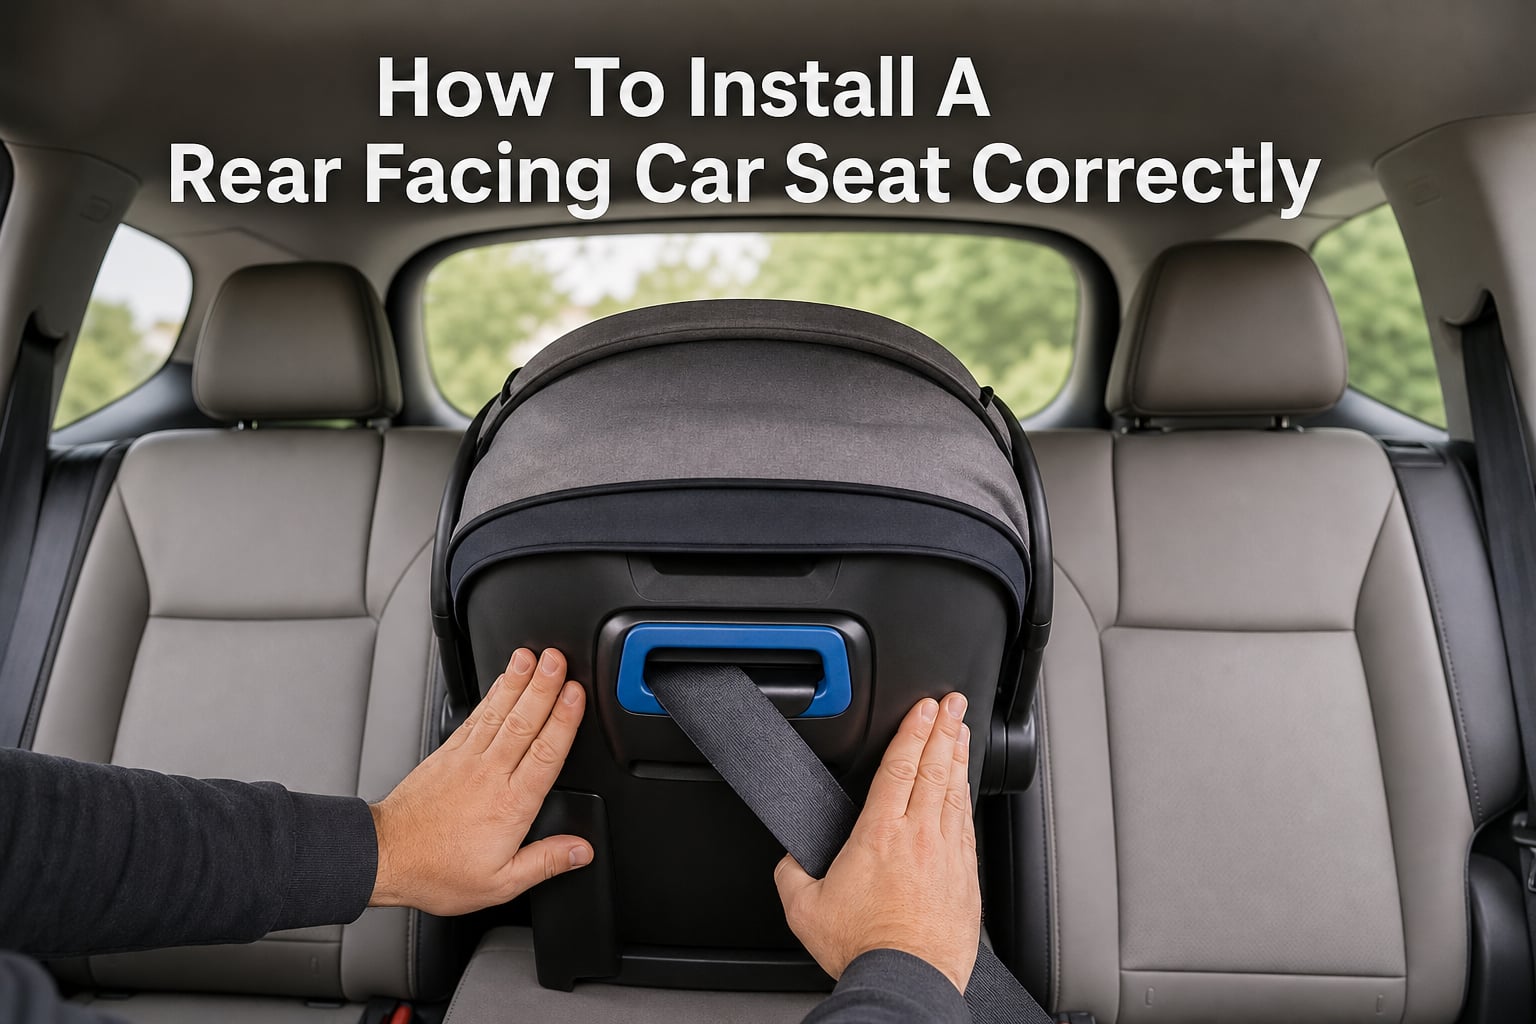
I remember the day I brought my first baby home from the hospital. The nurses walked me to the car, watched me buckle the infant carrier into the base, and gave me a thumbs-up. I drove away feeling like a pro. A week later, a local police officer running a free car seat check told me my install was off by almost two inches at the belt path. That moment changed how I think about car seat safety forever.
If you’re searching for how to install a rear facing car seat correctly, you’re already doing the right thing. Studies show that 59 to 96 percent of parents install their child’s car seat with at least one critical error. This guide will walk you through both installation methods, the inch test, the correct recline angle, and the mistakes I see parents make most often. By the end, you’ll know exactly what a safe install looks and feels like.
Why Rear-Facing Is Safer for Your Child
Rear-facing car seats protect your child’s head, neck, and spine better than any other restraint option. In a frontal crash (the most common and most severe type), a rear-facing seat cradles the child’s entire body and lets the car seat shell absorb the crash forces instead of the child’s still-developing spine.
According to the American Academy of Pediatrics, children under age 2 are 75 percent less likely to be seriously injured or killed when riding rear-facing. Their heads are proportionally large and heavy compared to their necks, which makes forward-facing too early a serious risk for infants and toddlers.
The physics are simple. When a car stops suddenly, everything inside it keeps moving at the original speed. A rear-facing child rides down the crash inside a protective shell, with the force spread across the back of the seat. A forward-facing child gets thrown forward, with all that force concentrated on the harness straps and the still-fragile neck.
What You Need Before Installation
Before you start, gather a few essentials. The single most important item is your car seat manual. Every model has a slightly different belt path, recline angle, and tightening sequence, and the manual is your definitive reference.
You will also want your vehicle owner’s manual. It tells you where the lower anchors and tether anchors are located, which seating positions are LATCH-compatible, and whether your vehicle has special requirements for car seat installation.
Here’s a quick checklist:
Car seat with manufacturer instructions
Vehicle owner’s manual
A flat, well-lit space (your driveway works great)
About 20 to 30 minutes of uninterrupted time
Optional: a rolled towel or pool noodle for angle adjustment
If your car seat is expired, has been in a crash, or has visible cracks in the shell, do not use it. Most seats expire after 6 to 10 years, and the date is printed on the seat itself.
Method 1: Installing with the Seat Belt
Every rear-facing car seat can be installed using the vehicle’s seat belt. Many parents prefer this method because it works in any seating position and has no weight limit like LATCH does. Here is the step-by-step process.
Step 1. Place the car seat rear-facing in the back seat. The back seat is the safest spot for children under 13. The center position is ideal if your vehicle allows it, but a properly installed seat on either side is also safe.
Step 2. Thread the seat belt through the rear-facing belt path. This path is usually labeled with blue markers or blue tags. The belt should lie flat without any twists.
Step 3. Buckle the seat belt. Make sure you hear the click and that the buckle is fully latched.
Step 4. Lock the seat belt. Most modern seat belts have a locking mode that engages when you pull the shoulder belt all the way out and let it retract. Older belts may need a locking clip. Check your vehicle manual for the locking procedure.
Step 5. Press down firmly on the car seat with your body weight (about 60 to 80 pounds of force) while you remove all slack from the seat belt. Pull the shoulder portion tight while pressing down.
Step 6. Test your install using the inch test described below.
Tip: If your car seat has a lock-off mechanism (a built-in clamp that grips the belt), use it. Lock-offs eliminate the need to lock the seat belt retractor separately and make a tighter install possible.
Method 2: Installing with the LATCH System
LATCH stands for Lower Anchors and Tethers for Children. Every vehicle made since September 2002 has this system, and every car seat made in the US comes with LATCH connectors. LATCH can be easier than the seat belt method, especially for new parents.
Step 1. Locate the lower anchors in your vehicle’s back seat. They are metal bars found in the bight (the crease where the seat back meets the seat cushion) and are usually marked with a small button or tag.
Step 2. Place the car seat rear-facing in the chosen position and attach the LATCH connectors to the lower anchors. The connectors click into place when correctly attached. Pull on each to confirm they are locked.
Step 3. Tighten the LATCH strap by pulling the free end of the webbing. Press down on the seat with your body weight as you tighten. The strap should not have any slack.
Step 4. Verify the install with the inch test.
Important weight limit: Since 2014, LATCH systems have a combined weight limit of 65 pounds for the child plus the car seat. Check both your car seat manual and your vehicle manual for the specific limit. Once your child exceeds it, switch to the seat belt method, which has no such limit.
Common issue: If your vehicle has lower anchors in the center position, you may need a single LATCH connector instead of two. Some vehicles also prohibit using LATCH in the center even when anchors are present. Always check the owner’s manual.
The Inch Test: How to Verify a Secure Installation
The inch test is the fastest way to confirm your car seat is installed tightly enough. It takes 10 seconds and should be done at the belt path, not at the top of the seat.
How to do the inch test: Grab the car seat at the belt path with both hands. Push and pull the seat side to side and front to back. The seat should not move more than one inch in any direction.
If the seat moves more than one inch, your install is too loose. Go back to whichever method you used, press down harder on the seat, and tighten the belt or LATCH strap further. Test again until the movement is under one inch.
A small amount of side-to-side wobble at the top of the seat is normal and expected. The seat is designed to pivot at the belt path. What matters is that the belt path itself stays locked in place.
Our team has tested dozens of installs over the years, and the number one reason seats fail the inch test is parents not pushing hard enough while tightening. Use your full body weight, not just your hand.
Finding the Correct Recline Angle
The recline angle keeps your child’s airway open and prevents their head from falling forward, which can restrict breathing. Every rear-facing car seat has an angle indicator built into the side of the shell, and the manual shows the correct range for your child’s age.
Newborns and small infants need a more reclined angle (typically 30 to 45 degrees from vertical) because their neck muscles cannot hold their head up. Older babies with good head control can sit at a slightly more upright angle, usually 30 degrees.
How to check your angle: Look at the indicator on the side of the seat. Most use a bubble level, a ball, or a line that must stay within a printed zone. Adjust the recline until the indicator sits in the correct range.
Quick fix if the seat is too upright: Place a tightly rolled towel or a pool noodle under the front of the car seat base (where the child’s feet go). This tilts the seat back into the correct angle without affecting the install. Never place anything under the child.
Quick fix if the seat is too reclined: Some car seats come with angle adjusters, or you can place a thin towel under the entire base to lift it slightly.
Common Installation Mistakes to Avoid
After watching hundreds of installs at car seat checks, I can tell you the same handful of mistakes come up over and over. Here are the most common ones, and how to fix each.
Mistake 1: Loose installation. This is the most frequent error and the most dangerous. If your seat moves more than one inch at the belt path, it’s not safe. Retighten and retest.
Mistake 2: Wrong belt path. Rear-facing and forward-facing have different belt paths. Using the forward-facing path for a rear-facing install will leave the seat sitting too high and unstable. Always check the labels and your manual.
Mistake 3: Twisted seat belt or LATCH strap. A twisted belt cannot tighten properly. Run your hand along the strap before tightening to remove any twists.
Mistake 4: Chest clip in the wrong position. The chest clip should sit at armpit level, not on the belly or near the neck. We cover this in detail in the next section.
Mistake 5: Harness straps too loose. If you can pinch the harness strap horizontally at the shoulder and have extra fabric, the harness is too loose. A tight harness is just as important as a tight install.
Mistake 6: Using both LATCH and seat belt together. Unless your car seat manual specifically allows it, do not use both systems at once. In a crash, the extra anchor point can cause the seat to fail.
Fitting Your Child Correctly in the Car Seat
A perfect installation means nothing if your child isn’t buckled in correctly. Here’s how to get the harness right every single time.
Harness strap height: For rear-facing seats, the harness straps should be at or below your child’s shoulders. Most seats have slots behind the headrest or on the back of the shell. Switch to the higher slots only when you turn the seat forward-facing.
Harness tightness: Pull the harness straps snug against your child’s body. You should not be able to pinch any slack in the strap at the shoulder. If you can pinch extra fabric between your fingers, tighten more.
Chest clip position: The chest clip (also called the retainer clip) sits at armpit level, level with your child’s nipples. This keeps the harness straps properly positioned over the shoulders. A chest clip on the belly can injure internal organs in a crash. A chest clip near the neck can fail to restrain the child properly.
Buckle placement: Make sure the buckle clicks firmly into place and lies flat against your child’s body. A twisted or partially buckled crotch strap can fail under crash forces.
Winter coat warning: Never put your child in the car seat wearing a bulky coat or snowsuit. The harness cannot tighten correctly over the padding, and in a crash the coat compresses and leaves the child loose. Use a blanket over the harness instead.
When to Transition from Rear-Facing
The single biggest mistake parents make is turning their child forward-facing too early. The AAP now recommends keeping children rear-facing until they reach the maximum weight or height limit of their car seat, regardless of age.
For most convertible seats, this limit is between 40 and 50 pounds, and many children don’t reach it until age 3 or 4. Some extended rear-facing seats accommodate children up to 50 pounds rear-facing.
Signs your child is ready to turn forward-facing:
They have reached the maximum weight limit for rear-facing on their seat
Their head is within one inch of the top of the seat shell
They have reached the maximum height limit stated in the manual
Social pressure is real, and relatives will sometimes push you to turn your child forward-facing “because they’re getting big.” Ignore it. The data is clear: rear-facing is dramatically safer for as long as your child’s seat allows it.
Yes, their legs may bend or touch the vehicle seat back. That is normal and not a safety concern. Children’s joints are far more flexible than adults’, and they often sit cross-legged comfortably for the entire ride.
Rear-Facing Car Seat Installation FAQs
How should a rear-facing car seat be positioned?
A rear-facing car seat should be positioned in the back seat of the vehicle, facing the rear, at a recline angle of 30 to 45 degrees from vertical. The center of the back seat is the safest spot if your vehicle allows it, but a properly installed seat on either side is also safe.
What are the most common mistakes when installing a car seat?
The most common mistakes include a loose installation (more than 1 inch of movement at the belt path), using the wrong belt path for the seat direction, twisted straps, harness straps that are too loose, and the chest clip positioned at the wrong height. Always do the inch test after installing.
What percent of child car seats are incorrectly installed?
Studies by NHTSA and Safe Kids Worldwide show that between 59 and 96 percent of child car seats are installed with at least one critical error. The most common issue is the install being too loose at the belt path.
How tight should a car seat be installed?
A properly installed car seat should not move more than 1 inch in any direction at the belt path when you grab it with both hands and push or pull. Use your full body weight when tightening the seat belt or LATCH strap to achieve this tightness.
What angle should a rear-facing car seat be?
Newborns need a 45-degree recline angle to keep their airway open. Older babies with good head control can use a 30-degree angle. Check the angle indicator on the side of your car seat to confirm it is in the correct range.
When should I switch from rear-facing to forward-facing?
Switch to forward-facing only when your child reaches the maximum weight or height limit for rear-facing on their specific car seat. The AAP recommends keeping children rear-facing as long as possible, often until age 3 or 4.
Final Thoughts: Getting Professional Help
Even after reading this guide, the best thing you can do is have your install checked by a Certified Child Passenger Safety Technician (CPST). These are trained volunteers who can spot issues you might miss, and the service is usually free.
You can find a CPST near you through the NHTSA website or by searching for local car seat check events. Many fire stations, hospitals, and police departments host monthly checks. Bring your car seat, your vehicle, and your child if possible.
Knowing how to install a rear facing car seat correctly is one of the most important parenting skills you will ever learn. Take your time, follow the steps in this guide, and don’t hesitate to ask for help. The 20 minutes you spend getting it right could save your child’s life.
For 2026 and beyond, keep your child rear-facing as long as their seat allows, do the inch test every few weeks, and trust the data over the opinions of well-meaning relatives. Your rear-facing little one is in the safest possible spot.