
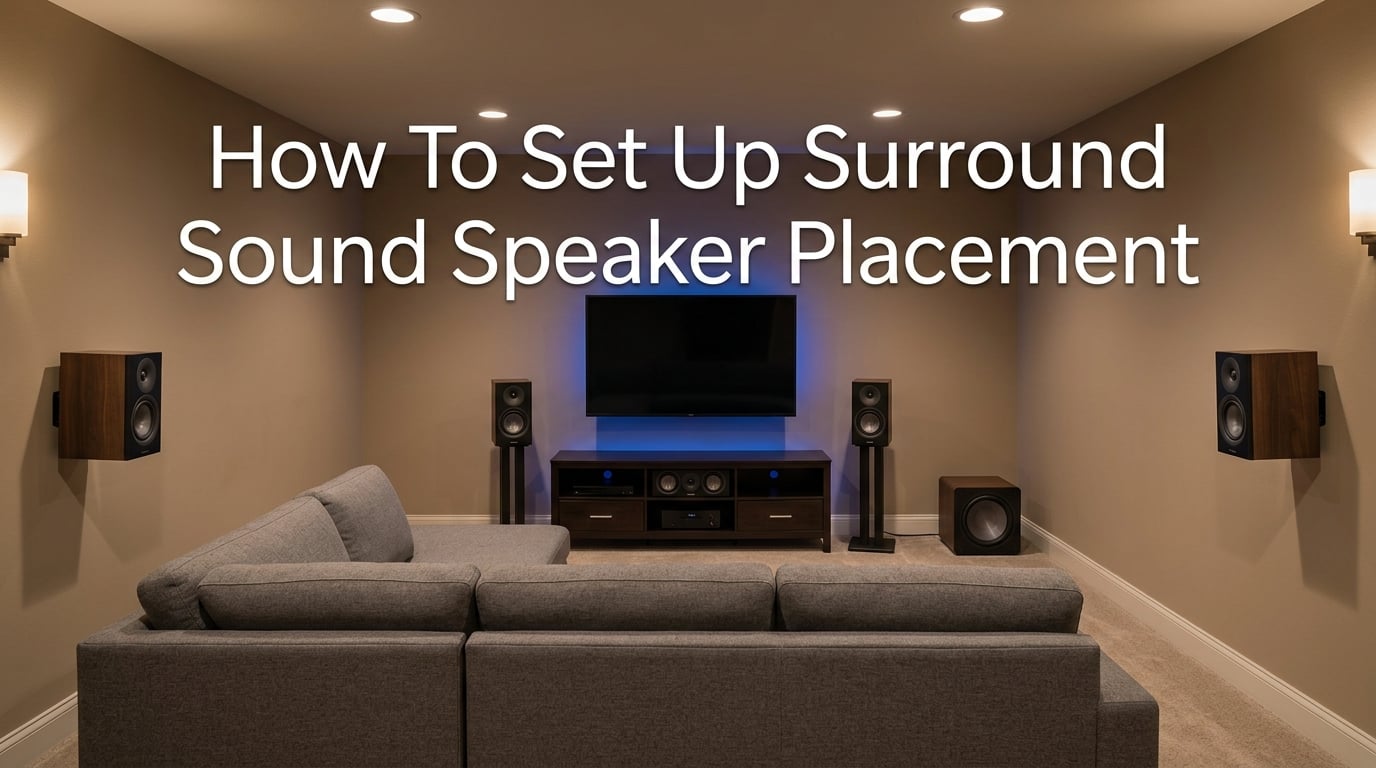
I still remember the day I unboxed my first real home theater system. I had spent weeks researching receivers, reading spec sheets, and comparing speaker brands. But when I finally wired everything together and hit play on my favorite action movie, something felt off. The dialogue was muddy. Explosions rattled the walls but lacked punch. Surround effects seemed to come from everywhere and nowhere at once.
The problem was not my equipment. It was my surround sound speaker placement. I had placed every speaker where it looked good, not where it sounded good. Once I learned the actual rules of positioning, angles, and heights, the difference was night and day.
If you want to learn how to set up surround sound speaker placement the right way, this guide walks you through every step. We will cover front speaker positioning, 5.1 and 7.1 layouts, subwoofer placement techniques, Dolby Atmos height channels, room acoustics, and calibration. Whether you are building a dedicated theater room or upgrading your living room setup, these techniques will help you get the best possible sound from your system.
Our team has tested these placement principles across multiple rooms, speaker configurations, and acoustic environments. The guidelines below combine manufacturer recommendations from Dolby and THX with real-world experience from home theater communities and our own listening tests.
Understanding Surround Sound Speaker Placement Fundamentals
Surround sound speaker placement is the strategic positioning of multiple speakers around a room to create an immersive audio experience. Each speaker handles specific audio channels, and their physical location determines how accurately your brain interprets directional sound.
Think of your listening position as the center of a circle. Every speaker sits at a specific angle on that circle, measured in degrees from the center. Front speakers sit at 0 degrees (center), plus or minus 30 degrees (left and right). Surround speakers in a 5.1 system sit at 90 to 110 degrees. Rear surrounds in a 7.1 system sit at 135 to 150 degrees. These angles are not arbitrary. Dolby, THX, and ITU standards developed them based on how human hearing localizes sound.
Why does this matter? Because proper surround sound speaker placement gives you three things that random positioning never will. First, accurate sound imaging, meaning voices and effects come from the direction the filmmaker intended. Second, balanced frequency response across your seating area. Third, genuine immersion, where a helicopter flies overhead and you look up, or rain surrounds you from every direction.
Even a modest speaker system placed correctly will outperform an expensive system placed poorly. I have heard $500 setups that sounded better than $5,000 systems because the owner took the time to measure angles, adjust heights, and run calibration. Speaker placement is the single highest-impact variable in your entire home theater.
How To Set Up Surround Sound Speaker Placement: Front Speakers (LCR)
Your front speakers, also called the front stage, consist of three channels: left, center, and right (LCR). These three speakers handle roughly 70% of your movie’s audio, including all dialogue, music, and on-screen action. Getting them right is non-negotiable.
The Equilateral Triangle Principle
Place your left and right front speakers and your primary listening position so they form an equilateral triangle. That means the distance between the left and right speakers equals the distance from each speaker to your ears. If your left and right speakers are 8 feet apart, your listening position should be 8 feet back from a line drawn between them.
This equilateral triangle creates a focused soundstage where instruments and voices lock into precise positions in space. If the speakers are too close together, the soundstage collapses into a narrow blob. If they are too far apart, the center image disappears and you hear two distinct speakers instead of one seamless wall of sound.
Left and Right Speaker Positioning
Aim your left and right speakers at a 22 to 30-degree angle from your listening position, measured from center. The tweeters should sit at ear level when you are seated, typically 36 to 42 inches from the floor. If your speakers are on stands, make sure the stands bring the tweeters to that height.
Keep front speakers at least 2 to 3 feet away from the front wall and side walls. When speakers sit too close to a wall, boundary effects boost certain frequencies and create boomy, uneven sound. If you must place speakers near walls, look for front-ported or sealed designs that tolerate close placement better than rear-ported models.
Toe-In Angle
Toeing in means angling your left and right speakers slightly inward toward the listening position rather than pointing them straight ahead. A slight toe-in of 5 to 15 degrees typically sharpens the center image and widens the sweet spot. Some speakers sound best with no toe-in at all, firing straight forward. Experiment with your specific speakers.
The general rule: more toe-in creates a narrower, more focused sweet spot with sharper imaging. Less toe-in creates a wider but less precise soundstage. For home theater with multiple viewers, less toe-in often works better because it widens the listening area.
Center Channel Placement
Your center channel speaker handles all dialogue, making it the most important speaker for movie clarity. Place it directly above or below your screen, centered horizontally. The tweeter should align as closely as possible to your seated ear height.
If the center speaker sits below the TV, angle it slightly upward toward your ears. If it sits above the TV, angle it slightly down. Many people skip this step and wonder why dialogue sounds like it is coming from the floor or ceiling. A small wedge or angled stand fixes this instantly.
Match your center speaker brand and series to your left and right speakers. This timbre matching ensures voices sound the same as they pan across the front stage. Mixing brands often creates a noticeable tonal shift when sound moves from left to center to right.
The 1/3 Rule for Speaker Placement
The 1/3 rule states that your listening position should sit approximately one-third of the room length back from the front wall. In a 21-foot-long room, your ears would land about 7 feet from the front wall. This position minimizes the impact of standing waves, which are bass frequencies that pile up near walls and corners.
Standing waves create dead zones where bass disappears and boom zones where bass overwhelms everything else. The 1/3 position naturally avoids the worst of these nodes in most rectangular rooms. It is not a hard rule, but it gives you a strong starting point before fine-tuning.
The 38% Rule for Speaker Placement
Closely related to the 1/3 rule, the 38% rule places your listening position 38% of the room length back from the front wall. Acoustic engineers developed this ratio because it tends to produce the smoothest low-frequency response in typical rectangular rooms. Some experts prefer 38% over 33% (1/3) because it better balances bass distribution in rooms with standard dimensions.
In practice, both positions are excellent starting points. Try sitting at both spots and playing a bass-heavy track. You will likely hear a noticeable difference in low-frequency smoothness. Choose whichever position sounds more balanced, then adjust your speaker placement from there.
The 83% Rule for Speakers
The 83% rule refers to placing your listening position 83% of the room length from the rear wall (or equivalently, 17% from the rear wall). Some acoustic designers use this as an alternative to the 38% rule, particularly for rooms where the front of the room has heavy treatment or unusual geometry. The 83% position can reduce rear-wall reflections that smear imaging.
In most rooms, the 38% rule and 83% rule give you two viable listening positions. Test both and use whichever sounds cleaner. Neither is universally correct because every room has unique dimensions, construction, and furnishings that affect acoustic behavior.
5.1 Surround Sound Setup Guide
A 5.1 system uses five speakers (left, center, right, left surround, right surround) plus one subwoofer. It is the most common home theater configuration and the baseline that all surround sound content supports. Here is how to place each speaker step by step.
Step 1: Set up your front left, center, and right speakers using the equilateral triangle principle described above. The left and right speakers sit at 22 to 30 degrees from center, with tweeters at seated ear level.
Step 2: Place your left and right surround speakers at 90 to 110 degrees relative to your listening position. At 90 degrees, the speakers sit directly to your left and right. At 110 degrees, they sit slightly behind you, about 20 degrees past your shoulders. Dolby recommends 90 to 110 degrees for 5.1 systems, while THX prefers 110 degrees for a more enveloping rear soundfield.
Step 3: Mount surround speakers 2 to 3 feet above your seated ear level. If your ears are at 40 inches when seated, the surround speaker tweeters should sit at roughly 64 to 76 inches from the floor. This elevation creates a sense of spaciousness and prevents the surround speakers from competing with the front stage at ear level.
Step 4: Aim surround speakers directly at the listening position for the most precise localization, or fire them across the room (bipole/dipole designs) for a more diffuse ambient field. Direct-radiating speakers aimed at you work best for home theater. Bipole or dipole speakers mounted on side walls create a wider, less localizable field that some prefer for movies.
Step 5: Place your subwoofer following the crawl test method described in the subwoofer section below. For a 5.1 system, one well-placed subwoofer can deliver excellent bass if positioned correctly.
Step 6: Run your receiver’s automatic calibration (Audyssey, Dirac Live, YPAO, or similar) to set distances, levels, and crossover frequencies. Then manually verify the settings make sense for your room.
Common 5.1 mistake: placing surround speakers behind the couch facing forward. In a 5.1 system, surrounds should be to your sides or slightly behind, not directly behind you. Directly-behind placement belongs in 7.1 systems with dedicated rear surround channels.
7.1 Surround Sound Setup Guide
A 7.1 system adds two rear surround speakers to the 5.1 layout, giving you seven speakers plus one subwoofer. The extra rear channels create a more complete soundfield behind the listener, improving directional accuracy for sounds that originate from the rear.
Step 1: Set up your front LCR speakers and side surround speakers exactly as you would for a 5.1 system. Left and right fronts at 22 to 30 degrees, center at 0 degrees, and side surrounds at 90 to 110 degrees.
Step 2: Place the two rear surround speakers at 135 to 150 degrees relative to your listening position. At 135 degrees, they sit behind you at roughly the 4 and 8 o’clock positions. At 150 degrees, they sit wider, approaching directly behind you. Dolby recommends 135 to 150 degrees for rear surrounds.
Step 3: Mount rear surrounds at the same height as your side surrounds, 2 to 3 feet above seated ear level. Keep both rear speakers equidistant from the listening position to maintain balanced imaging.
Step 4: Aim rear surround speakers at the listening position or slightly inward. Like side surrounds, they can be direct-radiating or bipole/dipole depending on your preference for precise localization versus diffuse ambiance.
Step 5: Run calibration and verify all seven channels plus the subwoofer are detected and properly leveled.
The key difference between 5.1 and 7.1: in 5.1, your side surrounds at 90 to 110 degrees handle all non-front audio. In 7.1, side surrounds at 90 to 110 degrees handle side audio, while rear surrounds at 135 to 150 degrees handle back audio. This separation creates more convincing wraparound effects, especially in action scenes with complex sound design.
When 7.1 is worth it: dedicated theater rooms, rooms with at least 4 feet of clearance behind the main seating position, and viewers who watch a lot of 7.1-encoded content. When 5.1 is sufficient: living rooms where the couch sits against the back wall, smaller spaces, and casual viewing.
Subwoofer Placement Techniques
The subwoofer handles all low-frequency effects, from movie explosions to musical bass lines. Subwoofer placement affects bass more than any other factor, including the subwoofer’s quality or power. A $300 subwoofer in the right spot will beat a $1,000 subwoofer in the wrong spot.
The Subwoofer Crawl Test
The crawl test is the single most effective subwoofer placement technique. Here is how to do it step by step.
Step 1: Place your subwoofer at your primary listening position, exactly where your head would be when seated. Yes, this means temporarily putting the sub on your couch or chair.
Step 2: Play a bass-heavy test tone or a movie scene with sustained low frequencies. Bass sweeps or pink noise tracks work well. Many receivers include built-in test tones for this purpose.
Step 3: Get down on your hands and knees and slowly crawl along the walls of your room. Listen carefully as you move through different positions.
Step 4: Identify the spots where bass sounds the smoothest and most full. Also note spots where bass disappears entirely. These dead zones and boom zones are caused by room modes, which are standing waves determined by your room dimensions.
Step 5: Pick the spot that sounded best during your crawl. Place your subwoofer there. The physics principle at work is acoustic reciprocity. The spot where bass sounds best from your listening position is also the spot where a subwoofer will produce the best bass at your listening position.
Step 6: Return to your seat and verify the bass sounds smooth and balanced. Fine-tune by moving the subwoofer a few inches at a time if needed.
Corner Loading vs Mid-Wall Placement
Placing a subwoofer in a corner produces the loudest bass because two walls reinforce low frequencies. This is called corner loading. However, corner placement often excites multiple room modes simultaneously, creating boomy, uneven bass that sounds powerful but lacks definition.
Mid-wall placement, with the subwoofer along one wall between two corners, typically produces smoother, more accurate bass. The trade-off is lower overall output. For movies where impact matters, corner loading may be preferable. For music where accuracy matters, mid-wall placement usually wins.
The boundary effect describes how proximity to walls boosts low-frequency output. Each nearby surface (floor, front wall, side wall) adds approximately 3 dB of gain. A subwoofer on the floor near one wall gets about 6 dB of boost. In a corner on the floor, that becomes 9 dB. Understanding this helps you predict how placement will affect output before you move anything.
Multiple Subwoofers
Two subwoofers placed at opposite mid-wall positions is the gold standard for smooth bass across multiple seats. This configuration, developed by Dr. Floyd Toole and Harman International, reduces seat-to-seat variation by smoothing out room modes. Each sub fills in the dead zones the other creates.
For a 7.2 system, the second subwoofer does not just add more bass. It adds more even bass across a wider listening area. If you have multiple viewers or a large room, two subwoofers are one of the best upgrades you can make.
Dolby Atmos and Height Speaker Integration
Dolby Atmos and DTS:X add height channels to traditional surround sound, creating a three-dimensional soundfield with sounds that move above you. Height speakers are what separate a great home theater from a truly immersive one.
5.1.2 Setup (Two Height Speakers)
In a 5.1.2 configuration, you add two height speakers to your 5.1 layout. Place them slightly in front of your listening position, at an elevation angle of 65 to 100 degrees overhead. The goal is for sounds to appear to come from above and slightly ahead of you.
Two options for height speakers: up-firing speakers that sit on top of your front left and right speakers and bounce sound off the ceiling, or in-ceiling speakers mounted above and slightly ahead of the listening position.
Up-firing speakers are easier to install and work well in rooms with flat, reflective ceilings between 8 and 12 feet high. In-ceiling speakers provide more accurate overhead positioning but require ceiling installation. If your ceiling is vaulted, extremely high, or acoustically treated, in-ceiling speakers are generally the better choice.
5.1.4 Setup (Four Height Speakers)
A 5.1.4 system adds four height speakers: two in front and two behind the listening position. Front heights go at 65 to 100 degrees elevation. Rear heights mirror them behind you. This configuration delivers a much more convincing overhead soundfield than 5.1.2, especially for rain, helicopters, and overhead flyby effects.
7.1.2 and 7.1.4 Setups
These configurations combine 7.1 bed layer speakers with height channels. 7.1.4 is considered the sweet spot for Atmos in dedicated home theaters, offering the most immersive experience without requiring an extreme channel count. The placement rules for each layer remain the same as described above.
Height speaker angle rule: Dolby recommends height speakers at 65 to 100 degrees elevation from the listening position. Below 65 degrees, sounds become difficult to distinguish from ear-level speakers. Above 100 degrees (directly behind overhead), sounds lose their forward positioning.
Speaker Height, Angles, and Toe-In Guidelines
Consistent speaker height and proper angling make a bigger difference than most people realize. Here are the specific guidelines by speaker type.
Front left and right speakers: tweeters at seated ear level, approximately 36 to 42 inches from the floor. Angle them at 22 to 30 degrees from center. Apply 5 to 15 degrees of toe-in for a focused sweet spot, or fire them straight for wider coverage.
Center channel: as close to ear level as possible, directly above or below the screen. Angle it to point at the listener’s ears if it sits above or below ear level.
Side surround speakers (5.1 and 7.1): mounted 2 to 3 feet above seated ear level, at 90 to 110 degrees. Angle them at the listening position or fire them across the room for ambient diffusion.
Rear surround speakers (7.1 only): same height as side surrounds, at 135 to 150 degrees behind the listener.
Height speakers (Atmos): at 65 to 100 degrees elevation overhead, either in-ceiling or up-firing.
Distance and Time Alignment Calibration
Sound travels at approximately 1,130 feet per second. If your left front speaker is 8 feet away but your right front speaker is 10 feet away, sound from the right speaker arrives about 1.8 milliseconds later. Your brain perceives this delay as a shift in the soundstage toward the closer speaker.
Distance alignment fixes this. Use a measuring tape to record the exact distance from each speaker to your primary listening position. Enter these distances into your receiver’s manual setup menu. Even if you run automatic calibration, verify the distances manually. Audyssey and other systems sometimes mismeasure by a foot or more.
Time alignment ensures that sounds arrive at your ears simultaneously from all speakers. This is especially important when speakers sit at different distances, which is common in real rooms. Proper time alignment creates a cohesive soundfield where effects pan smoothly across channels instead of jumping.
Crossover frequency settings also matter. Set small bookshelf speakers to crossover at 80 Hz, directing bass below that frequency to the subwoofer. Tower speakers with large woofers might handle lower crossover points, but 80 Hz is the THX standard and works well for most setups. This setting lets each speaker focus on what it does best.
Room Acoustics and Challenging Room Layouts
Even perfect speaker placement cannot overcome terrible room acoustics. Hard parallel surfaces create flutter echo, bare corners build up bass, and large flat walls reflect mid and high frequencies back at the listener, smearing imaging. Acoustic treatment addresses these issues.
First Reflection Points
First reflection points are the spots on your walls, floor, and ceiling where sound from your front speakers bounces once before reaching your ears. These reflections arrive milliseconds after the direct sound and blur the soundstage, reducing clarity and imaging precision.
To find first reflection points, use the mirror trick. Sit in your listening position and have a friend slide a mirror along each side wall. Wherever you see a speaker reflected in the mirror, that is a first reflection point. Place acoustic panels at those locations, typically at ear level on the side walls between your front speakers and listening position.
First reflection point treatment is the single most impactful acoustic upgrade you can make. A set of 2-inch-thick absorption panels at these locations dramatically tightens imaging and clarifies dialogue.
Bass Traps
Bass traps are thick absorption devices placed in room corners to control low-frequency standing waves. They reduce boominess and smooth out bass response across the listening area. Corner-placed bass traps made from rigid fiberglass or mineral wool are the most effective and affordable treatment for low-frequency problems.
For a dedicated theater room, bass traps in all four vertical corners plus ceiling-wall corners provide the most consistent low-frequency response. For living rooms where aesthetics matter, smaller corner traps or even heavy furniture and bookcases filled with books can provide modest bass absorption.
L-Shaped Rooms and Open Floor Plans
L-shaped rooms present a challenge because the irregular geometry creates complex room modes and reflection patterns. The general approach: treat the main listening area as a rectangular room defined by the longest walls, and use the L-extension as a natural bass trap. Placing a couch or heavy furniture in the L-extension helps absorb low frequencies.
Open floor plans, where the theater area flows into a kitchen or hallway, actually have an advantage for bass. Open spaces reduce standing wave buildup because low frequencies dissipate rather than reflecting back. The trade-off is weaker overall bass impact because energy leaks into adjacent spaces.
For open floor plans, consider a second subwoofer to compensate for bass loss. Position both subs along the wall shared with the listening area for maximum boundary reinforcement.
Practical Compromises for Non-Ideal Rooms
Most real rooms are not perfect rectangles with ideal speaker positions. Here are the compromises we have found work best. If your couch sits against the back wall, skip the 7.1 rear surrounds and invest in better 5.1 speakers or height channels instead. Rear surrounds need at least 3 to 4 feet of clearance behind the listener to work properly.
If you cannot mount surround speakers on side walls, use tall speaker stands positioned to your sides. Bookshelf speakers on 36-inch stands placed at 90 degrees work nearly as well as wall-mounted surrounds.
If WAF (wife acceptance factor) or partner approval limits visible speakers, consider in-wall speakers for fronts and surrounds. Modern in-wall speakers from brands like Polk, Klipsch, and Speakercraft deliver performance approaching traditional box speakers while disappearing into the decor.
From our forum research and community discussions, one truth emerges consistently: real-world experimentation beats rigid adherence to rules. Start with the guidelines above, then trust your ears. Small adjustments of even an inch or two can meaningfully change the sound. Play familiar content, move a speaker, listen, and repeat until the sound locks in.
Speaker Placement Quick Reference: Angles by Setup Type
Here is a quick reference for speaker angles by setup type. Use this as a cheat sheet when placing speakers.
5.1 System: Front left at 30 degrees, center at 0 degrees, front right at 30 degrees, left surround at 90 to 110 degrees, right surround at 90 to 110 degrees, one subwoofer via crawl test. Surround height 2 to 3 feet above ear level.
7.1 System: Same as 5.1 plus rear left surround at 135 to 150 degrees and rear right surround at 135 to 150 degrees. Same height as side surrounds.
5.1.2 Atmos: Same as 5.1 plus two height speakers at 65 to 100 degrees elevation, positioned slightly ahead of the listening position.
5.1.4 Atmos: Same as 5.1 plus four height speakers. Two front heights at 65 to 100 degrees ahead of listener, two rear heights at 65 to 100 degrees behind listener.
7.1.4 Atmos: Same as 7.1 plus four height speakers positioned as in 5.1.4. This is the recommended configuration for dedicated home theaters.
3.1 System: Front left at 30 degrees, center at 0 degrees, front right at 30 degrees, one subwoofer. No surround speakers. Good for small spaces or dialogue-focused listening.
FAQs
What is the 83% rule for speakers?
The 83% rule places your listening position 83% of the room length from the rear wall, or about 17% from the back wall. Some acoustic designers prefer this position because it reduces rear-wall reflections that can blur imaging and smear dialogue clarity. In practice, the 83% rule and the 38% rule give you two strong starting positions. Test both and choose whichever produces cleaner, more balanced sound in your specific room.
What is the 1/3 rule for speaker placement?
The 1/3 rule states that your primary listening position should sit approximately one-third of the room length back from the front wall. In a 21-foot room, your ears would land about 7 feet from the front wall. This position minimizes standing waves, which are bass frequencies that build up near walls and corners, creating dead zones and boom zones. The 1/3 position naturally avoids the worst bass nodes in most rectangular rooms.
How to properly set up a 7.1 surround sound system?
To set up a 7.1 system, place front left and right speakers at 22 to 30 degrees from center with tweeters at ear level. Place the center channel directly above or below the screen. Position side surround speakers at 90 to 110 degrees at 2 to 3 feet above seated ear level. Add rear surround speakers at 135 to 150 degrees at the same height. Place the subwoofer using the crawl test method. Finally, run your receiver’s calibration to set distances, levels, and crossover frequencies for all eight channels.
What is the 38% rule for speaker placement?
The 38% rule places your listening position 38% of the room length back from the front wall. Acoustic engineers developed this ratio because it tends to produce the smoothest low-frequency response in typical rectangular rooms. For a 20-foot room, your listening position would be 7.6 feet from the front wall. This rule is an alternative to the 1/3 (33%) rule and often produces slightly better bass smoothness depending on room dimensions.
How high should surround speakers be mounted?
Surround speakers should be mounted 2 to 3 feet above your seated ear level. If your ears sit at 40 inches when seated, the surround speaker tweeters should be at approximately 64 to 76 inches from the floor. This elevation creates a sense of spaciousness and prevents surround effects from competing with front speakers at ear level. Both side surrounds and rear surrounds should be at this same height.
Should surround speakers be to the sides or behind you?
In a 5.1 system, surround speakers should be placed at 90 to 110 degrees, meaning directly to your sides or slightly behind your shoulders. They should not be directly behind you. In a 7.1 system, side surrounds go at 90 to 110 degrees and dedicated rear surrounds go at 135 to 150 degrees. Placing 5.1 surrounds directly behind the listener is a common mistake that creates a gap in the side soundfield.
Where is the best place to put a subwoofer?
The best subwoofer position varies by room because standing waves create unique bass patterns. Use the subwoofer crawl test to find the ideal spot: temporarily place the sub at your listening position, play a bass tone, and crawl along the walls to find where bass sounds smoothest. Move the subwoofer to that location. Corner placement gives maximum output but can sound boomy. Mid-wall placement typically delivers smoother, more accurate bass across multiple seats.
Do I need acoustic treatment for proper speaker placement?
Acoustic treatment significantly improves the results of any speaker placement. The most impactful treatment is absorption panels at first reflection points on the side walls between your front speakers and listening position. Bass traps in room corners control low-frequency standing waves. Even basic treatment with a few panels and traps can transform a mediocre-sounding room into a great one. That said, proper speaker placement always comes first; treatment enhances but cannot fix fundamentally wrong placement.
Wrapping Up: Getting the Most From Your Surround Sound Speaker Placement
Learning how to set up surround sound speaker placement transformed my home theater experience, and it can do the same for you. The key principles are straightforward: form an equilateral triangle with your front speakers, position surrounds at the correct angles and heights, use the crawl test for your subwoofer, and add height channels for Atmos immersion.
Remember that these guidelines are starting points, not rigid laws. Every room has unique dimensions, furnishings, and acoustic properties. Start with the recommended angles and positions, then fine-tune by ear. Move speakers in small increments and listen to familiar content after each change. The improvement from careful adjustment is often dramatic.
If you take away one thing from this guide, let it be this: speaker placement matters more than any single piece of equipment you can buy. A well-placed budget system will always outperform a poorly placed premium system. Take the time to measure, position, calibrate, and listen. Your ears will thank you.
Start with your front stage today. Get the equilateral triangle right. Then work outward to surrounds, subwoofer, and height channels. Each step builds on the last, and the cumulative effect is a home theater that sounds the way the filmmakers intended.