
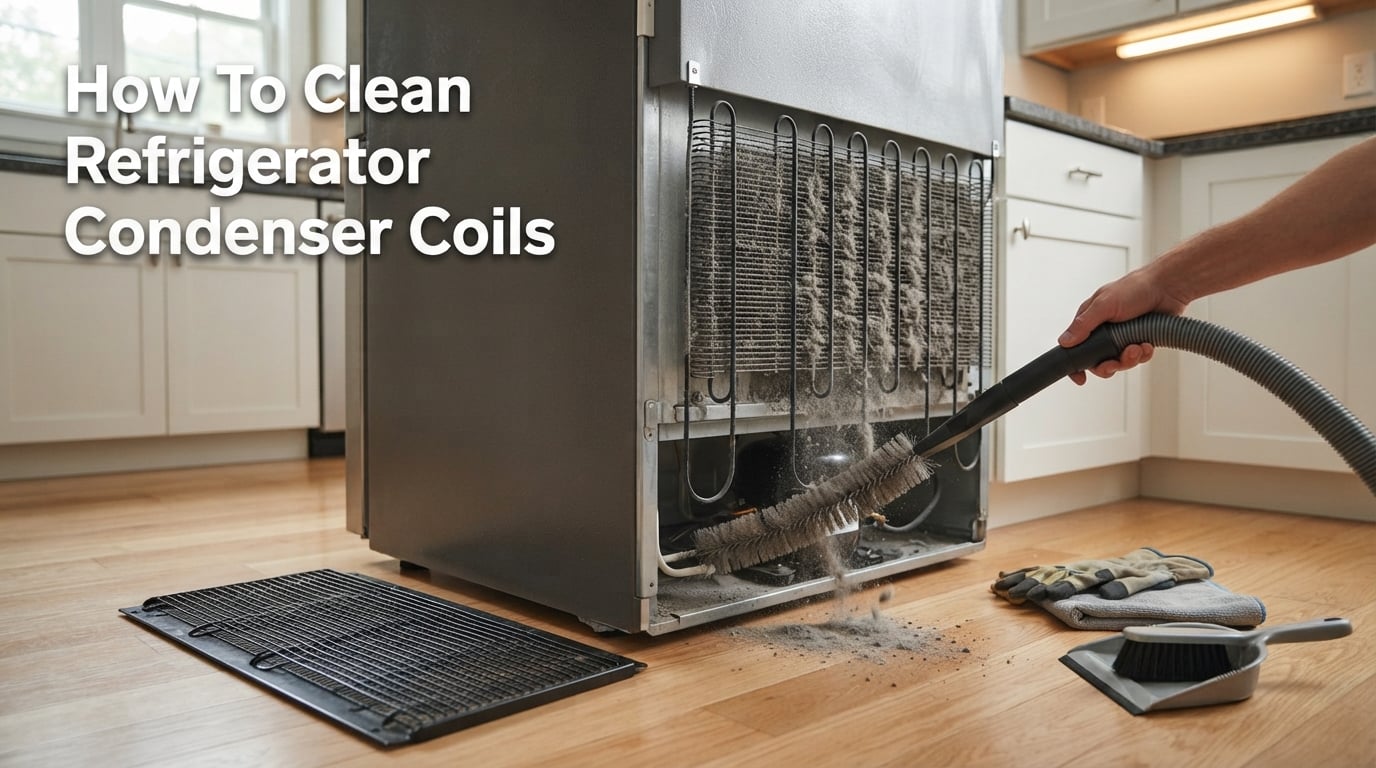
Cleaning your refrigerator condenser coils is one of the simplest maintenance tasks you can do to extend the life of your appliance and lower your energy bills. In this guide, I will walk you through exactly how to clean refrigerator condenser coils, where to find them, and how often this task should be done. Most homeowners can complete this job in under 20 minutes with basic tools they already have at home.
Dirty condenser coils force your refrigerator’s compressor to work harder, which wastes electricity and shortens the lifespan of your fridge. By keeping these coils clean, you can improve cooling efficiency by up to 25% and avoid costly repairs down the road. Let me show you how to tackle this job safely and effectively.
Why You Need to Clean Refrigerator Condenser Coils
Condenser coils are the heat exchangers that release the heat absorbed from inside your refrigerator into the surrounding air. When these coils get coated with dust, pet hair, and debris, they cannot release heat efficiently. Your refrigerator then runs longer cycles to maintain proper temperature, which puts extra strain on the compressor and uses more electricity.
According to the Department of Energy, dirty coils can increase your refrigerator’s energy consumption by 15% to 25%. Over a year, that adds up to a noticeable difference on your utility bill. Beyond energy costs, a compressor that runs too often will wear out faster, potentially cutting years off your refrigerator’s lifespan.
I have seen refrigerators last 15 to 20 years with proper maintenance, while neglected units often fail within 8 to 10 years. The compressor replacement alone can cost several hundred dollars, often making it more economical to buy a new refrigerator. A quick cleaning every 6 to 12 months helps avoid that expense.
Signs Your Coils Need Cleaning
Many homeowners do not realize their coils need attention until problems appear. Watch for these warning signs that indicate it is time to clean your refrigerator condenser coils:
Your refrigerator runs constantly or cycles on and off frequently without reaching proper temperature
The back or bottom of your refrigerator feels noticeably warmer than usual
Food inside takes longer to cool or does not stay as cold as expected
Energy bills have increased without other explanation
You hear the compressor running louder or more often than before
It has been more than a year since you last cleaned the coils
You have pets and have not cleaned the coils in the past 6 months
If you notice any of these symptoms, checking and cleaning the condenser coils should be your first step. Often, a thorough cleaning resolves the issue without needing a service call.
Tools and Materials You Will Need
Before you begin, gather these basic tools. You likely have most of them already, and the entire setup costs under $15 if you need to buy anything.
Coil brush: A long, narrow brush designed specifically for cleaning refrigerator coils. You can find these at hardware stores for $8 to $12. A soft bristle paintbrush can work as an alternative if the bristles are flexible enough.
Vacuum cleaner with hose attachment: Any household vacuum with a crevice tool or brush attachment works well. A shop vac is ideal if you have one.
Flashlight: Helps you see into tight spaces under the refrigerator.
Damp cloth or rag: For wiping down accessible coil surfaces and the floor beneath the fridge.
Screwdriver: May be needed to remove the base grille on some refrigerator models.
Some people use compressed air cans for this task, but I recommend caution with that approach. Blowing air can push dust deeper into the coils rather than removing it. Vacuuming and brushing is more effective and safer for your refrigerator.
Where Are Refrigerator Condenser Coils Located
Condenser coil placement varies by refrigerator model and age. Knowing where to look is half the battle when learning how to clean refrigerator condenser coils.
Bottom-Front Location (Most Common)
Most modern refrigerators built in the last 15 years have condenser coils located behind a grille at the bottom front of the unit. You will see a removable kick plate or grille near the floor. Behind this grille, a fan pulls air across the coils, which is why dust and pet hair accumulate so quickly in this area.
To access these coils, you typically need to remove the grille by pulling it straight off or unsnapping clips. Some models use Phillips-head screws. The coils usually sit just behind this opening, sometimes with a fan visible.
Back-Mounted Location (Older Models)
Refrigerators from the 1990s and earlier often have condenser coils mounted on the back exterior of the unit. You will see a large grid of metal tubing on the back panel. These are easier to access but can still collect significant dust and dirt.
For back-mounted coils, you need to pull the refrigerator away from the wall to reach them. Leave enough clearance for air circulation after cleaning as well.
Top-Mounted Location (Built-In Models)
Some built-in and high-end refrigerators have coils located on top of the unit. These require removing a top panel or grille. If you have a built-in refrigerator, consult your owner’s manual for the specific access method for your model.
Check your refrigerator’s user manual if you are unsure where the coils are located. The manual will show the exact position and any model-specific access instructions.
How to Clean Refrigerator Condenser Coils: Step by Step
Follow these steps carefully to clean your coils safely and thoroughly. The entire process takes 15 to 30 minutes depending on how dirty your coils are.
Step 1: Unplug the Refrigerator
Safety comes first. Unplug your refrigerator from the wall outlet before doing anything else. If you cannot reach the plug easily, turn off the circuit breaker that controls your refrigerator circuit. Working on electrical appliances while they are plugged in creates a serious shock hazard.
Unplugging also prevents the condenser fan from turning on while your fingers or tools are near it. Even a brief brush against a spinning fan blade can cause injury.
Step 2: Remove the Base Grille
Locate the grille at the bottom front of your refrigerator. Most grilles pop off by pulling gently toward you. Some models have clips that snap in place, while others use screws that require a screwdriver. Set the grille aside and keep any screws in a safe place.
Once the grille is removed, use your flashlight to inspect the area. You will likely see a buildup of dust, pet hair, and debris on the coils and around the fan.
Step 3: Vacuum Loose Dust and Debris
Attach the crevice tool or brush attachment to your vacuum hose. Run the vacuum along the coils to remove as much loose dust as possible. Work slowly and get into all the nooks and crannies. The goal is to remove the bulk of the debris before using the brush.
For bottom-mounted coils, vacuum the floor beneath the refrigerator as well. Dust bunnies accumulate there and get pulled into the coils over time.
Step 4: Brush the Coils
Use your coil brush to dislodge stubborn dust and pet hair. Insert the brush between the coil fins and gently sweep up and down. Work in small sections and move systematically across the entire coil surface. The long, narrow shape of a coil brush helps you reach deep between the fins.
Avoid pressing too hard, as bent fins can restrict airflow. Let the brush do the work rather than forcing it. Pause frequently to vacuum up the debris you loosen.
If you have pets, you may find clumps of hair caught in the coils. Use the brush to pull these out gently, then vacuum them away. Pet hair is one of the biggest causes of coil blockage.
Step 5: Wipe Down Accessible Surfaces
Dampen a cloth with warm water and a small amount of dish soap. Wipe down any accessible coil surfaces and the area around the condenser fan. Do not saturate the coils with water, and avoid getting moisture near any electrical connections. A lightly damp cloth is all you need.
Let the area air dry for a few minutes before proceeding. This prevents moisture from getting into electrical components when you plug the unit back in.
Step 6: Reinstall the Grille and Plug In
Replace the base grille by aligning it with the mounting slots and pressing it into place. If your grille uses screws, reinstall them securely. Plug your refrigerator back into the outlet or turn the circuit breaker back on.
Listen for the condenser fan to start running. This confirms that power is restored. Your refrigerator may need several hours to return to its optimal temperature, so avoid opening the doors frequently during this time.
Special Tips for Pet Owners and Garage Refrigerators
Pet owners face unique challenges with refrigerator maintenance. Pet hair circulates through the air and gets pulled directly into condenser coils by the cooling fan. If you have dogs or cats, I recommend checking your coils every 3 to 4 months instead of the standard annual schedule.
For refrigerators located in garages or dusty environments, cleaning frequency should increase to every 3 months. Garages often have higher dust levels, and temperature extremes force the refrigerator to work harder. Regular cleaning helps maintain efficiency despite the tougher conditions.
If you cannot easily move your refrigerator, use a long-handled coil brush and vacuum attachments to reach under it. Some vacuum brands sell extended crevice tools designed specifically for reaching under appliances. Cleaning without moving the unit takes longer but still removes significant debris.
How Often Should You Clean Refrigerator Coils
The ideal cleaning frequency depends on your specific situation. Here is a simple guide based on common factors:
Every 12 months: Standard recommendation for most households without pets or dust issues. Set a reminder on your phone or calendar for annual maintenance.
Every 6 months: If you have one or two pets, a dusty home environment, or notice your refrigerator running more often than usual.
Every 3 to 4 months: Households with multiple pets, garage refrigerators, or homes in areas with high dust or pollen levels.
Modern refrigerators with NeverClean condenser technology claim to need less frequent cleaning because the coils are enclosed. Even these units benefit from occasional inspection to ensure proper airflow around the compressor compartment.
What to Do If Your Fridge Still Does Not Cool After Cleaning
Sometimes cleaning the coils does not solve cooling problems. If your refrigerator still does not cool properly after 24 hours, check these additional factors:
First, verify that the thermostat is set to the correct temperature. Accidental adjustments happen, and settings may shift over time. The ideal refrigerator temperature is between 35 and 38 degrees Fahrenheit.
Second, inspect the door seals for gaps or tears. Warm air entering through a damaged seal forces the compressor to run constantly. Replace worn seals to restore proper cooling.
If the compressor runs but the refrigerator still does not cool, you may have a refrigerant leak or compressor failure. These issues require professional service. Contact a licensed appliance technician for diagnosis and repair.
FAQs
How to unblock a fridge condenser?
Unblock your fridge condenser by unplugging the refrigerator, removing the base grille, vacuuming loose debris, and using a coil brush to dislodge stubborn dust between the fins. Work systematically across all coils and vacuum frequently to remove loosened material.
What happens when a refrigerator condenser coil is dirty?
A dirty condenser coil cannot release heat efficiently, causing the compressor to run longer and work harder. This increases energy consumption by 15-25%, raises your electricity bill, and shortens the refrigerator’s lifespan by putting extra strain on the compressor.
What are the signs that the refrigerator coils need to be cleaned?
Common signs include the refrigerator running constantly, warm spots on the exterior, food not staying cold enough, higher energy bills, and a louder than normal compressor. If it has been over a year since cleaning, or you have pets, inspect the coils immediately.
How often should refrigerator condenser coils be cleaned?
Clean refrigerator condenser coils every 12 months for standard households. Pet owners should clean every 6 months, and homes with multiple pets or garage refrigerators should clean every 3 to 4 months due to higher dust and hair accumulation.
Do you really need to clean refrigerator coils?
Yes, cleaning refrigerator coils improves cooling efficiency by 15-25%, reduces energy consumption, extends appliance lifespan, and prevents premature compressor failure. Skipping this maintenance leads to higher electric bills and potentially expensive repairs.
How do I clean refrigerator coils without a coil brush?
You can clean refrigerator coils using a vacuum with a crevice tool attachment and a soft paintbrush. Vacuum first to remove loose dust, then gently brush between the coils to dislodge stuck-on debris. Avoid using compressed air, which can push dust deeper into the coils.
Conclusion
Learning how to clean refrigerator condenser coils gives you a simple way to extend your appliance’s life and reduce energy costs. The process takes just 15 to 30 minutes and requires only basic tools you likely already own. By following the step-by-step guide above, you can remove dust, pet hair, and debris that force your compressor to overwork.
Set a recurring reminder on your calendar to clean your refrigerator condenser coils every 6 to 12 months depending on your household conditions. This small investment of time pays for itself through lower electric bills and fewer repair calls. Your refrigerator will thank you with years of reliable service.