
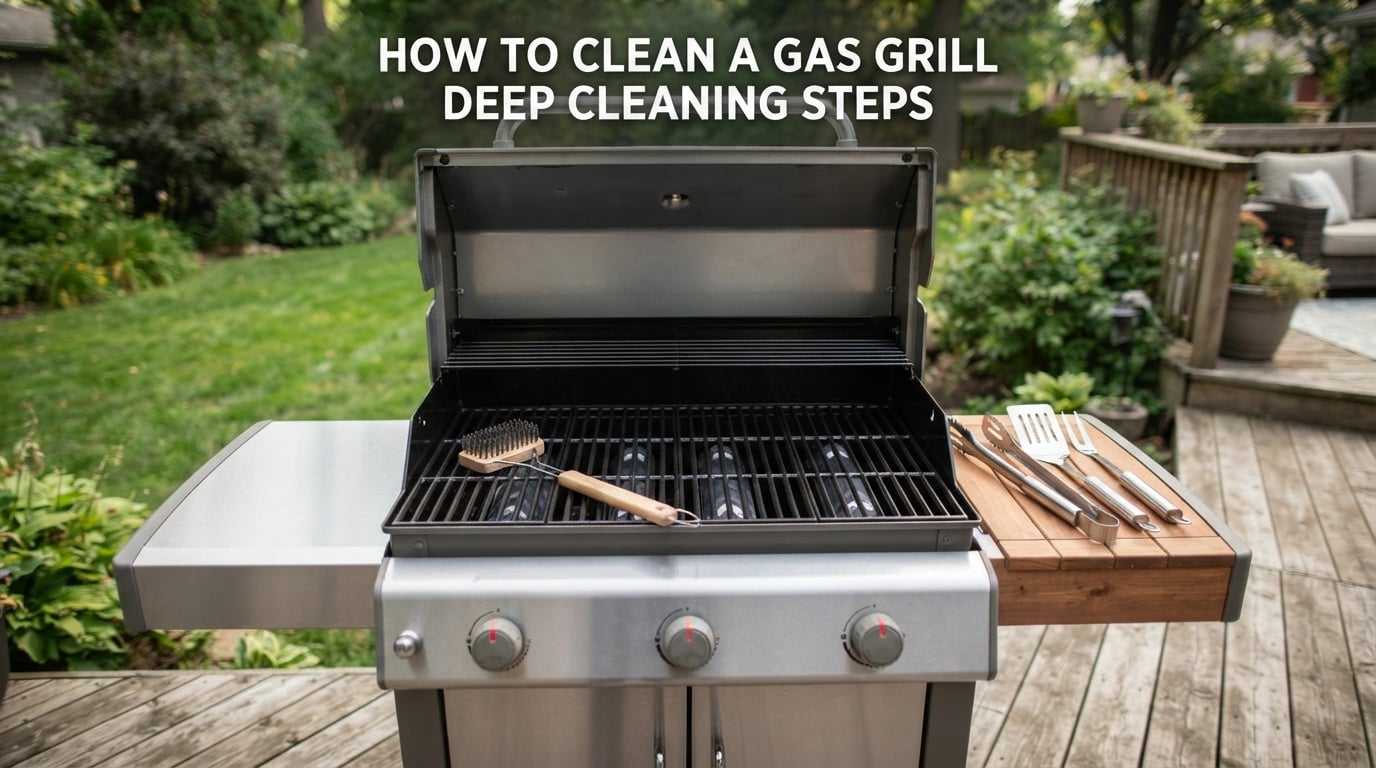
Last summer, my neighbor nearly burned down his back deck because grease had been building up inside his grill for three grilling seasons. He never opened the grease tray. He never checked the burner tubes. One afternoon, a grease fire shot flames two feet above the lid, and the fire department had to come. That was the day I decided to write this guide on how to clean a gas grill deep cleaning steps so nobody else makes the same mistake.
Deep cleaning your gas grill is not glamorous work. But it is the single most important thing you can do to prevent grease fires, keep your food tasting fresh, and extend the life of your grill. A dirty grill cooks unevenly, produces off-flavors from carbonized residue, and becomes a genuine fire hazard over time.
In this guide, I will walk you through every step of the deep cleaning process from start to finish. You will learn exactly what tools you need, how to clean each component of your grill, how often to do it, and what mistakes to avoid along the way. I have spent years refining this process, and I will share the tips that actually make a difference.
Whether you are preparing your grill for the start of grilling season in 2026, putting it away for winter, or just dealing with a grill that has been neglected for too long, these deep cleaning steps will get your gas grill performing like new again.
Quick Clean vs Deep Clean: What Is the Difference?
Before diving into the deep cleaning process, it helps to understand the difference between a quick clean and a deep clean. Most grill owners do some form of quick cleaning after each cook. A deep clean is a much more thorough process that happens far less frequently.
Quick cleaning takes about 5 to 10 minutes after each grilling session. It involves brushing the grates while they are still warm, emptying the grease tray if it is getting full, and wiping down the exterior. This routine keeps surface-level buildup in check.
Deep cleaning takes 1.5 to 2.5 hours and involves disassembling the major components of your grill. You remove the grates, flavorizer bars, and burner tubes. You scrub the cookbox interior, clear clogged burner ports, soak everything in soapy water, and tackle baked-on carbonized grease that has been accumulating for months.
Think of quick cleaning as brushing your teeth and deep cleaning as going to the dentist. Both are necessary, but they serve different purposes and happen at very different intervals.
Tools and Supplies You Will Need
Having the right tools ready before you start makes the entire process smoother. I learned this the hard way after stopping midway through a deep clean to run to the hardware store for a grill brush.
Essential Tools
Here is what I consider the minimum toolkit for a proper deep clean:
Brass or stainless steel grill brush (or a safe alternative like a pumice stone or wooden scraper)
Putty knife or paint scraper for heavy buildup
Stiff-bristled nylon brush for scrubbing
Bucket with warm soapy water (dish soap works well)
Microfiber cloths or old rags
Paper towels
Disposable aluminum drip pans
Work gloves and safety glasses
Screwdriver or wrench set (for removing burner tubes on some models)
Bottle brush or pipe cleaner for clearing burner ports
Commercial degreaser or grill cleaner
Stainless steel wool pads (for stubborn grease on metal surfaces)
Natural Cleaning Alternatives
If you prefer to avoid chemical cleaners, you can substitute with items you probably already have in your kitchen. White vinegar cuts through grease effectively when heated. Baking soda mixed with water forms a paste that lifts baked-on residue. Lemon juice combined with steel wool works wonders on stainless steel surfaces.
I will cover these natural methods in detail in a later section, but gather what you need now so you do not have to stop mid-clean.
What NOT to Use
Avoid using oven cleaner on your grill grates or interior surfaces. Oven cleaner is formulated for enclosed ovens and can leave chemical residues that are unsafe for food contact surfaces. Also avoid abrasive pads on porcelain-coated grates, as they can scratch the coating and lead to rust. Never use chlorine bleach on any part of your grill.
Before You Start: Safety First
Safety is not optional when cleaning a gas grill. You are working around gas lines, grease deposits, and potentially sharp metal edges. Take five minutes to follow these precautions before touching anything.
Turn off the gas supply. If you have a propane grill, close the valve on the propane tank completely. For natural gas grills, shut off the gas supply at the house connection. This is the most commonly missed step, according to discussions on Reddit’s r/BBQ community, and it is critical.
Make sure the grill is completely cool. Never start cleaning a grill that was recently used. Wait at least 2 to 3 hours after your last cook. Touch the grates and lid with your bare hand to confirm everything is at room temperature.
Disconnect the propane tank and move it away from your work area. Work in a well-ventilated outdoor space. Put on your gloves and safety glasses before handling degreaser or scraping old grease.
Remove the cooking grates, flavorizer bars, and any heat plates. Set them on a protected surface like cardboard or a tarp. This gives you clear access to the cookbox interior and burner tubes.
How to Clean a Gas Grill: Deep Cleaning Steps
This is the core of the process. I have broken it down into eight clear steps with time estimates for each. The entire deep clean should take you about 1.5 to 2.5 hours depending on how dirty your grill is and how thorough you want to be.
Step 1: Set Up Your Workstation (10 Minutes)
Fill a large bucket or plastic storage bin with warm water and a few squirts of dish soap. You will use this for soaking grates and bars. Set up a second bucket with clean rinse water.
Lay down cardboard or a tarp next to your grill to place dirty components on. Have all your tools within arm’s reach. Put on your gloves.
Remove the cooking grates, flavorizer bars (or heat tents, depending on your grill model), and any grease management trays that lift out. Place everything on your tarp.
Step 2: Scrape Cooking Grates and Flavorizer Bars (15 Minutes)
Start by scraping loose debris from the grates while they are dry. Use your grill brush or a putty knife to remove large chunks of carbonized food and grease. Work along the bars, not across them, to avoid damaging the surface.
For heavy buildup that a brush cannot handle, use a paint scraper or putty knife at a 45-degree angle. This is where real effort pays off. Forum users on r/grilling consistently recommend paint scrapers for stubborn carbon deposits that have been baking on for months.
Do the same with the flavorizer bars. These angled metal plates sit above the burner tubes and catch drippings. They collect a surprising amount of grease and carbonized residue over a season.
If your flavorizer bars are rusted through or have holes, this is the time to order replacements. Thin, rusted bars cannot direct grease properly and will cause flare-ups.
Step 3: Soak Grates and Bars in Soapy Water (30-Minute Soak)
Once you have scraped off the loose debris, submerge the grates and flavorizer bars in your bucket of warm soapy water. Let them soak for at least 30 minutes. If the buildup is severe, let them soak for an hour or more.
Soaking is the step that most people skip, and it is the one that makes everything else easier. The warm soapy water loosens baked-on grease so you can scrub it off with minimal effort instead of fighting every inch.
While the grates are soaking, move on to Step 4 and come back to finish scrubbing them later.
Step 4: Clean the Cookbox Interior (20 Minutes)
The cookbox is the interior cavity of your grill that houses the burner tubes. This is where grease and food particles accumulate over time, and it is ground zero for grease fires.
Use your putty knife or paint scraper to loosen baked-on grease from the interior walls and bottom of the cookbox. Work systematically from top to bottom, pushing debris toward the opening at the bottom where the grease tray sits.
For stubborn buildup, apply a commercial degreaser and let it sit for 5 to 10 minutes before scrubbing with a stiff nylon brush. Avoid spraying degreaser directly onto the burner tubes or igniter assembly.
Use paper towels to wipe out the loosened grease and debris. You may go through a lot of paper towels on this step if the grill has not been cleaned in a while. That is normal.
Check the interior surfaces for rust. Light surface rust can be scrubbed off with steel wool. Deep rust or metal that is flaking or thinning may indicate it is time to consider replacement parts or a new grill.
Step 5: Clear Burner Tubes and Ports (15 Minutes)
This is arguably the most important step for grill performance, yet it is the one most owners neglect entirely. Clogged burner ports cause uneven flames, hot spots, and poor heat distribution.
Look at your burner tubes. You will see a row of small holes along one side, and these are the burner ports where gas flows to create the flame. Over time, grease and food debris clog these holes.
Use a paperclip, pin, or toothpick to carefully clear each port. Work through every single hole along the burner tube. This is tedious but makes an immediate, noticeable difference in how evenly your grill heats.
For tubes with significant buildup inside, use a bottle brush or pipe cleaner to clean the interior. Some grills allow you to remove the burner tubes entirely for more thorough cleaning. Check your owner’s manual for instructions specific to your model.
Spiders and insects love to build nests inside burner tubes, which is a common cause of low flame or ignition problems. If you have had ignition issues, this step may solve them entirely.
After clearing the ports, inspect the igniter electrode. It should be clean and positioned close to the burner tube. Gently wipe it with a dry cloth. If it is corroded, it may need replacement.
Step 6: Clean the Grease Tray and Drip Pan (10 Minutes)
The grease tray sits below the cookbox and catches all the fat and drippings that run down from your food. If this overflows, you are looking at a grease fire waiting to happen.
Remove the grease tray and scrape out all the old grease. If you use disposable aluminum drip pans, throw away the old one and replace it with a fresh pan. If your tray is reusable, scrub it with warm soapy water and dry it thoroughly before reinserting.
Check the channel or tube that runs from the cookbox to the grease tray. This pathway can become clogged with solidified grease. Clear it with a bottle brush or a bent wire hanger so that drippings flow freely into the tray.
This is also a good time to inspect the area under and around the grease tray for any grease that has overflowed onto the cabinet floor or wheel assembly. Wipe it clean.
Step 7: Scrub and Reassemble Soaked Parts (15 Minutes)
By now, your grates and flavorizer bars have been soaking for at least 30 minutes. Pull them out of the soapy water and give them a thorough scrubbing with your grill brush or nylon brush.
For porcelain-coated grates, use a nylon brush rather than steel wool to avoid scratching the coating. For cast iron grates, you can use steel wool or a wire brush more aggressively.
Rinse everything with clean water and dry thoroughly. This is especially important for cast iron grates, which will rust if stored wet. Some grill owners briefly heat the grill after reassembly to ensure all components are completely dry.
Reassemble the grill in reverse order: flavorizer bars first, then cooking grates, then any heat plates or warming racks. Make sure everything sits properly in its designated position.
If you have cast iron grates, consider applying a thin coat of cooking oil after they are clean and dry. This process, called seasoning, creates a protective layer that prevents rust and creates a non-stick surface for your next cook.
Step 8: Clean the Exterior Surfaces (15 Minutes)
The exterior is the part everyone sees, so it deserves attention even though it does not affect cooking performance. For stainless steel surfaces, use a microfiber cloth with warm soapy water or a dedicated stainless steel cleaner.
Wipe in the direction of the grain to avoid scratching. For stubborn stains or water spots, a mixture of equal parts vinegar and water works effectively.
Clean the side shelves, control panel, and cabinet doors. Check the thermometer on the lid and wipe it clean. If your grill has a cabinet below, sweep out any debris, leaves, or spider webs that have accumulated inside.
Clean the wheels and legs. Check for rust on the cart frame, and touch up any bare metal with high-temperature paint if needed. This prevents structural deterioration over time.
Finally, wipe down the propane tank and check the hose connection for cracks or wear. If you smell gas after reconnecting, spray soapy water on the connection and look for bubbles, which indicate a leak.
Natural Cleaning Alternatives: Vinegar, Baking Soda, and More
Not everyone wants to use commercial chemical degreasers on a surface that cooks their food. The good news is that several natural methods clean grills just as effectively as chemical products, and they cost a fraction of the price.
Vinegar and Baking Soda Method
This is the most popular natural cleaning combination, and for good reason. Mix equal parts white vinegar and water in a spray bottle. Spray the solution generously on the interior surfaces of your grill, then let it sit for 10 to 15 minutes.
For stubborn buildup, make a paste by mixing baking soda with a small amount of water. Apply the paste to baked-on grease spots and let it sit for 20 minutes before scrubbing. The alkaline baking soda breaks down the grease bonds.
After scrubbing, rinse everything with clean water. This method takes a bit more patience than commercial degreasers but produces excellent results without any chemical residue.
Lemon Juice and Steel Wool
The acid in lemon juice cuts through grease naturally. Cut a lemon in half and rub it directly on warm (not hot) grates. Let the juice sit for 10 minutes, then scrub with steel wool. This method was recommended by multiple users on r/CleaningTips and works particularly well on stainless steel.
Coffee Grounds Trick
This one surprises people, but used coffee grounds make an excellent abrasive cleaner. The gritty texture helps scrub away stubborn residue without scratching metal surfaces. Mix used grounds with a little warm water to form a paste and scrub with a cloth.
Steam Cleaning Method
If you want to avoid scrubbing altogether, try steam. Fill a safe container with water and place it on the grill grates. Heat the grill to about 300 degrees Fahrenheit for 20 to 30 minutes. The steam loosens baked-on grease so you can wipe it away with minimal effort.
Be very careful when removing the container, as it will be extremely hot. Use heavy-duty gloves and long-handled tongs.
How Often Should You Deep Clean a Gas Grill?
The frequency of deep cleaning depends on how often you use your grill and what you cook on it. Someone who grills burgers several times a week needs to deep clean more often than someone who occasionally grills vegetables.
Heavy use (3 or more times per week): Deep clean every 2 to 3 months. If you cook a lot of fatty meats like burgers, bacon, or ribeyes, lean toward the 2-month schedule. Fat renders out and accumulates quickly.
Moderate use (1 to 2 times per week): Deep clean twice per year. The standard recommendation is once at the start of grilling season and once at the end before winter storage.
Light use (a few times per month): Deep clean once per year. A spring cleaning before the season starts is usually sufficient.
Signs Your Grill Needs an Immediate Deep Clean
Sometimes you cannot wait for the scheduled cleaning. Here are signs that your grill needs attention right now:
Flare-ups are happening more frequently than usual during normal cooking
You see thick black smoke coming from the grill
Food tastes off or has a bitter, acrid flavor
Flames are uneven, with some burners producing low or no flame
The grease tray is more than half full
You notice a rancid smell when opening the grill lid
You have not cleaned the grill in over 6 months
Any of these signs means it is time to set aside a weekend afternoon and go through the full deep cleaning process outlined above.
Common Mistakes to Avoid When Cleaning Your Gas Grill
Even experienced grill owners make cleaning mistakes that can damage their grill or create safety hazards. Here are the most common ones I see and how to avoid them.
Using a Wire Brush Incorrectly
Wire brushes are effective for cleaning grates, but they come with a real safety risk. Bristles can break off and end up in your food, causing serious injury if swallowed. This is a well-documented concern that has been discussed extensively in grilling communities.
If you use a wire brush, inspect the grates carefully afterward and wipe them down with a damp paper towel to remove any loose bristles. Better yet, switch to a safer alternative like a pumice stone, wooden grill scraper, or coil brush without bristles.
Pouring Water on a Hot Grill
Never pour water on hot grates to clean them. The sudden temperature change can warp the metal or crack porcelain coatings. Always wait until the grill is completely cool before applying water.
Some people try to speed up cleaning by throwing water on hot grates to create steam. This is risky and can cause grease splattering that leads to burns. Use the controlled steam method described in the natural cleaning section instead.
Using Oven Cleaner on Grill Grates
Oven cleaner seems like a logical choice, but it is designed for enclosed ovens that are not direct food-contact surfaces. The harsh chemicals can leave residues that are unsafe for cooking grates. If you need heavy-duty degreasing power, use a grill-specific cleaner or the natural vinegar and baking soda method.
Neglecting the Burner Tubes
This is the most commonly skipped step, and it is also the one that most affects cooking performance. People clean the grates and grease tray but never touch the burner tubes. Over time, the ports clog with grease and food debris, leading to uneven heating and poor performance.
Clearing the burner ports takes about 15 minutes with a paperclip or pin. It is simple work, but it transforms how your grill cooks.
Forgetting to Reinstall the Drip Pan
After cleaning, some people forget to put a fresh drip pan back in the tray. Without a drip pan, grease runs directly onto the grease tray and cabinet, creating a mess that is much harder to clean next time. Always install a fresh disposable pan before your next cook.
Grill Maintenance Tips for Long-Term Performance
Deep cleaning is important, but regular maintenance between deep cleans keeps your grill running smoothly all season long. Here is the routine I follow to keep my grill in top shape.
Post-Cook Quick Clean (5 Minutes)
While the grates are still warm (not hot), brush them with a grill brush or scraper. This removes food residue before it carbonizes and becomes much harder to clean later. Let the grill cool with the lid closed to keep the heat working on loosening debris.
Check the grease tray and empty it if it is more than half full. Wipe any splatter off the exterior with a damp cloth.
Monthly Maintenance Tasks
Once a month during grilling season, take 15 minutes to do a quick inspection. Check burner flames for evenness. Clear any partially clogged ports you notice. Wipe down the interior walls of the cookbox if grease is starting to accumulate.
Inspect the gas hose for cracks, abrasions, or signs of animal damage. Check the propane level so you are not surprised mid-cook.
Seasonal Storage Preparation
Before storing your grill for winter, do a full deep clean following all eight steps above. A clean grill stored for winter will not develop the rancid smells and pest problems that a dirty grill will.
Coat cast iron grates lightly with cooking oil before storage to prevent rust. Disconnect the propane tank and store it outdoors, upright, away from the grill. Cover the grill with a properly fitted, weather-resistant cover.
If you live in an area with harsh winters, consider moving the grill into a garage or shed. Freezing temperatures do not damage the grill itself, but snow and ice accumulation on a cover that does not fit properly can cause moisture problems.
When to Replace Parts
Even with perfect maintenance, some parts wear out. Flavorizer bars typically last 2 to 4 years depending on material and usage. Burner tubes last 3 to 5 years. Cooking grates can last 5 to 10 years if well maintained.
Replace parts when you see rust-through, holes, warping, or significant pitting. Upgrading to higher-quality replacement parts (like stainless steel flavorizer bars instead of porcelain-coated steel) can extend the life of your grill significantly.
FAQs
How do you clean heavily soiled grill grates?
For heavily soiled grates, start by scraping off loose debris with a grill brush or putty knife. Then soak the grates in warm soapy water for 30 to 60 minutes. After soaking, scrub with a nylon brush for porcelain-coated grates or steel wool for cast iron. For extreme buildup, make a paste of baking soda and water, apply it to the grates, let it sit for 20 minutes, then scrub and rinse thoroughly.
How often should you deep clean a gas grill?
For heavy use (3 or more times per week), deep clean every 2 to 3 months. For moderate use (1 to 2 times per week), deep clean twice per year, once at the start and once at the end of grilling season. For light use (a few times per month), one annual deep clean is sufficient. Always deep clean immediately if you notice frequent flare-ups, thick smoke, or uneven flames.
What are some common grill cleaning mistakes?
The most common mistakes include using oven cleaner on grates (it leaves unsafe chemical residues), pouring water on a hot grill (which can warp metal and crack porcelain coatings), neglecting burner tube cleaning (which causes uneven heating), and not wiping grates after using a wire brush to remove loose bristles. Another frequent mistake is forgetting to install a fresh drip pan after cleaning.
Can you pour water on a gas grill to clean it?
No, you should never pour water on a hot gas grill. The sudden temperature change can warp metal grates, crack porcelain coatings, and cause grease to splatter dangerously. Always wait until the grill is completely cool before using water. If you want to use steam for cleaning, place a container of water on the grates and heat the grill to 300 degrees Fahrenheit for 20 to 30 minutes instead.
How long does it take to deep clean a gas grill?
A thorough deep clean takes 1.5 to 2.5 hours. This includes 10 minutes for setup, 15 minutes for scraping grates and flavorizer bars, 30 minutes for soaking, 20 minutes for cleaning the cookbox, 15 minutes for clearing burner ports, 10 minutes for the grease tray, 15 minutes for scrubbing and reassembly, and 15 minutes for exterior cleaning. Heavily neglected grills may take closer to 3 hours.
Can I use oven cleaner on my gas grill?
No, oven cleaner is not safe for gas grill grates or interior cooking surfaces. It is formulated for enclosed ovens and can leave chemical residues that transfer to your food. Use a grill-specific degreaser instead, or go with natural alternatives like a vinegar and water solution or a baking soda paste for effective cleaning without chemical risks.
Conclusion
Learning how to clean a gas grill deep cleaning steps is one of the most valuable skills any grill owner can develop. A clean grill cooks more evenly, tastes better, lasts longer, and most importantly, keeps you and your family safe from grease fires.
The eight-step process I have outlined covers everything from setting up your workstation to clearing clogged burner ports. Follow it twice a year for moderate use, or more frequently if you grill several times a week. The time investment is small compared to the cost of replacing a neglected grill or dealing with a grease fire.
Remember that safety always comes first. Turn off the gas supply, let the grill cool completely, and wear protective gloves. Whether you choose commercial cleaners or natural alternatives like vinegar and baking soda, the key is consistency. Your grill works hard for you. Give it the deep clean it deserves in 2026, and it will reward you with better cooks all season long.