
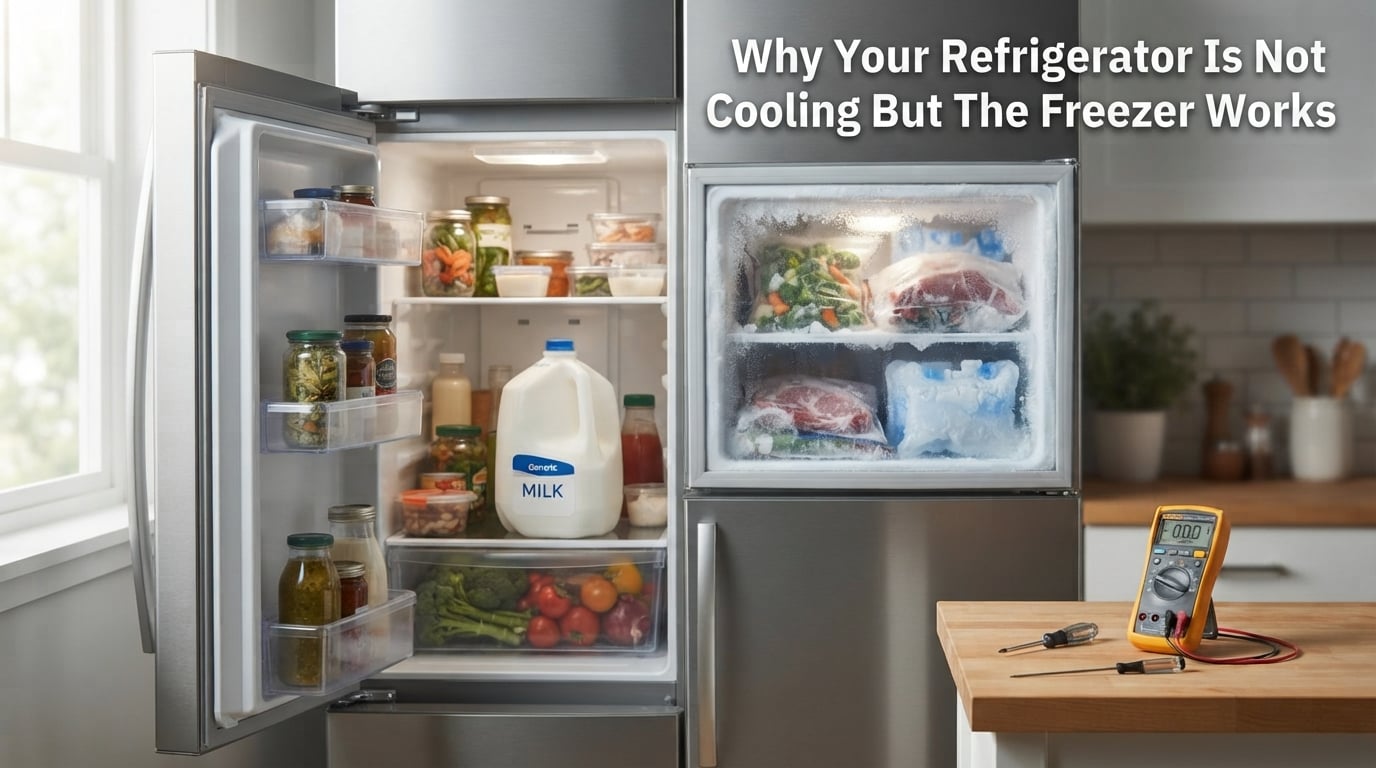
You open the fridge door and your milk is warm, but the ice cream in the freezer is rock solid. Sound familiar? This is one of the most common refrigerator problems homeowners face, and the good news is that you can often fix it yourself.
When your refrigerator is not cooling but the freezer works, the cooling system itself is still running. The problem is that cold air from the freezer is not making its way into the refrigerator compartment. Something in the airflow path between the two sections has failed or gotten blocked.
In most cases, the culprit is a failed evaporator fan motor, a stuck damper control, or a defrost system problem that has caused ice to block the air vents. I have helped dozens of friends and neighbors diagnose this exact issue, and in about 70% of cases, the fix takes less than an hour with basic tools.
This guide walks you through every possible cause, from the simplest five-second fixes to component-level diagnosis using a multimeter. You will learn how to identify the specific problem, whether you can fix it yourself, and when it makes sense to call a professional.
Let’s start with the fastest checks first, then move into detailed component testing so you do not waste time or money replacing parts blindly.
Quick Diagnosis: Check These Things First
Before tearing your fridge apart, run through these quick checks. I have seen cases where the entire problem was a blocked vent or a bumped thermostat dial. These take less than five minutes and rule out the simple stuff.
1. Feel the refrigerator vents. Put your hand near the vents inside the refrigerator compartment (usually at the top back or mid-back wall). You should feel cold air flowing. If there is no airflow at all, the problem is likely the evaporator fan or damper.
2. Check for blocked vents. Look inside both the freezer and refrigerator compartments. A large frozen pizza box, a bag of peas, or an overstuffed shelf can block the vents that allow cold air to pass from the freezer to the fridge. Clear anything sitting directly in front of or against the vents.
3. Verify the thermostat setting. Someone may have bumped the dial. The refrigerator should be set between 37 and 40 degrees Fahrenheit. If it got turned down accidentally, adjust it and wait 24 hours for temperatures to stabilize.
4. Listen to the freezer. Open the freezer door and press the door switch. You should hear the evaporator fan running. If you hear nothing, or if you hear a clicking, buzzing, or grinding noise, the fan motor is likely failing.
5. Check for frost buildup. Look at the back interior wall of the freezer. If you see a thick layer of frost or ice, the defrost system has failed and ice is blocking airflow to the refrigerator. This is a very common cause.
6. Test the door seals. Close the refrigerator door on a dollar bill. Pull the bill out slowly. You should feel resistance. If it slides out with no friction, the gasket is worn and warm air is leaking in.
If none of these quick checks reveal the problem, do not worry. The sections below walk you through each component in detail, with testing instructions you can follow even if you have never repaired an appliance before.
Why Your Refrigerator Is Not Cooling But The Freezer Works: Common Causes
The key to understanding this problem is knowing how a modern refrigerator works. Most refrigerators use a single cooling system located in the freezer. Cold air is generated in the freezer and then blown into the refrigerator compartment through a series of vents controlled by a fan and a damper.
When the freezer works but the fridge does not, the compressor and refrigerant system are fine. The issue is somewhere in the chain that moves cold air from the freezer to the refrigerator. Here are the most common causes, ranked by how frequently they show up in real-world repairs.
I have ranked these from most common to least common based on technician reports and repair forum data. Start at the top and work your way down.
Evaporator Fan Motor Failure (Most Common Cause)
The evaporator fan is the single most common reason a refrigerator stops cooling while the freezer stays cold. This fan sits in the freezer compartment behind the back interior panel. Its job is to blow cold air from the evaporator coils into both the freezer and the refrigerator through the vent system.
When the fan motor fails, the freezer can still maintain its temperature because it is right next to the cooling coils. But the refrigerator, which depends entirely on air being pushed through the vents, gradually warms up.
Symptoms of a failing evaporator fan:
The freezer is cold but the refrigerator is warm
You hear a ticking, buzzing, or grinding noise from the freezer
The fan does not spin when you press the freezer door switch
The fan blades are blocked by ice buildup
The refrigerator temperature rises gradually over a few days
How to test the evaporator fan:
Step 1: Unplug the refrigerator. Safety first, always.
Step 2: Remove the back interior panel of the freezer. This usually requires removing a few screws. On some models, you may also need to remove shelves and ice maker components.
Step 3: Locate the fan motor behind the panel. Visually inspect the fan blades. Are they intact? Is anything blocking them? Sometimes ice buildup physically prevents the blades from spinning.
Step 4: Manually spin the fan blades. They should turn freely and smoothly. If they are stiff, grinding, or will not move at all, the motor needs replacement.
Step 5: If you have a multimeter, set it to the ohms setting and test the motor windings for continuity. A reading of infinity or OL means the motor is open and must be replaced. A good motor typically reads somewhere between a few ohms and a few hundred ohms depending on the model.
Step 6: While you have the panel off, check the evaporator coils. A light coating of frost is normal. A thick wall of solid ice means the defrost system has failed, which may have also damaged the fan.
Replacing the evaporator fan motor: Replacement motors typically cost $40 to $80. The job takes about 30 to 60 minutes if you are comfortable with basic tools. You unplug the old motor, disconnect two or three wires, remove the mounting screws, and install the new one in reverse order. Take a photo of the wiring before disconnecting anything so you know where each wire goes.
Airflow Blockage and Stuck Damper Control
The damper control, also called the air damper or diffuser assembly, is a small motorized door between the freezer and refrigerator compartments. It opens and closes to regulate how much cold air flows from the freezer into the fridge. When the refrigerator reaches the target temperature, the damper closes. When it needs cooling, the damper opens.
If the damper gets stuck in the closed position, no cold air reaches the refrigerator. The freezer stays perfectly cold, but the fridge slowly warms up. This is the second most common cause of this problem.
What causes a stuck damper:
The damper motor burns out and the door freezes shut
Ice buildup from a defrost system failure physically jams the damper door
The damper linkage breaks mechanically
The temperature control board sends no signal to open the damper
Debris or a foreign object blocks the damper mechanism
How to test the damper:
Step 1: Locate the damper assembly. It is usually in the upper back corner of the refrigerator compartment, behind a plastic cover. On some models, it is in the center divider between the freezer and fridge.
Step 2: Remove the cover and visually inspect the damper door. Is it open or closed? If the fridge is warm, it should be open. A closed damper when the fridge is warm means the damper is stuck or the control signal is not getting through.
Step 3: Try gently moving the damper door with your finger. If it is frozen shut, you may be able to free it temporarily by manually defrosting the unit. But if ice keeps returning, you have a defrost system problem that needs addressing.
Step 4: If the door moves freely but stays closed during operation, the damper motor or the temperature control board may be faulty. A multimeter test on the damper motor for continuity can confirm whether the motor itself has failed.
Also check for physical airflow blockage: Even if the damper is working, an overstuffed refrigerator can block the vents from the inside. I have seen cases where a holiday turkey shoved against the back wall completely stopped airflow. Make sure there is at least an inch of clearance between your food items and the back wall of both compartments.
Defrost System Failures
The defrost system is the third major cause of a warm fridge with a cold freezer, and it is often the most frustrating because the problem keeps coming back. Here is what happens: every 8 to 12 hours, your refrigerator enters a defrost cycle. A heater melts frost off the evaporator coils, and the water drains out through a tube at the bottom.
When the defrost system fails, frost accumulates on the coils and eventually builds into a solid block of ice. This ice blocks the air channels that carry cold air from the freezer to the refrigerator. The freezer can still cool because it is adjacent to the coils, but the refrigerator gets nothing.
The defrost system has three main components that can fail:
1. Defrost heater. This is a glass or metal tube that heats up to melt frost. If the heater burns out (very common), ice builds up rapidly. Test it with a multimeter for continuity. No continuity means the heating element is broken and must be replaced.
2. Defrost thermostat (bi-metal). This small disc-shaped component clips onto the evaporator coil. It closes the circuit to turn on the heater when the coil temperature drops below a set point, and opens the circuit when defrosting is complete. If it sticks open, the heater never turns on. Test it cold (below 40 degrees Fahrenheit) for continuity.
3. Defrost timer or defrost control board. Older refrigerators use a mechanical timer that rotates through cooling and defrost cycles. Newer models use an electronic control board. If the timer seizes or the board fails, the defrost cycle never starts. Testing the timer involves manually advancing it with a screwdriver (on mechanical models) to see if the heater kicks on.
The telltale sign of a defrost system failure is ice buildup on the back wall of the freezer. If you see a thick frost layer or feel a solid sheet of ice, the defrost system is the problem. A manual defrost (unplugging the fridge for 24 to 48 hours with the doors open) will temporarily fix the issue, but the ice will return within a week or two if you do not repair the failed component.
How to diagnose which defrost component failed:
Step 1: Unplug the refrigerator and remove the freezer back panel to expose the evaporator coils.
Step 2: Locate the defrost heater. It is usually a glass tube or wire element running along the bottom of the coils. Test it with a multimeter set to ohms. A functional heater reads between 20 and 200 ohms. An open circuit (OL or infinity) means the heater is broken.
Step 3: Locate the defrost thermostat clipped to the top of the evaporator coil. Test it for continuity while it is still cold. If the freezer has been unplugged and the thermostat has warmed above 40 degrees, you may need to test it with it submerged in ice water to simulate cold conditions. No continuity when cold means it needs replacement.
Step 4: If both the heater and thermostat test fine, the defrost timer or control board is the likely culprit. On mechanical timer models, manually advance the timer and listen for a click. If the heater turns on, the timer is probably bad. On electronic models, the control board needs replacement, which is best left to a professional.
Faulty Thermistor (Temperature Sensor)
The thermistor is a small sensor that measures the temperature inside the refrigerator and freezer compartments. It sends resistance readings to the temperature control board, which uses that data to decide when to run the compressor, activate the fans, and open the damper.
If the thermistor fails, it can report incorrect temperatures to the control board. The board might think the refrigerator is already cold enough when it is actually warm, so it never opens the damper or activates the evaporator fan for the fridge side.
Symptoms of a bad thermistor:
Refrigerator temperature fluctuates wildly or stays warm
Freezer temperature seems normal
The compressor runs constantly or not enough
The damper never opens even though the fridge is warm
Error codes on the display panel (on models with digital controls)
How to test a thermistor: You need a multimeter and a glass of ice water. Set the multimeter to read resistance (ohms). With the thermistor disconnected from the wiring harness, read its resistance at room temperature. Then submerge the sensor tip in ice water (approximately 32 degrees Fahrenheit) for two minutes and read the resistance again.
A functioning thermistor will show a significant change in resistance between warm and cold conditions, typically dropping by several thousand ohms as it gets colder. If the reading does not change, or if the thermistor reads open (OL) at any temperature, it needs replacement.
Thermistors are inexpensive, usually $15 to $30, and they are one of the easiest components to replace. They typically plug into a wiring harness with a simple clip connector and slide into a slot on the compartment wall.
Dirty Condenser Coils
Condenser coils release heat from the refrigerant as it circulates through the system. On most refrigerators, these coils are either on the back of the unit or underneath, accessible from the front by removing the kickplate grille.
When condenser coils get covered in dust, pet hair, and grease, they cannot release heat efficiently. The compressor has to work harder and longer, and overall cooling performance drops. While this usually affects both compartments, it can sometimes affect the refrigerator first because it is farther from the cooling source.
How to clean condenser coils:
Step 1: Unplug the refrigerator.
Step 2: If your coils are underneath, remove the kickplate at the bottom front of the unit. If they are on the back, pull the refrigerator away from the wall.
Step 3: Use a vacuum with a brush attachment to remove loose dust and debris. A coil cleaning brush (a long, narrow bristle brush available at any hardware store for about $5) works well for getting between the coils.
Step 4: Vacuum up any remaining dust. Do not use water or liquid cleaners on the coils.
Clean your condenser coils every six months to maintain optimal cooling performance. This is the single easiest preventive maintenance task you can do, and it takes about ten minutes.
Worn or Damaged Door Seals (Gaskets)
Door gaskets create an airtight seal between the door and the cabinet. When they fail, warm moist room air leaks into the compartment. This forces the refrigerator to work harder and can also introduce humidity that causes frost buildup on the evaporator coils, leading to a cascade of airflow problems.
A bad door seal on the refrigerator side can cause the fridge to warm up while the freezer (with its own intact seal) continues to function normally. This is especially common on older refrigerators where the gasket has become brittle, cracked, or permanently compressed.
The dollar bill test: This is the simplest way to check your door seals. Close the refrigerator door on a dollar bill so that half of the bill is inside and half is outside. Slowly pull the bill out. You should feel consistent resistance. Repeat this all the way around the door. If the bill slides freely in any section, the gasket is not sealing properly in that area.
Other signs of bad door seals: Visible cracks, tears, or gaps in the gasket material. Condensation or moisture on the outside of the refrigerator near the door. The door feels loose or does not stay shut on its own.
How to replace a door gasket: Replacement gaskets cost $40 to $70 depending on the model. On most refrigerators, the gasket attaches to the door panel with screws under a retainer strip. You loosen the screws, pull out the old gasket, press the new gasket into the retainer channel, and retighten. After installation, close the door and run your fingers around the entire gasket to make sure it seats evenly. Some minor sealing gaps can be fixed by warming the new gasket with a hair dryer to soften it and help it conform to the door frame.
Temperature Control Board and Compressor Issues
If you have tested the evaporator fan, damper, defrost system, thermistor, and door seals without finding the problem, the remaining causes are more serious and typically require professional diagnosis. The temperature control board (also called the main control board on some models) is the brain of the refrigerator. It receives input from the thermistors and controls the compressor, fans, damper, and defrost cycle.
A failed control board can cause unpredictable behavior. The damper may never open, the fan may never run, or the defrost cycle may never activate. Diagnosing a control board failure is difficult because the board itself does not fail in a simple way you can test with a multimeter. Usually, it is diagnosed by ruling out every other component first.
Signs the control board may be failing:
Multiple components are not working simultaneously
The refrigerator behaves erratically (fans cycle on and off randomly)
Error codes on the display that persist after resetting
Burn marks or visible damage on the board itself
You have tested and ruled out every other component
Control board replacement costs $150 to $350 for the part alone, and professional installation is recommended because of the complexity of wiring connections.
Compressor problems: A failing compressor is less likely when only the refrigerator is warm and the freezer is cold. The compressor serves both compartments. However, a weak compressor that cannot maintain adequate pressure may cool the freezer (which is closer to the coils and needs less cooling effort) while failing to push enough refrigerant to cool the refrigerator compartment.
Signs of compressor problems: The compressor is extremely hot to the touch. It cycles on and off rapidly (short cycling). It makes a loud humming or rattling noise. It does not start at all. If you suspect compressor failure, this is almost always a job for a professional. Compressor replacement involves brazing refrigerant lines and requires EPA certification for handling refrigerants.
Step-by-Step Troubleshooting Guide
If you want a systematic approach rather than jumping between causes, follow this ordered procedure. I designed this to go from the easiest, most common fixes to the most complex, so you do not waste time or buy unnecessary parts.
Step 1: Check for blocked vents (2 minutes). Look inside both compartments. Make sure no food items are blocking the vents between the freezer and refrigerator. Move any items that are against the back wall. Wait 24 hours and check if cooling improves.
Step 2: Check the thermostat setting (1 minute). Make sure the refrigerator is set to 37 to 40 degrees Fahrenheit. If someone bumped it to a warmer setting, adjust it back and wait 24 hours.
Step 3: Listen to the evaporator fan (1 minute). Open the freezer door and press the door switch. You should hear the fan running. If you hear nothing, clicking, or grinding, the fan motor likely needs replacement. Proceed to the evaporator fan testing steps above.
Step 4: Check for frost on the freezer back wall (1 minute). Look at the interior back wall of the freezer. If you see thick frost or ice, the defrost system has failed. Do a manual defrost (unplug for 24 to 48 hours) as a temporary fix, then test and replace the failed defrost component using the instructions above.
Step 5: Test the door seals (2 minutes). Do the dollar bill test all the way around both doors. If the gasket is worn, replace it.
Step 6: Clean the condenser coils (10 minutes). Unplug the fridge, locate the coils, and vacuum them thoroughly. If you have never cleaned them, this alone can restore cooling performance.
Step 7: Test the damper assembly (15 minutes). Remove the damper cover in the refrigerator compartment. Check if the damper door opens and closes. If it is stuck closed, test for ice buildup, motor failure, or control board signal issues.
Step 8: Test the thermistor (10 minutes). Disconnect the thermistor and test it with a multimeter in ice water. If resistance does not change between warm and cold, replace it.
Step 9: Test the defrost heater and thermostat (20 minutes). Remove the freezer back panel. Test both components with a multimeter for continuity. Replace whichever part has failed.
Step 10: Inspect the control board (10 minutes). If everything else tests fine, remove the control board cover and look for visible damage, burn marks, or failed solder joints. If the board looks damaged or you have ruled out everything else, consider board replacement or calling a professional.
When to stop and call a professional: If you have completed steps 1 through 9 without finding the problem, or if you are uncomfortable working with electrical components, it is time to call a technician. Also call immediately if you smell burning plastic, see sparks, or hear a loud buzzing from the compressor area.
How to Reset a Refrigerator That Is Not Cooling
Sometimes a refrigerator needs a simple reset, just like restarting a computer. A power surge, a glitch in the control board, or a defrost cycle that got stuck can all cause temporary cooling failures. A reset clears these issues without any parts or tools.
Hard reset method:
Step 1: Unplug the refrigerator from the wall outlet, or flip the circuit breaker that powers it.
Step 2: Leave it unplugged for at least 5 minutes. Some technicians recommend waiting 10 to 15 minutes to allow any residual charge in the control board capacitors to dissipate.
Step 3: Plug it back in or flip the breaker on.
Step 4: Listen for the compressor to start. You should hear a low humming sound within a minute or two.
Step 5: Wait 24 hours for temperatures to stabilize. Do not open the doors frequently during this period.
Control board reset method (for models with a display panel): Some refrigerators have a reset function accessible through the control panel. Check your owner’s manual for specific instructions. Common methods include holding the “Power Freeze” and “Power Cool” buttons simultaneously for 5 to 10 seconds, or holding a “Reset” button if your model has one.
If a reset temporarily fixes the problem but cooling fails again after a few days, you have a component failure that needs diagnosis and repair. A reset will not fix a bad fan motor, a stuck damper, or a failed defrost heater.
Repair vs Replace: Cost Considerations
One question I hear constantly is: should I repair this refrigerator or just buy a new one? The answer depends on the age of your refrigerator, the cost of the repair, and the type of failure.
DIY repair costs (parts only):
Evaporator fan motor: $40 to $80
Defrost heater: $25 to $60
Defrost thermostat: $15 to $30
Thermistor: $15 to $30
Door gasket: $40 to $70
Damper assembly: $40 to $90
Condenser coil brush: $5
If you are comfortable doing the repair yourself, most of these fixes cost under $100 and take less than an hour. That is almost always worth doing, even on an older refrigerator.
Professional repair costs (parts and labor):
Service call and diagnosis: $75 to $150
Evaporator fan replacement (with labor): $150 to $300
Defrost system repair: $150 to $350
Control board replacement: $250 to $500
Compressor replacement: $500 to $1,200
Sealed system repair (refrigerant leak): $400 to $1,000
My rule of thumb: If the repair cost exceeds half the price of a comparable new refrigerator and your unit is more than 8 years old, replacement is usually the better financial decision. A refrigerator with a $700 compressor repair bill on a 10-year-old unit is not a good investment.
Refrigerators typically last 10 to 15 years. If yours is under 8 years old and the repair is under $300, fixing it makes sense. Between 8 and 12 years, consider the specific repair cost. Over 12 years, even small repairs may not be worth it because other components are likely to fail soon.
Preventive Maintenance to Avoid Future Cooling Problems
Most refrigerator cooling problems are preventable with simple routine maintenance. Here is a maintenance schedule that takes less than 30 minutes total per year and can add years to your refrigerator’s life.
Every 6 months: Clean the condenser coils. This is the single most important maintenance task. Dusty coils force the compressor to work harder, which shortens its life and reduces cooling efficiency. Vacuum the coils with a brush attachment and use a coil brush for stubborn buildup.
Every 6 months: Inspect and clean the door gaskets. Wipe them down with warm soapy water, then dry thoroughly. Check for cracks, tears, or areas where the gasket is not sealing. Do the dollar bill test to confirm a proper seal.
Monthly: Check that vents inside both compartments are not blocked by food items. Keep at least an inch of clearance around all vents and along the back wall.
Annually: Check the drain pan and drain tube at the bottom of the refrigerator. A clogged drain tube can cause water to pool and freeze, leading to airflow problems. Flush the tube with warm water if it appears slow to drain.
Annually: Level the refrigerator. An unlevel refrigerator can cause door seal problems and improper drainage. Use a level on top of the unit and adjust the leveling legs as needed. The refrigerator should be level side to side and tilted very slightly back (about a quarter inch) so doors close on their own.
FAQs
What is the first thing to check when a refrigerator stops cooling?
The first thing to check is whether the vents between the freezer and refrigerator compartments are blocked by food items. Clear any items blocking the vents, verify the thermostat is set to 37-40 degrees Fahrenheit, and listen for the evaporator fan running in the freezer. These three quick checks take under five minutes and rule out the most common simple causes.
How to fix a refrigerator that is not cooling but the freezer works?
Start by checking for blocked vents, then test the evaporator fan by pressing the freezer door switch and listening for airflow. If the fan is silent or making grinding noises, replace the fan motor. If you see frost buildup on the freezer back wall, the defrost system has failed and you need to test the defrost heater and thermostat with a multimeter. If the fan runs but no air reaches the fridge, test the damper assembly for a stuck-closed condition.
Why would my freezer be cold but not my refrigerator?
This happens because cold air is generated in the freezer and blown into the refrigerator through vents. If the evaporator fan motor fails, the damper control sticks closed, ice blocks the air channels from a defrost system failure, or the thermistor gives false readings, the freezer continues cooling normally while the refrigerator receives no cold air.
How to reset a fridge that is not cooling?
Unplug the refrigerator or flip its circuit breaker off for 5 to 15 minutes. Plug it back in and wait 24 hours for temperatures to stabilize. For models with a display panel, check the owner’s manual for a specific reset button sequence. If cooling returns temporarily but fails again, a component has failed and needs diagnosis and replacement.
What are signs of a failing refrigerator compressor?
Signs include the compressor running extremely hot to the touch, short cycling (turning on and off rapidly), loud humming or rattling noises, the compressor not starting at all, and both compartments warming up gradually. If only the refrigerator is warm while the freezer stays cold, the compressor is less likely to be the cause since it serves both compartments.
Why is my freezer freezing up but not cooling my fridge?
This typically means the defrost system has failed. Frost accumulates on the evaporator coils and grows into a solid block of ice that blocks the air channels between the freezer and refrigerator. Test the defrost heater for continuity, check the defrost thermostat with a multimeter while cold, and verify the defrost timer or control board is advancing properly. A temporary fix is to unplug the fridge for 24-48 hours to melt the ice, but the failed component must be replaced to prevent recurrence.
Conclusion
When your refrigerator is not cooling but the freezer works, the problem almost always comes down to airflow. The cooling system is functioning, but cold air is not reaching the refrigerator compartment because of a failed fan, stuck damper, ice blockage, or sensor problem.
Start with the quick checks: clear blocked vents, verify the thermostat setting, listen for the evaporator fan, and look for frost buildup. These take five minutes and solve a surprising number of cases. If the quick checks do not help, work through the step-by-step troubleshooting guide in order, from the evaporator fan through the defrost system and beyond.
Most repairs cost under $100 in parts and take less than an hour if you are comfortable with basic tools. The evaporator fan motor is the single most common failure point, followed closely by defrost system components. Replacing these parts yourself can save you $200 to $400 compared to a professional service call.
If you have worked through all the diagnostic steps and still cannot identify the problem, or if the repair estimate exceeds half the cost of a new refrigerator on a unit over 8 years old, it is time to call a technician or start shopping for a replacement. Either way, you now have the knowledge to make an informed decision rather than guessing.