
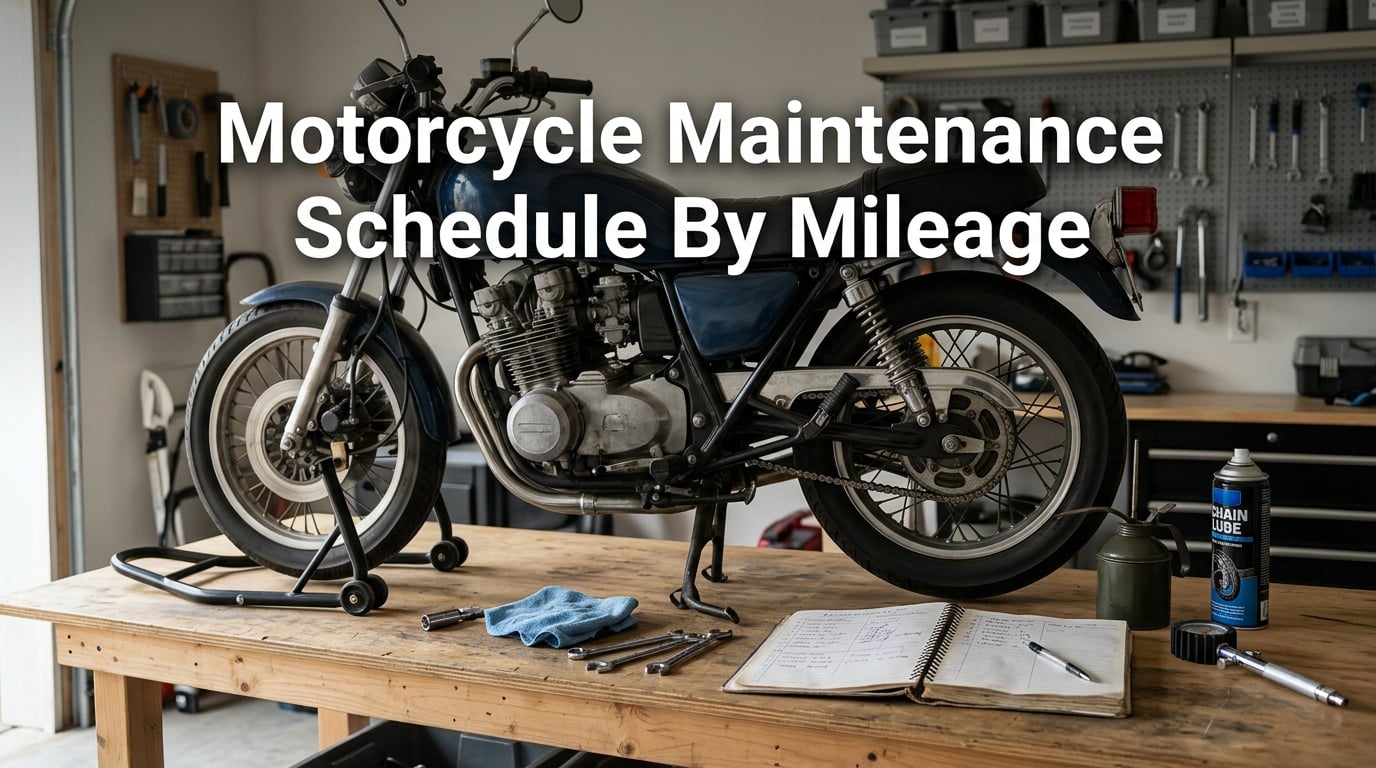
Keeping your motorcycle running like new comes down to one thing: following a consistent maintenance schedule based on how many miles you ride. Whether you just bought your first bike or you have been riding for decades, having a clear motorcycle maintenance schedule by mileage takes the guesswork out of knowing when to service each component.
I have spent years wrenching on my own bikes and talking with mechanics, forum communities, and fellow riders about what actually works. What I learned is that most breakdowns are preventable if you stay ahead of the service intervals. Skipping a $40 oil change can turn into a $2,000 engine rebuild faster than you might think.
This guide breaks down every maintenance task by mileage milestone, from the break-in period all the way past 20,000 miles. You will find exactly what to check, when to check it, and which tasks you can handle yourself versus when to visit a shop. I have also included cost estimates, a printable checklist concept, and answers to the most common questions riders ask.
By the end of this article, you will have a complete roadmap for keeping your motorcycle safe, reliable, and performing at its best for years to come.
Break-In Period: The First 0 to 500 Miles
The break-in period is the most critical phase of your motorcycle’s life. Those first 500 miles determine how well your engine components seat together, and mistakes here can cause long-term performance issues that no amount of later maintenance can fix.
During the break-in period, the goal is to let internal engine parts wear in gradually. Piston rings need to seat against cylinder walls. Brake pads need to bed into rotors. Tires need to shed their manufacturing mold-release coating before they offer full grip.
Break-In Do’s
Do vary your engine RPM constantly. Avoid holding the throttle at one speed for extended periods. Instead, accelerate and decelerate through a range of RPMs to help components seat evenly. Stay below roughly 75% of your bike’s redline during the first 500 miles.
Do allow the engine to warm up fully before riding hard. Cold oil does not lubricate properly, and putting load on a cold engine during break-in can score cylinder walls. Give it two to three minutes at idle before pulling away.
Do check your oil level frequently during the first 500 miles. New engines consume more oil as components break in, and running low on oil during this phase can cause permanent damage. Check the sight glass or dipstick every 100 miles.
Break-In Don’ts
Do not rev the engine to redline during the first 500 miles. High RPMs generate excess heat and prevent proper ring seating. This is the most common mistake new bike owners make.
Do not carry heavy loads or ride with a passenger during break-in. Extra weight puts additional stress on new brake components and suspension that have not yet settled in.
Do not use synthetic oil during break-in unless your manufacturer specifically recommends it. Conventional oil allows controlled friction that helps rings seat. Many riders switch to synthetic after the first scheduled oil change.
The First Service: 500 to 600 Miles
Your first dealership service is not optional. Around 500 to 600 miles, you need an initial service that typically includes an oil and filter change, a thorough inspection of all fasteners, chain tension adjustment, and a check of all fluid levels. This first service also validates your warranty on most new bikes.
Expect to pay between $150 and $300 for this initial service at a dealership. Some riders do the first oil change themselves, but if your bike is under warranty, having the dealer document the first service is worth the cost for the paper trail alone.
Routine Checks Every 500 to 1,000 Miles
Between major service intervals, a set of routine checks keeps your bike in safe riding condition. These are the tasks that riders on forums like r/motorcycles consistently recommend doing every 500 to 1,000 miles. They take about 20 minutes total if you stay consistent.
Chain Lubrication and Cleaning
Clean and lubricate your chain every 500 to 700 miles for O-ring and X-ring chains. If you ride a bike with an older non-O-ring chain, you need to clean it every 200 miles. Use a dedicated chain cleaner, a grunge brush, and a quality chain lube designed for your chain type.
I check my chain tension at every lubrication interval too. Most bikes need 1 to 1.5 inches of slack at the midpoint between the sprockets. Too tight and you risk bearing failure. Too loose and the chain could slap or skip off the sprocket.
Tire Pressure and Condition
Check tire pressure before every long ride and at least every 500 miles during regular commuting. Underinflated tires heat up faster, reduce fuel efficiency, and wear unevenly. Overinflated tires reduce contact patch and grip.
Use the pressure specified on your bike’s swingarm sticker or in the owner’s manual, not the max pressure printed on the tire sidewall. While you are down there, inspect the tread for embedded objects, cuts, or cupping.
Fluid Level Check
Check your engine oil sight glass or dipstick every 500 miles. Also check coolant level (on liquid-cooled bikes) and brake fluid reservoir levels. Brake fluid should be a light amber color. If it looks dark brown or black, it is time for a brake fluid flush.
Fastener and Hardware Check
Vibration from riding can loosen bolts over time. Every 500 to 1,000 miles, give a quick visual inspection of critical fasteners: axle nuts, engine mounting bolts, handlebar clamp bolts, and brake caliper bolts. A simple visual check takes two minutes and can catch a loose bolt before it becomes a roadside emergency.
Motorcycle Maintenance Schedule By Mileage: Complete Interval Guide
Below is the complete motorcycle maintenance schedule by mileage. This table covers the major service milestones that apply to most street motorcycles. Always cross-reference your specific owner’s manual, as manufacturers like Harley-Davidson, Honda, Yamaha, and Kawasaki have slightly different recommendations.
| Mileage | Key Tasks | Estimated Cost (DIY) | Estimated Cost (Shop) |
|---|---|---|---|
| 500-600 mi | First service: oil and filter change, fastener inspection, chain adjustment, full safety check | $40-$60 | $150-$300 |
| 3,000-4,000 mi | Oil and filter change, chain clean and lube, air filter inspection, tire rotation or replacement check | $50-$70 | $200-$400 |
| 5,000-6,000 mi | Minor service: oil change, spark plug inspection, valve clearance check, brake pad inspection, chain and sprocket wear check | $80-$150 | $400-$700 |
| 10,000-12,000 mi | Major service: all 5K items plus valve adjustment, throttle body sync, coolant replacement, brake fluid flush, air filter replacement | $150-$300 | $600-$1,200 |
| 15,000-16,000 mi | Repeat minor service, replace chain and sprockets if worn, replace brake pads if needed, inspect steering head bearings | $200-$400 | $700-$1,500 |
| 20,000+ mi | Full major service, suspension service, wheel bearing inspection, cam chain tensioner check, fork seal inspection | $300-$600 | $1,000-$2,500 |
1,000 to 2,000 Miles: Light Maintenance
At this interval, your focus is on keeping fluids clean and components adjusted. Change your oil if you have not already done so since the first service. Clean and lubricate the chain, inspect brake pad thickness, and check tire tread depth.
This is also a good time to inspect your air filter. If you ride in dusty conditions or off-road, the air filter may already need cleaning or replacement. A clogged air filter reduces performance and fuel efficiency.
3,000 to 5,000 Miles: Standard Service
The 3,000 to 5,000 mile mark is where the first real service interval kicks in for most bikes. Change the engine oil and replace the oil filter. Inspect and clean or replace the air filter. Check spark plug condition and gap.
This is also when you should inspect brake pad thickness. Most brake pads have wear indicator grooves. If the groove is nearly gone, it is time for new pads. Ignoring worn pads leads to rotor damage, which turns a $40 pad replacement into a $200 rotor and pad job.
Forum riders on r/motorcycles consistently report that this interval is where most DIY maintenance happens. An oil change with filter and air filter inspection takes about 45 minutes in your garage with basic tools.
5,000 to 6,000 Miles: Minor Service
At this mileage, many manufacturers call for a minor service that goes beyond a basic oil change. You will want to check valve clearance on bikes that need it (check your manual, as some modern bikes do not need valve checks until 15,000+ miles). Inspect the throttle cable for free play, check clutch cable adjustment, and examine the chain and sprockets for wear.
Chain and sprocket replacement is a common task around this mileage, especially if the chain has not been cleaned and lubricated regularly. Signs of a worn chain include tight and loose spots as you rotate the wheel, or the chain lifting off the rear sprocket when you push on it.
10,000 to 12,000 Miles: Major Service
The 10,000-mile service is the big one. This is where you address items that have a longer service life but still need attention. Valve clearance adjustment is the most significant task, and it is one most riders leave to a professional unless they have experience with feeler gauges and camshaft removal.
Other tasks at this interval include throttle body synchronization (on fuel-injected bikes), coolant replacement (on liquid-cooled bikes), brake fluid flush, and air filter replacement. Expect a major service to take a full day at the shop and cost between $600 and $1,200 depending on your bike and labor rates in your area.
15,000 to 16,000 Miles: Intermediate Major Service
By 15,000 miles, several wear items may need replacement. The chain and sprocket set is usually at the end of its life if you ride regularly. Brake pads on the front are likely due, and the rear may also need attention. Inspect steering head bearings for notchiness or play by putting the bike on a stand and turning the bars lock to lock.
This is also a good time to replace fork oil and inspect fork seals. Leaking fork seals leave oil on the stanchions and reduce suspension performance. Fork seal replacement is a job most DIY mechanics can handle with the right tools, but it is messy and time-consuming.
20,000+ Miles: High-Mileage Service
Past 20,000 miles, your motorcycle enters high-mileage territory where you need to pay closer attention to bearings, seals, and internal components. Check wheel bearings by spinning each wheel on its axle and listening for grinding or roughness. Inspect the cam chain tensioner if your bike has one.
Suspension service becomes more important at this stage. Consider having the forks and shock rebuilt with fresh oil and new seals. The rear shock may also need a nitrogen recharge if it is serviceable.
For riders covering 5,000 to 10,000 miles annually, total maintenance costs typically range from $500 to $2,500 per year depending on whether you DIY or use a shop. High-mileage bikes that are well maintained can easily exceed 50,000 miles without major engine work.
Chain, Tire, and Brake Maintenance
These three systems wear out faster than any other on your motorcycle. Understanding how to maintain each one is the difference between a bike that feels new at 20,000 miles and one that feels ragged at 8,000.
Chain Maintenance Schedule
Your chain transmits power from the engine to the rear wheel, and it operates under extreme stress. A well-maintained chain lasts 15,000 to 20,000 miles. A neglected one can fail in 5,000 miles.
For O-ring and X-ring chains, clean and lubricate every 500 to 700 miles. Use a paraffin-based chain cleaner to remove old lube and grime, then apply a quality chain lube to the inside of the chain while it is warm from a ride. The centrifugal force spreads the lube evenly as the chain spins.
For non-O-ring chains, clean and lubricate every 200 miles. These chains lack the rubber sealing rings that hold factory lubricant inside the pins, so they need more frequent attention.
Check chain tension at every lubrication session. The correct slack varies by bike, but most street bikes need 1 to 1.5 inches of vertical movement at the chain’s midpoint. Adjust both sides of the rear axle evenly to maintain wheel alignment.
Replace the chain and sprockets as a set. Installing a new chain on worn sprockets causes rapid chain stretch. Look for hooked or shark-fin shaped sprocket teeth as a sign of wear.
Tire Maintenance and Replacement
Tires are your only contact with the road. Check tire pressure every week or every 500 miles, whichever comes first. Use a quality digital gauge rather than relying on a gas station air pump, which can be inaccurate.
Replace motorcycle tires when the tread wears to 2/32 of an inch depth. Most sport tires have wear bars molded into the tread that indicate this point. For riders who push hard in corners, replacing tires earlier at 3/32 gives an extra safety margin.
Typical tire life ranges from 5,000 to 12,000 miles for the rear and 8,000 to 15,000 miles for the front, depending on riding style and tire compound. Sport touring tires last longer than sport tires. Aggressive riders will see shorter life from any tire.
Age matters as much as tread. Replace tires that are more than 5 to 6 years old regardless of mileage, as rubber compounds harden over time and lose grip. Check the four-digit date code on the tire sidewall to determine the manufacturing date.
Brake Maintenance and Pad Replacement
Inspect brake pad thickness every 3,000 to 5,000 miles. Most pads start at 4 to 5 millimeters of friction material and need replacement at 1 to 2 millimeters. If you wait until you hear metal-on-metal grinding, the rotors are already damaged.
Front brake pads typically last 10,000 to 15,000 miles. Rear pads last longer, often 15,000 to 25,000 miles. Riders who commute in stop-and-go traffic will see shorter pad life than highway cruisers.
Replace brake fluid every 2 years regardless of mileage. Brake fluid absorbs moisture from the air over time, which lowers the boiling point and causes a spongy lever feel. A brake fluid flush is a straightforward DIY job if you have a bleed bottle and a helper or a one-person bleeder kit.
Inspect brake lines for cracks, bulges, or leaks at every service interval. Rubber lines degrade over time and can expand under pressure, reducing braking force. Steel-braided lines are a popular upgrade that provides firmer lever feel and more consistent braking.
Battery Maintenance and Seasonal Storage
Motorcycle batteries take more abuse than car batteries because they are smaller, operate in hotter conditions, and often sit unused for weeks at a time. A few simple habits will extend battery life from one season to three or more.
Battery Care During Riding Season
Check battery terminal connections every few months for corrosion. Clean any white or green buildup with a wire brush and a baking soda and water solution. Coat the terminals with dielectric grease to prevent future corrosion.
If your bike sits unused for more than two weeks, connect a smart battery tender that maintains charge without overcharging. This is the single most effective way to extend battery life. Modern lithium batteries also benefit from tenders, though they hold charge longer than lead-acid units.
Most motorcycle batteries last 2 to 4 years. If your bike struggles to start or the headlights dim noticeably at idle, the battery is nearing the end of its life.
Winter Storage Checklist
Proper winter storage protects your bike from fuel degradation, battery drain, and moisture damage. Follow these steps before parking your bike for the off-season:
Fill the gas tank completely and add a fuel stabilizer like Sta-Bil. Run the engine for 10 minutes so stabilized fuel reaches the carburetors or fuel injectors. A full tank prevents internal condensation and rust.
Change the oil before storage. Used oil contains combustion byproducts that can corrode internal engine surfaces over months of sitting. Fresh oil coats everything protectively.
Remove the battery and store it in a cool, dry place connected to a battery tender. Or leave it in the bike plugged into a tender if your garage has power.
Clean and wax the bike thoroughly. Apply a light coat of WD-40 or similar corrosion inhibitor to exposed metal surfaces and the exhaust pipe. Inflate tires to the maximum pressure on the sidewall to prevent flat spots, and ideally put the bike on stands so the tires are off the ground.
Cover the bike with a breathable motorcycle cover. Avoid plastic tarps that trap moisture and cause condensation.
Pre-Season Preparation
Before riding season starts, reverse your storage process. Check tire pressure and inspect for flat spots or cracking. Reinstall and charge the battery. Start the engine and let it reach operating temperature while checking for leaks. Do a test ride at low speeds to confirm everything feels right before hitting the highway.
Warning Signs Your Motorcycle Needs Immediate Service
Sometimes your bike tells you something is wrong before a scheduled service interval arrives. Knowing these warning signs can prevent a minor issue from becoming a major repair or a safety hazard.
Unusual Noises and Vibrations
A ticking sound from the engine often points to loose valve clearance. A whining noise from the transmission or clutch could indicate low fluid or worn bearings. A squealing sound when you apply the brakes means the pads are worn to the wear indicators.
New vibrations that appear suddenly usually mean something has loosened or a component is failing. Check engine mounting bolts, exhaust headers, and front-end fasteners. If the vibration is coming from the engine itself, stop riding and have it inspected.
Handling and Performance Changes
If your motorcycle starts pulling to one side, the tire pressure may be uneven, or you could have a misaligned wheel after a chain adjustment. A wobbling feeling at speed can indicate worn steering head bearings or an out-of-balance tire.
Spongy brake levers mean air or moisture in the brake lines. A firm brake lever that does not release could mean a stuck caliper. Both conditions are dangerous and need immediate attention.
Reduced power or rough idling can indicate clogged fuel injectors, a dirty air filter, or failing spark plugs. If your bike stalls at idle or hesitates under acceleration, diagnose the issue before it leaves you stranded.
Fluid Leaks
Any fluid leak is a reason to investigate immediately. Brown or black fluid is engine oil. Green or orange fluid is coolant. Clear or slightly amber fluid on the wheels or brake rotor is brake fluid, which is an urgent safety issue.
Check fluid levels if you notice drips under your parked bike. Small oil seepage from a gasket can wait until your next service, but active dripping needs to be addressed right away.
Warning Lights and Indicators
Modern motorcycles have engine management lights, ABS warning lights, and oil pressure lights. Never ignore an illuminated warning light. An oil pressure light means stop riding immediately to prevent engine destruction. An ABS light means your anti-lock braking system is disabled, which affects safety but is less immediately critical.
If a check engine light comes on, the bike’s computer has detected a fault. Most auto parts stores and dealerships can read the diagnostic code to pinpoint the issue.
DIY vs Professional Service: What to Tackle Yourself
One of the biggest questions riders ask on forums is which maintenance tasks they can handle themselves and which should go to a professional. The answer depends on your mechanical skill, available tools, and available time.
Tasks Most Riders Can DIY
Oil and filter changes are the most common DIY task. You need a socket for the drain plug, an oil filter wrench, and a catch pan. Total cost for supplies runs $40 to $60 compared to $100 to $200 at a shop.
Chain cleaning, lubrication, and tension adjustment are straightforward. A rear stand makes the job easier, but you can do it with the bike on its side stand using a paddock stand or by having a friend help.
Air filter replacement, spark plug replacement (on accessible engines), and brake pad replacement are all manageable for riders with basic hand tools and a service manual. YouTube has detailed tutorials for nearly every popular motorcycle model.
Tasks Best Left to Professionals
Valve clearance adjustment requires removing the valve cover or camshafts on many bikes, using feeler gauges to measure clearance, and installing different shims to correct the gap. This is precise work that can damage the engine if done incorrectly.
Throttle body synchronization requires a specialized tool called a vacuum gauge or manometer. Suspension rebuilds, including fork seal replacement and shock servicing, require special tools and can be dangerous due to compressed springs.
If you are ever unsure about a task, it is always cheaper to pay a mechanic than to fix a mistake. A botched DIY repair can cost far more than the original service would have.
Keeping a Maintenance Log
No competitor in the SERP space provides a clear system for tracking maintenance, so here is a simple approach. Use a notebook, a spreadsheet, or a motorcycle maintenance app like Garage Buddy or Fuelly to log every service you perform.
Record the date, mileage, task performed, parts used, and cost. This log serves three purposes: it reminds you when the next service is due, it provides documentation that increases resale value, and it helps you spot recurring issues before they become serious.
I keep a simple log for each of my bikes. When I sold my last motorcycle, the buyer was impressed by three years of documented maintenance and paid top dollar for it. That log added real dollars to the sale price.
FAQs
What is the maintenance schedule for a motorcycle?
A motorcycle maintenance schedule by mileage includes an initial service at 500-600 miles, oil changes every 3,000-5,000 miles, minor service at 5,000-6,000 miles (including valve and brake inspection), and major service at 10,000-12,000 miles (including valve adjustment, coolant, and brake fluid flush). Chain lubrication should happen every 500-700 miles, and tire pressure should be checked weekly.
What is the 30 60 90 maintenance schedule?
The 30-60-90 maintenance schedule is primarily a car maintenance concept that translates to service intervals at 30,000, 60,000, and 90,000 miles. For motorcycles, which typically have shorter service intervals, the equivalent approach uses 5,000, 10,000, and 15,000-mile milestones. Each interval includes progressively more comprehensive inspections and component replacements.
How to maintain a motorcycle for beginners?
Beginners should focus on five core tasks: check tire pressure weekly, clean and lubricate the chain every 500-700 miles, change the oil every 3,000-5,000 miles, inspect brake pad thickness monthly, and keep a maintenance log. Start with oil changes and chain care, which are the easiest high-impact tasks. Always follow your owner’s manual for model-specific intervals.
What kind of maintenance does a motorcycle need?
Motorcycles need regular oil and filter changes, chain cleaning and lubrication, tire pressure and tread inspection, brake pad and fluid service, air filter replacement, spark plug inspection, valve clearance checks, coolant replacement (on liquid-cooled bikes), and battery maintenance. Most riders should perform basic checks every 500-1,000 miles and schedule professional service at major mileage intervals.
How often should I change motorcycle oil?
Change motorcycle oil every 3,000 to 5,000 miles or every 6 months, whichever comes first. New bikes need the first oil change at 500-600 miles during the break-in service. Riders who commute in stop-and-go traffic or ride in extreme heat should change oil closer to the 3,000-mile mark. Always replace the oil filter at every oil change.
What mileage should I replace motorcycle tires?
Replace motorcycle tires when tread depth reaches 2/32 of an inch or when the tires are 5-6 years old regardless of mileage. Rear tires typically last 5,000-12,000 miles and front tires last 8,000-15,000 miles depending on riding style and tire compound. Check the four-digit date code on the sidewall to determine tire age.
Conclusion
Following a motorcycle maintenance schedule by mileage is the single best thing you can do to protect your bike, your safety, and your wallet. From the critical break-in miles to the high-mileage service milestones, every interval has a purpose.
Start with the basics: oil changes, chain care, and tire pressure checks. Build from there as your confidence grows. Keep a log of every service, and never ignore the warning signs your bike gives you. Your motorcycle will reward you with years of reliable, enjoyable riding.