
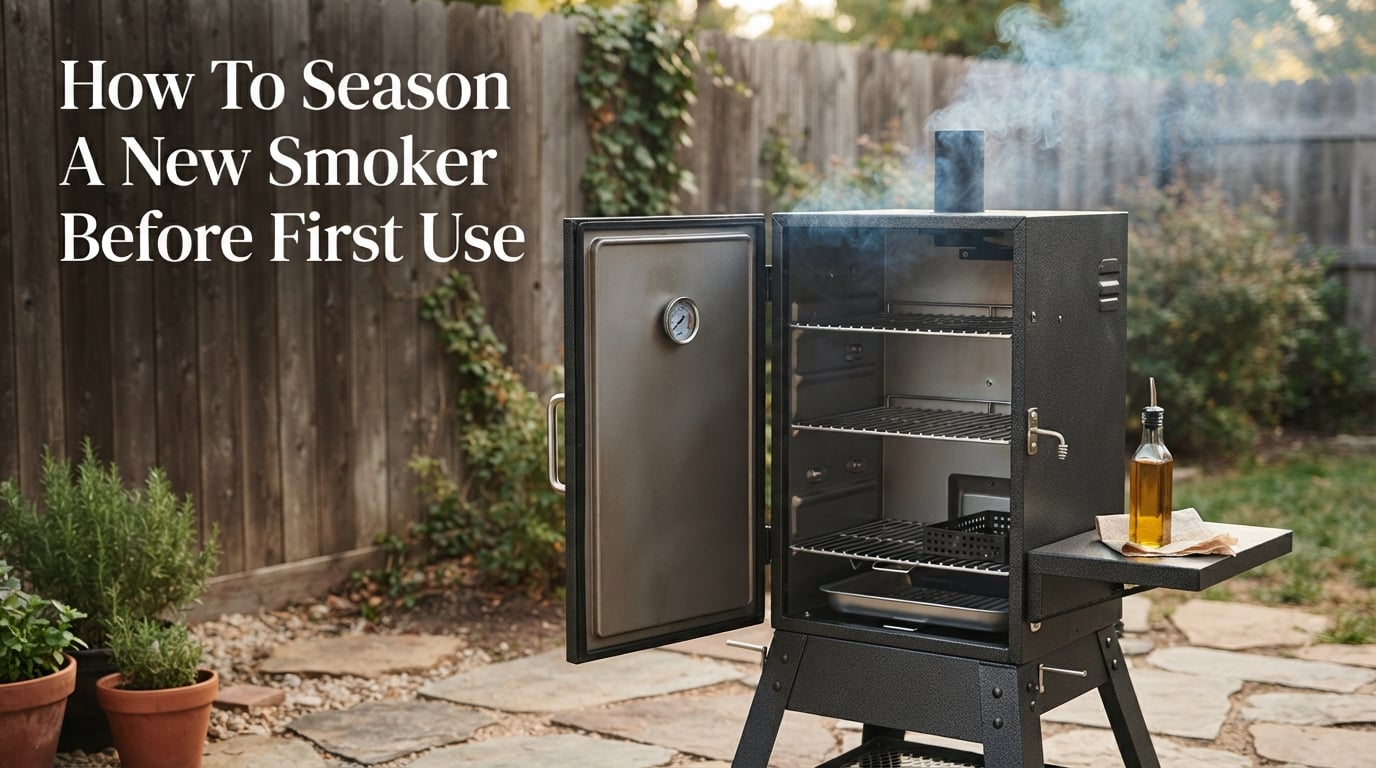
When I unboxed my first smoker a few years back, I could not wait to throw a brisket on the grates. But my neighbor, a seasoned BBQ competitor, stopped me cold. “You need to season it first,” he said. That single step made the difference between a smoker that lasted for years and one that rusted out by the next summer. Learning how to season a new smoker before first use is the most important thing you can do for your equipment and your food.
Seasoning creates a protective barrier on the inside of your smoker. It burns off factory oils, prevents rust from forming, and builds a layer of seasoning that actually improves the flavor of everything you cook. Skip this step and you risk metallic-tasting food, uneven heating, and a shorter lifespan for your investment.
In this guide, I will walk you through the exact process I use, from cleaning to oil selection to temperature control. Whether you have an offset, pellet, or electric smoker, this process works.
What Is Smoker Seasoning and Why It Matters
Seasoning a smoker means coating the interior surfaces with a high smoke-point oil and heating it to a temperature that causes the oil to undergo polymerization. This is the same chemical process that seasons a cast-iron skillet. The oil bonds with the metal, creating a slick, dark, protective layer.
This protective coating does four critical things for your smoker:
1. Rust protection: The polymerized oil layer seals the metal against moisture. Without it, even a small amount of condensation inside your smoker can start surface rust within days.
2. Removes factory residues: New smokers ship with manufacturing oils, dust, and metal shavings. The high heat of seasoning burns these off so they never touch your food.
3. Better heat distribution: The dark, seasoned surface absorbs and radiates heat more evenly than bare metal. This means fewer hot spots and more consistent cooking temperatures.
4. Flavor building: Each seasoning layer adds to a flavor patina. Over time, this builds complexity that makes food cooked in your smoker taste better than food cooked in a brand-new one.
What happens if you do not season your smoker? From my experience and countless forum discussions, the most common problems are a metallic chemical taste on first cooks, rapid rust formation, and food sticking to the grates. I have seen smokers develop rust patches within two weeks of being unseasoned.
Step-by-Step: How to Season a New Smoker Before First Use
This is the exact process I have used on three different smokers over the years. Follow these steps in order and you will have a properly seasoned smoker ready for its first cook.
Step 1: Clean the Interior Thoroughly
Start by removing all the grates, racks, water pans, and drip trays. Wash each piece with warm soapy water and a sponge. Some people skip soap, but I always use a mild dish soap for the initial clean because factory machining oils are stubborn.
For the interior walls and lid, use paper towels or a clean rag with warm soapy water. Wipe down every surface. You do not need to scrub aggressively, but you do need to remove visible dust and oil films. Rinse everything with clean water and dry thoroughly with towels.
Leave the doors open for 30 minutes to let any remaining moisture evaporate. Water trapped under your oil layer will cause exactly the rust you are trying to prevent.
Step 2: Choose Your Oil
You need an oil with a high smoke point. This is the temperature at which the oil starts to break down and burn rather than polymerize. The ideal range is 400 degrees Fahrenheit or higher.
The three most recommended oils in the BBQ community are canola oil, grapeseed oil, and peanut oil. All three have smoke points between 400 and 450 degrees Fahrenheit. I personally use canola oil because it is affordable, widely available, and works reliably across every smoker type.
Avoid butter, margarine, and animal fats like bacon grease for your initial seasoning. These contain water and milk solids that can go rancid. Some experienced smokers do use bacon fat for re-seasoning to add flavor, but for your first time, stick with a neutral vegetable-based oil.
Step 3: Apply Oil to All Interior Surfaces
Pour a small amount of oil onto a paper towel or clean rag. I mean a small amount. Think of it as a thin film, not a coating. Too much oil creates a sticky mess that never fully polymerizes.
Wipe down every interior surface. This includes the walls, the inside of the lid, the firebox if you have an offset, the cooking grates, the warming racks, and even the water pan. If it is metal and inside the smoker, it gets oiled.
After applying the oil, take a dry paper towel and wipe off any excess. The surface should look slightly glossy but not wet. If you see pooling oil, you have used too much. Wipe it down again.
Step 4: Heat the Smoker to the Right Temperature
Now bring your smoker up to temperature. The target range for seasoning is between 250 and 350 degrees Fahrenheit. I recommend starting at 275 degrees Fahrenheit as a reliable middle ground that works for all smoker types.
If you are using a charcoal or offset smoker, build your fire and let it stabilize. For pellet smokers, set the controller to your target temperature. Electric smokers just need the dial set correctly. Gas smokers should start on medium heat and adjust from there.
The key is maintaining a steady temperature. Wild swings between 200 and 400 degrees will not give the oil time to properly polymerize. Keep it steady in that 250 to 350 range.
Step 5: Let It Smoke for 2 to 4 Hours
Once your smoker hits the target temperature, let it run for at least 2 hours. I prefer 3 hours for a first seasoning. Some BBQ pros run theirs for 4 to 6 hours. The longer the heat exposure, the more complete the polymerization.
You do not need to add wood for seasoning. You can if you want the extra smoke flavor, but the oil polymerization happens from heat alone. If you do add wood, use a mild wood like apple or pecan. Strong woods like mesquite can leave a bitter taste in the seasoning layer.
During this time, you will notice smoke coming from the smoker. This is normal. It is the factory residues burning off and the oil beginning to bond with the metal.
Step 6: Cool Down and Inspect
After the time is up, let the smoker cool naturally. Do not open the lid to speed things up. Sudden temperature changes can cause the seasoning layer to crack. Let it sit until it reaches room temperature, which typically takes 2 to 3 hours.
Once cool, open the lid and inspect the interior. The metal should have a darker, slightly glossy appearance. It should feel smooth to the touch, not sticky. If it feels tacky, you used too much oil. Run the smoker for another hour at 300 degrees to finish the polymerization.
If the surface looks patchy or uneven, do not worry. Reapply a thin layer of oil and repeat the heating process. Seasoning builds over time.
Best Oils for Seasoning Your Smoker
Choosing the right oil confuses more new smoker owners than any other part of the process. The BBQ community on Reddit and smoking forums debates this constantly. Here is what you need to know.
Grapeseed oil has the highest smoke point of common options at around 445 degrees Fahrenheit. It produces a hard, durable seasoning layer. It is my top recommendation if budget is not a concern.
Canola oil is the most popular choice. It has a smoke point around 400 degrees Fahrenheit, is affordable, and works well across all smoker types. This is what I use for every seasoning.
Peanut oil sits around 450 degrees Fahrenheit and creates a solid seasoning. It does have a faint nutty aroma that some people notice on first cooks. If anyone in your household has a peanut allergy, obviously avoid this option.
Avocado oil has the highest smoke point at roughly 520 degrees Fahrenheit. It works exceptionally well but costs significantly more than the alternatives. I would only recommend it if you already have it on hand.
Vegetable oil blends work fine in a pinch. Their smoke points vary by brand but generally fall between 400 and 450 degrees. Check the label before using.
One question that comes up constantly in forums is whether you can use Pam cooking spray. The short answer is technically yes, but I do not recommend it. Pam contains propellants and additives that are not designed for high-heat polymerization. Some users report a sticky residue that never fully cures. Use plain oil instead.
Different Smoker Types: Seasoning Variations
The core seasoning process is the same across all smoker types, but each has a few specific considerations.
Offset smokers need extra attention on the firebox. The firebox reaches much higher temperatures than the cooking chamber, so the oil polymerizes faster there. Coat it thoroughly but expect it to develop a darker patina more quickly. Season the cooking chamber and firebox separately if your smoker allows it.
Pellet smokers make seasoning easy because the digital controller maintains temperature automatically. Set it to 275 degrees Fahrenheit and walk away for 3 hours. Some pellet smoker manufacturers, like Traeger and Pit Boss, include a preseasoning cycle in their startup instructions. Always follow the manufacturer cycle first, then do a longer manual seasoning.
Electric smokers like Masterbuilt models heat up quickly and hold temperature well. The main consideration is that electric elements do not produce the radiant heat that fire does. Run your electric smoker at 300 degrees Fahrenheit for at least 3 hours to ensure complete polymerization.
Vertical smokers of any fuel type have a temperature gradient from bottom to top. The bottom shelves will season faster. Rotate the racks halfway through the process for even coverage.
Signs Your Smoker Is Properly Seasoned
One of the most common forum questions is how to tell when seasoning is complete. There is no timer that dings. You need to look for visual and tactile cues.
A properly seasoned smoker has a uniform dark gray or black interior. The metal should look slightly glossy but not wet. Run your fingers across the surface. It should feel smooth and slightly slick, like a well-seasoned cast-iron pan. If it feels sticky, gummy, or rough, it needs more heat time.
The smell test also works. Before seasoning, a new smoker has a metallic chemical odor. After seasoning, it should smell neutral or faintly smoky. If you still smell chemicals or solvents, run another heat cycle.
Common Seasoning Mistakes to Avoid
Over five years of smoking and hundreds of forum posts, the same mistakes appear repeatedly. Here are the ones that cause the most damage.
Using too much oil. This is the number one mistake. A thick oil layer never fully polymerizes and stays sticky forever. When in doubt, use less. You can always add another thin coat.
Skip the cleaning step. Factory machining oils and metal dust will get trapped under your seasoning layer. Take the 20 minutes to clean before oiling.
Heating too hot or too fast. Cranking your smoker to 500 degrees to speed up the process burns the oil instead of polymerizing it. Keep it in that 250 to 350 range.
Using flavored or infused oils. Garlic-infused olive oil, truffle oil, or any low smoke-point cooking oil will ruin your seasoning. Stick with neutral, high smoke-point options.
Not re-seasoning. Even a perfectly seasoned smoker needs maintenance. Re-season every 3 to 6 months, or whenever you notice rust spots, food sticking, or the finish looking dull.
FAQs
How to season a new smoker for the first time?
Clean all interior surfaces with soapy water, dry thoroughly, apply a thin coat of high smoke-point oil (canola or grapeseed), heat the smoker to 275 degrees Fahrenheit for 2 to 4 hours, then let it cool naturally. The oil will polymerize and create a protective coating on the metal.
Do you have to season a smoker before first use?
Yes, you absolutely should season a new smoker before first use. Seasoning burns off factory chemicals and machining oils, creates a rust-resistant protective layer, and prevents metallic flavors from transferring to your food. Skipping this step leads to poor-tasting food and premature rust.
Can I use Pam to season a smoker?
It is not recommended to use Pam cooking spray for seasoning a smoker. Pam contains propellants and additives that do not polymerize properly at high temperatures and can leave a sticky residue. Use plain canola, grapeseed, or peanut oil applied with a paper towel for best results.
What should I smoke in my smoker for the first time?
A pork shoulder or pork butt is the ideal first smoke. It is forgiving, inexpensive, and the high fat content helps continue seasoning the smoker through the cooking process. Chicken thighs are another good option for beginners as they cook quickly and are hard to overcook.
Conclusion
Learning how to season a new smoker before first use takes about 30 minutes of hands-on work and a few hours of patience. Clean thoroughly, apply a thin layer of high smoke-point oil, heat to 275 degrees Fahrenheit for 2 to 4 hours, and let it cool. That is all it takes to protect your smoker, improve your food, and extend the life of your equipment. Your first cook will thank you for it.
Remember to re-season every few months to keep that protective layer strong. A well-maintained smoker will reward you with better BBQ for years to come. Fire it up, and happy smoking.