
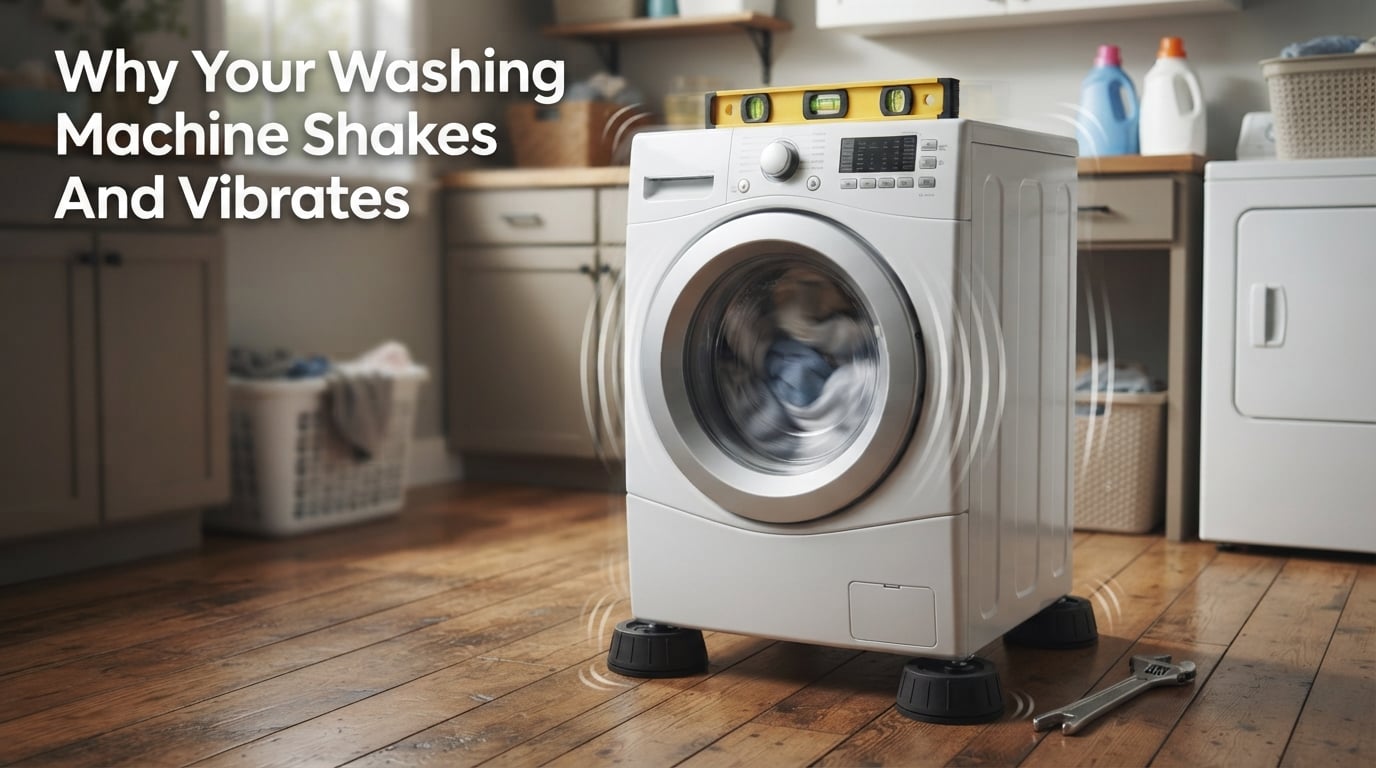
Your washing machine is rattling across the laundry room floor again. The walls are vibrating, the floor is shaking, and you are wondering if the whole thing is about to break apart. Understanding why your washing machine shakes and vibrates is the first step to fixing it before the problem damages your appliance, your floors, or your peace of mind.
Most washing machine vibration comes from a handful of fixable causes: unbalanced loads, unlevel legs, shipping bolts left in place, or worn suspension components. Professional repairs typically run $150 to $400, but many of these issues you can diagnose and fix yourself in under an hour.
In this guide, I will walk you through every common cause of washer vibration, a step-by-step troubleshooting process you can follow today, and clear guidance on when to call a professional versus when you can handle it yourself.
Is It Normal for a Washing Machine to Vibrate?
Some vibration during the spin cycle is completely normal. Your washing machine drum spins at 800 to 1,400 RPM during the spin cycle, and that kind of rotational force will always produce some movement. A slight hum or gentle vibration that you can feel through the floor is expected behavior on any modern washer.
Excessive vibration is a different story. If your washer is walking across the floor, shaking the walls, making loud banging noises, or moving more than half an inch from its starting position during a spin cycle, something is wrong. That level of washer shaking during spin cycle indicates a problem that needs attention.
The line between normal and excessive is straightforward. A properly leveled, properly loaded washing machine should stay in one place and produce a low, steady sound. If you can hear the machine from another room or feel the floor vibrating through your feet significantly, you are dealing with abnormal vibration.
Reddit users on r/Appliances frequently ask how much shaking is too much. The community consensus is clear: if the machine physically moves from its spot, shakes violently enough to rattle nearby cabinets, or makes banging sounds, you have a problem that needs fixing.
Safety First: What to Do When Your Washer Shakes Violently
If your washing machine is shaking violently right now, stop the cycle immediately. Press the pause or cancel button and let the drum come to a complete stop before doing anything else. Running a violently shaking washer can damage internal components, crack the drum, tear hoses, and cause water leaks.
Here are the immediate steps to take:
Stop the machine and unplug it from the wall outlet
Check if the machine has moved from its original position and slide it back
Open the lid or door and redistribute the clothes evenly around the drum
Check that all four leveling legs are touching the floor firmly
Remove any items that might be clumped together, especially comforters or heavy rugs
Restart the spin cycle after redistributing the load
Never ignore persistent violent shaking. Forum users on r/HomeImprovement report that running a shaking washer for extended periods has caused cracked floor tiles, damaged subfloors, and ruined bearings that turned a $20 fix into a $400 repair.
Why Your Washing Machine Shakes and Vibrates: Common Causes
Let us break down each common cause of washing machine vibration, what it sounds and feels like, and how to identify it.
1. Unbalanced Load
This is the single most common reason a washing machine vibrates excessively. When all the clothes bunch up on one side of the drum, the weight distribution becomes uneven. At spin speeds of 1,000+ RPM, even a few pounds of offset weight creates significant centrifugal force.
You will usually notice unbalanced load shaking as a rhythmic thumping or banging during the spin cycle. The machine may also rock side to side rather than staying put.
Single bulky items cause most unbalanced loads. Washing one heavy comforter, a single bathmat, or a pair of sneakers alone in the drum almost guarantees imbalance. The fix is simple: add a few towels or smaller items to balance the load.
Overloading produces similar symptoms. An overstuffed drum cannot distribute clothes evenly, and the machine cannot spin properly. Most manufacturers recommend filling the drum no more than three-quarters full.
2. Uneven Leveling Legs
Four leveling legs support your washing machine, and all four must press firmly against the floor. If even one leg is off, the machine rocks during the spin cycle and transfers that vibration through the floor and walls.
This issue develops over time. Wood floors flex with humidity changes, and vibration gradually loosens the lock nuts on adjustable feet. A machine that was perfectly level when installed can become unlevel after a few months.
You do not need any special tools to check. Press down on each corner of the washer. If any corner rocks or lifts, that leg needs adjustment. A bubble level placed on top of the machine confirms whether the drum sits truly horizontal.
3. Shipping Bolts Still Installed (Front-Load Washers)
Front-load washers ship with four shipping bolts that lock the drum in place during transport. These bolts must be removed before the machine is used. If they are left in, the drum cannot move freely and the machine shakes violently on the first spin cycle.
This problem almost exclusively affects brand-new installations or recently moved machines. If your front-load washer shakes right after delivery or after a move, check for shipping bolts before anything else.
The bolts are located on the back panel, usually four of them in a rectangular pattern. They are clearly marked in the installation manual. Removing them takes about five minutes with a wrench. Save them if you ever plan to move the washer again.
Reddit’s r/howto community sees this question regularly. Users who purchased new Samsung and LG front-load washers frequently report violent shaking on the first load, and the answer is almost always forgotten shipping bolts.
4. Worn Shock Absorbers (Front-Load Washers)
Front-load washing machines use two to four shock absorbers to dampen drum movement during the spin cycle. Over years of use, these absorbers wear out and lose their ability to control drum motion. The result is excessive vibration that gets progressively worse.
Worn shock absorbers produce a different feel than an unbalanced load. The shaking is consistent regardless of load size, and you may hear a clunking or grinding sound from the bottom of the machine during the spin cycle.
You can test shock absorbers yourself. Unplug the machine, remove the lower front panel, and locate the absorbers. Grab each one and try to push and pull the piston. A healthy shock absorber resists movement firmly. If it slides freely or feels loose, it needs replacement.
Replacement shock absorbers cost $30 to $60 per pair. The repair takes about 30 minutes if you are comfortable removing panels. Expect to replace these every 5 to 8 years on a front-load washer used regularly.
5. Suspension Rod Failure (Top-Load Washers)
Top-load washing machines use four suspension rods instead of shock absorbers. These rods hold the tub assembly and allow it to move during agitation and spin. When the rods lose tension or the springs on them break, the tub drops too low and bounces during the spin cycle.
Symptoms include a loud banging sound during spin, the tub visibly dropping when you push down on it, and the washer shaking more with every load. This is one of the most common failures on top-load washers after 5 to 10 years of use.
Test the suspension rods by pushing down firmly on the tub. It should resist and return to position smoothly. If the tub drops easily, bottoms out, or makes grinding sounds, the rods are worn out. A full set of four suspension rods costs $40 to $70 and takes about 45 minutes to replace.
6. Worn Drum Bearings or Spider Assembly
Drum bearings allow the inner drum to spin smoothly. When these bearings fail, you hear a loud roaring or grinding noise during the spin cycle. The drum also has excessive play when you push it with your hand.
Test for bearing failure by opening the door and lifting the top of the inner drum, then pushing down. If the drum moves more than a fraction of an inch or you feel grinding, the bearings are likely failing.
The spider assembly is the three-arm bracket that connects the drum to the bearing shaft. On front-load washers, corrosion from detergent residue can eat through this aluminum part over time. When the spider arm breaks, the drum drops and the machine vibrates severely.
Both bearing and spider assembly failures are serious repairs. Parts cost $80 to $150, but labor can take 2 to 4 hours. On some machines, the entire rear tub half must be replaced because the bearing is press-fit into it.
7. Weak or Flexible Flooring
The floor under your washing machine matters more than most people realize. A washing machine spinning at 1,200 RPM generates significant lateral force, and that force transfers directly into the floor. If the floor flexes, it amplifies the vibration.
Wood subfloors are the most common culprit. Over time, floor joists can flex under the combined weight of a washer filled with water and clothes, especially on second-floor laundry rooms. Tile floors over flexing subfloors can crack.
Concrete floors rarely have this problem because they do not flex. If your washer sits on concrete and still shakes, the cause is almost certainly something other than the floor.
Front-Load vs Top-Load Shaking: Key Differences
Front-load and top-load washers have different designs, and their vibration problems differ accordingly. Knowing which type you have helps narrow down the cause faster.
Front-Load Washer Specific Issues
Front-load washers spin faster than top-loaders, typically 1,200 to 1,400 RPM compared to 600 to 800 RPM for traditional top-load machines. Higher spin speeds mean more vibration when something is wrong. Front-loaders rely on shipping bolts for transport, shock absorbers for dampening, and a counterweight system for stability.
The most common front-load specific issues are shipping bolts left in after installation, worn shock absorbers, and spider assembly corrosion. Samsung front-load washers are frequently mentioned in forums for suspension-related vibration issues, while LG models sometimes develop bearing problems after 5 to 7 years.
Top-Load Washer Specific Issues
Traditional top-load washers with agitators vibrate less during spin because they spin slower. However, they have their own set of issues. Suspension rod failure is the dominant problem. The snubber ring, a friction pad that stabilizes the tub base, also wears out and allows excessive tub movement.
HE (high-efficiency) top-load washers without agitators spin faster, closer to front-load speeds. These machines share more vibration characteristics with front-loaders. Whirlpool top-load washers commonly see suspension rod and snubber ring wear after several years.
Quick Reference: Type-Specific Causes
Front-load washers: Check shipping bolts, shock absorbers, counterweights, spider assembly, and door seal. Top-load washers: Check suspension rods, snubber ring, damper pads, and balance ring.
How to Fix a Shaking Washing Machine: Step-by-Step DIY Troubleshooting
Follow these steps in order. Each takes only a few minutes, and you will likely find the problem before reaching the final step.
Tools You Will Need
A bubble level (or smartphone with a level app)
An adjustable wrench
A flashlight
A screwdriver set
A helper (washers are heavy)
Step 1: Redistribute the Load
Stop the machine and open the drum. Spread clothes evenly around the drum in a loose ring. If you are washing a single heavy item like a comforter, add 3 to 4 towels to balance the weight. Restart the spin cycle.
If the shaking stops, the problem was load imbalance. If it continues, move to Step 2.
Step 2: Check for Level
Place a bubble level on top of the washer, front to back and side to side. The bubble should sit between the center marks in both directions. If it does not, the machine needs leveling.
Adjust the leveling legs by loosening the lock nut, twisting the foot to extend or retract it, and retightening the lock nut. Recheck with the level. Repeat until the machine reads level in both directions.
Press down firmly on each corner. The machine should not rock. If one corner lifts, adjust that leg until all four contact the floor firmly. Tighten all lock nuts against the machine body to prevent the legs from shifting.
Step 3: Verify Shipping Bolts Are Removed
For front-load washers, check the back panel for shipping bolts. If four bolts are still installed, remove them with a wrench. Store them for future moves. Plug the holes with the plastic caps that came with the machine.
Step 4: Inspect the Floor
Stand next to the machine while it spins. If the floor visibly flexes or bounces, the floor is part of the problem. Place a sheet of paper under each leveling leg and try to pull it out. If paper slides freely under any leg, that leg is not making solid contact.
For wood floors that flex, consider adding anti-vibration pads under each leg. These rubber pads absorb vibration and prevent it from transferring into the floor structure.
Step 5: Test the Suspension System
For front-load washers: Unplug the machine, remove the lower access panel, and locate the shock absorbers (usually two or four at the bottom). Push and pull each absorber piston. It should resist firmly. If any moves freely, replace all of them as a set.
For top-load washers: Unplug the machine, open the lid, and push down firmly on the agitator or drum. The tub should resist and spring back. If it drops easily, grinds, or stays down, the suspension rods need replacement.
Step 6: Check for Bearing Failure
Open the washer door and grab the top of the inner drum. Lift up and push down with moderate force. The drum should move no more than a tiny fraction of an inch. If it wiggles significantly, or if you hear grinding, the bearings may be failing.
Spin the drum by hand. It should turn smoothly and quietly. A grinding, roaring, or rough feeling during manual rotation confirms bearing trouble.
Step 7: Listen for Specific Sounds
Run an empty spin cycle and listen carefully. A rhythmic thumping usually means unbalanced load or unlevel machine. A continuous grinding or roaring points to bearings. A single loud bang at the start of spin often indicates a broken suspension component.
Second-Floor Laundry Room: Special Vibration Solutions
Second-floor laundry rooms amplify every vibration problem because wood floor joists flex under dynamic loads. What would be a minor vibration on a concrete floor becomes a whole-house event when the washer is upstairs.
I have read dozens of forum threads from homeowners dealing with this exact situation. The most effective solutions combine multiple approaches rather than relying on one fix.
Anti-Vibration Pads
Rubber anti-vibration pads sit under each leveling leg and absorb vibration before it reaches the floor. Good quality pads reduce vibration transmission by 50 to 70 percent. They cost $25 to $40 for a set of four and install in minutes.
Look for pads made from dense rubber, not foam. Foam compresses under the weight of a full washer and loses effectiveness. Solid rubber pads maintain their damping properties for years.
Floor Reinforcement
If anti-vibration pads are not enough, the floor itself may need reinforcement. Adding blocking between floor joists, sistering joists with additional lumber, or installing a layer of plywood over the existing subfloor all increase floor stiffness.
This is a bigger project that may require a contractor, but for homes where the laundry room shakes the ceiling below, it is often the only permanent fix. The cost typically runs $300 to $800 depending on access and joist configuration.
Pedestal Considerations
Some homeowners add pedestals to raise their front-load washers. Pedestals can actually increase vibration because they raise the center of gravity. If you use a pedestal, make sure it is the manufacturer’s matching unit, installed per instructions, and that the combined unit is properly leveled.
When to Call a Professional (and What It Costs)
Many washer vibration problems are fixable with basic tools and 30 minutes of your time. But some situations call for a professional technician.
Call a Professional If:
You have leveled the machine, balanced loads, and checked the floor, but violent shaking continues
You hear grinding or roaring during spin that indicates bearing failure
The drum has visible play when you push it by hand
Your washer is under warranty (DIY repairs may void it)
You are not comfortable removing panels and working with internal components
The machine is leaking water along with the vibration
Typical Repair Costs
Based on forum reports and repair estimate data, here is what common washer vibration repairs cost when done professionally:
Suspension rod replacement (top-load): $150 to $280 total, including parts at $40 to $70 and labor. Shock absorber replacement (front-load): $180 to $350, including parts at $30 to $60 per pair. Bearing replacement: $250 to $450, as this is labor-intensive and sometimes requires replacing the entire rear tub. Spider assembly replacement: $300 to $500 for parts and labor. Service call and diagnostic fee: $75 to $150, often applied toward repair cost if you proceed.
Repair or Replace?
If repair costs approach 50 percent of a new washer’s price, replacing the machine usually makes more sense. For a washer over 8 years old with bearing failure, replacement is often the smarter financial choice. A new washer costs $500 to $1,200 depending on type and features, and newer models generally have better vibration control technology.
For washers under 5 years old, individual component replacement is almost always worth it. Parts are still readily available, and the machine has many useful years remaining.
How to Prevent Washing Machine Vibration
Preventing washer vibration is easier than fixing it. These habits keep your machine running smoothly for years.
Loading Best Practices
Always distribute clothes loosely around the drum rather than dumping them in a pile. Mix large and small items in each load. Never wash a single heavy item alone. Fill the drum to about 75 percent capacity for best results.
When washing comforters, blankets, or pillows, pause the cycle after 2 minutes of washing. Open the lid and manually redistribute the item. This prevents the clumping that causes spin-cycle imbalance.
Regular Maintenance Checklist
Check leveling every 3 to 4 months. Place a level on top and verify all four legs still contact the floor firmly. Tighten lock nuts that have loosened from vibration.
Inspect shock absorbers or suspension rods annually if your washer is over 4 years old. Look for signs of wear, leaking fluid, or loose connections.
Use the correct amount of HE detergent. Excess suds can throw off the machine’s balance sensors and cause longer, rougher spin cycles. Follow manufacturer recommendations, which are typically far less detergent than most people use.
Keep the Area Clean
Detergent residue, lint, and debris under the machine can cause uneven weight distribution and prevent leveling legs from sitting flat. Pull the machine out and clean underneath every 6 months. This also lets you inspect for leaks or worn components early.
FAQs
How to fix a washing machine that’s shaking or vibrating?
Start by redistributing the load evenly in the drum, then check that all four leveling legs press firmly against the floor. Use a bubble level on top of the machine to confirm it is level front-to-back and side-to-side. For front-load washers, verify shipping bolts were removed. If these steps do not resolve the shaking, inspect shock absorbers or suspension rods for wear, as these are common failure points after 5 to 10 years of use.
Is it safe to use a shaking washing machine?
No, it is not safe to use a washing machine that shakes violently. Running a shaking washer can damage internal components, crack the drum, tear water hoses, damage your floors, and cause leaks. Stop the cycle immediately, diagnose the cause, and fix it before running another load. Mild vibration during spin cycle is normal, but violent shaking that moves the machine or rattles walls indicates a problem that needs attention.
How do I stop my washing machine from shaking?
To stop your washing machine from shaking, follow these steps: 1) Redistribute clothes evenly in the drum. 2) Level the machine using a bubble level and adjust the leveling legs. 3) Remove shipping bolts on front-load washers. 4) Place anti-vibration pads under each leg if the floor is flexible. 5) Replace worn shock absorbers or suspension rods if the machine is over 5 years old. 6) Avoid washing single heavy items alone.
How much does it cost to fix a shaking washing machine?
Professional repair for a shaking washing machine typically costs $150 to $400. Suspension rod replacement on a top-load washer runs $150 to $280. Shock absorber replacement on a front-load washer costs $180 to $350. Bearing replacement is the most expensive repair at $250 to $450. If repair costs exceed 50 percent of a new washer’s price, replacement is usually the better financial choice.
What do I do if my washer is shaking violently?
Stop the cycle immediately and unplug the machine. Wait for the drum to stop spinning completely. Open the door and redistribute the clothes evenly. Check that all four leveling legs touch the floor. Remove the load and run an empty spin cycle to see if the machine still shakes. If it does, the problem is likely the suspension system, shipping bolts, or floor instability rather than the load.
How do I rebalance my washing machine drum?
You cannot rebalance the drum itself, but you can rebalance the machine. Place a bubble level on top of the washer. Adjust each leveling leg by loosening the lock nut, twisting the foot to extend or retract, and tightening the lock nut. Check level in both directions. Press down on each corner to confirm all four legs contact the floor firmly. If the inner drum itself wobbles when pushed by hand, the issue is worn bearings or suspension, not leveling.
Why does my washer shake during the spin cycle even with balanced loads?
If your washer shakes even with properly balanced loads, the cause is likely unlevel legs, worn suspension components, or shipping bolts still installed. Check leveling first using a bubble level. Then inspect shock absorbers on front-load washers or suspension rods on top-load washers for wear. For new installations, verify shipping bolts were removed from the back panel.
Conclusion
Understanding why your washing machine shakes and vibrates puts you in control of the situation instead of at its mercy. Most vibration problems trace back to one of seven causes: unbalanced loads, unlevel legs, shipping bolts, worn shock absorbers, failed suspension rods, bad bearings, or flexible flooring.
Start with the simplest fixes first. Redistribute your load, check the level, and verify shipping bolts are removed. These three steps resolve the majority of washer shaking issues without any cost or tools beyond a bubble level. If those do not solve it, work through the suspension and bearing tests.
For machines over 8 years old with major component failures, weigh the $150 to $400 repair cost against the price of a new washer. Sometimes walking away is the right call. But for newer machines, a $50 set of suspension rods or shock absorbers can buy you years of quiet, stable laundry days.