
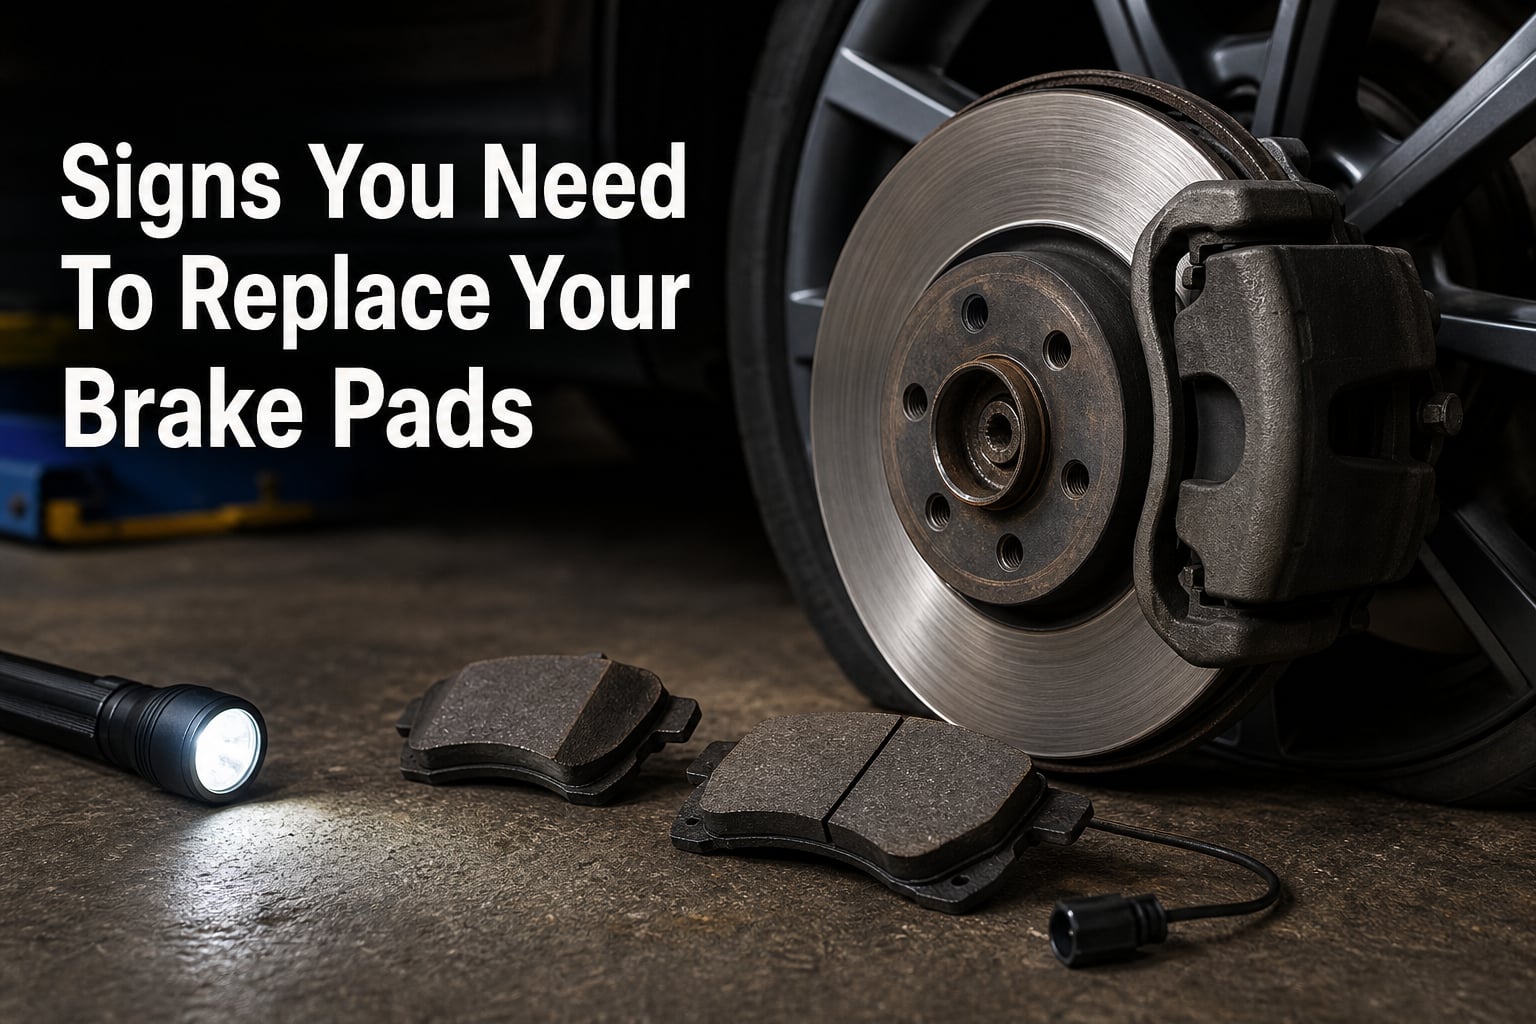
When I first started paying attention to my own vehicle maintenance, brake pads were the component that confused me the most. I could hear the squealing, but I had no idea if that meant I needed to replace them immediately or if I had weeks left. Knowing the signs you need to replace your brake pads is one of those skills that saves you money and keeps you safe on the road.
Brake pads are the friction material that presses against your vehicle’s rotors every time you step on the brake pedal. Over tens of thousands of miles, that friction wears the pad material down until there is almost nothing left. Ignoring the warning signs turns a routine pad replacement into a full brake system repair costing several times more.
In this guide, I will walk you through every warning sign to watch for, how to inspect your brake pads at home without removing your wheels, and exactly when you should stop driving and get to a shop. Whether you do your own brake work or just want to know if your mechanic is being honest, this article gives you the information you need.
How Brake Pads Work (And Why They Wear Out)
Every time you press the brake pedal, your car’s hydraulic system sends brake fluid to the calipers at each wheel. Those calipers clamp the brake pads against the spinning metal rotors. The friction between the pad material and the rotor surface is what slows and stops your vehicle.
Most modern cars use disc brakes on at least the front wheels. The brake pad sits inside the caliper and slides against a flat, circular rotor when pressure is applied. Some older or economy vehicles still use drum brakes on the rear, where curved brake shoes press outward against the inside of a round drum. Both systems rely on friction material that wears down with every stop you make.
New brake pads typically start with 10 to 12 millimeters of friction material. That material is bonded to a metal backing plate that never wears away. When the friction material gets thin, the pad loses its ability to absorb heat and create consistent friction. That is when you start noticing performance changes, unusual sounds, and physical warning signs.
Wear and tear is completely normal, but the rate depends heavily on your driving conditions. City driving with constant stop-and-go traffic wears pads much faster than open highway cruising. Mountainous terrain, towing heavy loads, and brake-riding habits can cut brake pad life in half compared to the average.
Signs You Need To Replace Your Brake Pads
Your brake system gives you plenty of warning before it fails, but only if you know what to look for. Here are the eight most common signs you need to replace your brake pads, ranked from early warnings to critical red alerts.
If you notice any combination of these symptoms, it is time to inspect your pads or have a trusted mechanic take a look. Catching worn brake pads early prevents rotor damage, keeps repair costs low, and most importantly keeps you and your passengers safe.
Squealing or screeching noise when braking
Deep grinding metal sound
Visible pad thickness under 1/4 inch (about 3mm)
Longer stopping distance than usual
Brake pedal vibration or pulsation
Car pulls to one side when you brake
Clicking or rattling noise from the wheels
Dashboard brake warning light illuminated
1. Squealing or Screeching Noise When Braking
That high-pitched squeal when you apply the brakes is usually your first warning sign. It comes from a small metal tab built into the brake pad called a wear indicator. When the friction material wears down to about 3mm or less, this metal tab makes contact with the rotor surface and creates a deliberate squealing sound to alert you.
Wear indicators are designed to make noise before the pad is completely gone. Think of it as a built-in alarm system telling you it is time to schedule a brake pad replacement soon. You typically still have some driving left at this stage, but you should not ignore it for long.
However, not all squealing means your pads are worn out. Moisture from rain, morning dew, or even car washing can cause a thin layer of rust on the rotors that produces a temporary squeak. This usually goes away after a few brake applications. If the squealing persists for more than a day or two of normal driving, it is time to check your pad thickness.
Forum users across Reddit communities like r/MechanicAdvice and r/AskDad consistently report squealing as the sign they noticed first. Many describe being tempted to ignore it, only to find out later that waiting turned a simple pad swap into a much larger repair.
2. Deep Grinding Metal Sound
A grinding or growling sound when you brake is a critical warning. This means the friction material on your brake pads is completely worn away, and the steel backing plate is now grinding directly against the metal rotor. You are experiencing metal-on-metal braking, and it will damage your rotors rapidly.
This is not an early warning sign. It is an emergency. Every mile you drive with grinding brakes gouges deeper grooves into your rotors. What should have been a straightforward brake pad replacement now requires new rotors as well, doubling or tripling your repair cost.
Drivers who have experienced grinding brakes describe it as a deep, low rumbling or metallic scraping sound. Some compare it to the sound of metal dragging on pavement. If you hear this, stop driving and get your vehicle to a brake shop or garage immediately.
From the forum discussions I reviewed, users who delayed replacing pads after the grinding started frequently ended up needing new calipers too. Metal-on-metal contact generates extreme heat that can warp components throughout the brake system. What started as a $150 pad replacement becomes a $600-plus repair.
3. Visible Thin Brake Pads (Under 1/4 Inch)
You can often see your brake pads without removing the wheels. Looking through the spokes of your alloy wheel, the pad sits between the caliper and the flat rotor disc. The friction material is the dark, compressed layer pressed against the shiny metal surface.
New pads have 10 to 12mm of friction material, which is roughly 3/8 to 1/2 inch thick. When that material wears down to less than 1/4 inch (about 3mm), it is time to plan a replacement. At 1/8 inch or less, you are driving on borrowed time and should replace the pads immediately.
Use a flashlight and look through the wheel spokes to inspect the outside pad. You can also take a photo with your phone and zoom in to get a closer look. If you can see that the pad material is thinner than the metal backing plate behind it, the pad is critically worn.
This visual inspection takes about two minutes per wheel and does not require any tools. Many forum users recommend doing this check every month or two as part of your routine. It is the most reliable way to confirm what those squealing noises mean.
4. Longer Stopping Distance Than Usual
If your car takes longer to stop than it used to, your brake pads may be the reason. As the friction material wears thin, the pad cannot generate the same amount of grip against the rotor. This increases your stopping distance, sometimes by several car lengths.
This phenomenon is related to brake fade. Brake fade occurs when the brake system overheats during repeated or prolonged braking. The friction material becomes less effective at high temperatures, and the pedal feels spongy or sinks lower than normal. While brake fade can happen with healthy pads during aggressive driving, worn pads experience it much sooner and at lower temperatures.
You might notice this sign when approaching a familiar stop sign or traffic light. If you find yourself pressing the pedal harder than you used to, or if the car does not decelerate as confidently as before, check your brake pad condition right away.
Reduced braking power is a serious safety concern. At highway speeds, even a few extra feet of stopping distance can be the difference between avoiding a collision and a serious accident.
5. Brake Pedal Vibration or Pulsation
If your brake pedal vibrates, pulses, or shudders when you press it, something is wrong with the braking surface. The most common cause is unevenly worn or warped rotors. The brake pad skips across the high and low spots on the rotor instead of making smooth, consistent contact.
Warped rotors often develop when worn brake pads fail to dissipate heat properly. The uneven pad material allows hot spots to form on the rotor surface, causing the metal to distort. You may also feel this vibration through the steering wheel, especially during higher-speed braking.
It is important to distinguish this from the rapid pulsing you feel during hard braking in a vehicle with anti-lock braking systems (ABS). ABS pulsation is normal and happens only during panic stops on slippery surfaces. If you feel vibration during normal, gentle braking, suspect rotor problems and worn pads.
Warped rotors and worn pads often go hand in hand. Replacing the pads without addressing the rotors will only temporarily fix the vibration, as the new pads will quickly conform to the uneven surface.
6. Car Pulls To One Side When Braking
When you press the brake pedal and the car veers left or right, you likely have uneven brake pad wear. One side is generating more stopping force than the other, pulling the vehicle toward the side with better grip. This can also indicate a stuck or seized caliper on one side of the vehicle.
Uneven pad wear happens for several reasons. A sticking caliper can keep constant pressure on one pad, wearing it down faster than the others. Brake fluid contamination, collapsed brake hoses, or worn suspension components can also create unequal braking force.
Driving with directional pull during braking is unsafe. Your vehicle does not stop in a straight line, which makes it harder to control in an emergency. It also places extra stress on your steering components and suspension system.
Forum users frequently report discovering this sign after nearly drifting into another lane during a hard stop. If your car pulls to one side, inspect all four brake pads and have the calipers checked for proper function.
7. Clicking or Rattling Noise From the Wheels
A clicking, rattling, or clunking sound from your wheels when you brake can indicate loose or damaged brake pads. The pad may be shifting inside the caliper bracket because the retaining clips or hardware are worn or broken. Some vehicles also use springs and anti-rattle shims that can degrade over time.
This clicking noise often happens at low speeds or when you first press the pedal. It is different from the continuous squealing of a wear indicator or the grinding of metal-on-metal contact. Think of it as a mechanical tapping rather than a friction-based sound.
While not as immediately dangerous as grinding brakes, loose pads can eventually dislodge from the caliper entirely. A brake pad that pops out of position will cause sudden, severe braking problems. Have this checked and repaired before it becomes a bigger issue.
8. Dashboard Brake Warning Light Illuminated
Many modern vehicles have electronic brake pad wear sensors that trigger a dashboard warning light when the pads reach a critical thickness. These sensors are small probes embedded in the pad material. When the friction wears down to the sensor level, the probe contacts the rotor and completes an electrical circuit, illuminating the warning.
If you see a brake warning light on your dashboard, do not assume it is a false alarm. Some vehicles use the same light for the parking brake and the pad wear system, so make sure your parking brake is fully released first. If the light stays on, the brake pads are at or near the end of their service life.
Not all vehicles have electronic wear sensors. Many cars rely solely on the mechanical squeal indicators described earlier. If your vehicle does have sensors and the light comes on, replace the pads promptly. The sensors themselves are often one-time-use items that must be replaced along with the pads.
How To Check Brake Pad Thickness Without Removing Wheels
You do not need to be a mechanic to inspect your brake pads. With a flashlight and about five minutes, you can check all four wheels from your driveway. This is one of the most practical skills any vehicle owner can learn, and forum users emphasize it is the single best way to verify what a shop tells you.
Here is a step-by-step process I recommend for checking your brake pad thickness at home.
Step 1: Park on a flat surface and ensure the car is secure. Set the parking brake and turn the steering wheel to full lock. This gives you the best viewing angle through the wheel spokes on whichever side you are checking first.
Step 2: Shine a flashlight through the wheel spokes. Look for the brake caliper, which is the metal assembly bolted over the rotor. The brake pad sits between the caliper body and the flat rotor disc. The pad material is the darker, compressed layer facing the shiny rotor.
Step 3: Estimate the pad material thickness. Compare the visible friction material to a common reference. A new pad is about the thickness of a standard pencil, roughly 10 to 12mm. If the material is thinner than a standard pencil, plan for replacement soon. If it is thinner than a credit card stacked three times (about 3mm or 1/8 inch), replace immediately.
Step 4: Take a photo with your phone. Zoom in on the image to get a more accurate reading. This also lets you compare measurements over time and track how quickly your pads are wearing.
Step 5: Check all four wheels. Front pads typically wear faster than rear pads because the front brakes handle most of the stopping force. Check at least one front and one rear wheel. If you notice uneven wear between left and right sides on the same axle, suspect a caliper or hydraulic issue.
Step 6: Look for scoring and grooves on the rotor. While you are inspecting the pad, check the rotor surface visible through the wheel. Deep grooves, a lip on the outer edge, or a blue discoloration indicate rotor damage from worn pads.
Some wheels have very few or very thick spokes, making it hard to see the pads. In those cases, you can use your phone camera with the flash on, or use a small inspection mirror from an auto parts store. If visibility is poor, most shops will inspect your pads for free or for a small fee during an oil change.
I recommend making this visual inspection part of your monthly routine. It takes less time than checking your tire pressure and gives you early warning long before you hear any noises.
How Long Do Brake Pads Last?
There is no single answer to how long brake pads last, because lifespan depends on your driving conditions, habits, and the type of pads installed. The general industry range is 25,000 to 60,000 miles, but I have seen pads wear out in as little as 15,000 miles and last as long as 80,000 miles in the right conditions.
City driving with frequent stop-and-go traffic is the hardest on brake pads. Every red light, stop sign, and traffic jam means another brake application. If your daily commute involves heavy urban traffic, expect your pads to be at the lower end of the range, closer to 25,000 to 35,000 miles.
Highway driving is much gentler on brakes. Once you reach cruising speed, you use the brakes far less frequently. Highway commuters can often get 50,000 to 70,000 miles from a set of pads.
Mountainous terrain and steep grades significantly accelerate pad wear. Long downhill descents require sustained braking, which generates heat and wears the friction material quickly. If you live in a hilly or mountainous area, check your pads more frequently.
Heavy loads and towing increase the energy required to stop your vehicle. More kinetic energy means more friction and faster pad wear. If you regularly tow a trailer or haul heavy cargo, expect shorter pad life.
Driving habits play a major role. Tailgating, aggressive acceleration followed by hard braking, and brake-riding (resting your left foot on the pedal) all wear pads prematurely. Smooth, gradual braking and maintaining proper following distance extends pad life considerably.
Many mechanics recommend the general guideline of inspecting your brake pads every 12,000 miles or once a year, whichever comes first. This gives you a reliable schedule for monitoring wear without waiting for warning sounds.
The 30-30-30 rule that some drivers reference is not an industry standard, but some interpret it as a simplified inspection guideline: check your brakes around 30,000 miles, inspect again at 30 percent remaining pad material, and replace before you hit 3mm of thickness. Regardless of the mnemonic you use, the key takeaway is to monitor your pads proactively rather than waiting for symptoms to appear.
What Happens If You Keep Driving With Worn Brake Pads
Delaying brake pad replacement does not just risk your safety. It also causes cascading damage that multiplies your repair costs with every mile you drive. Understanding the consequences helps explain why early action matters.
Rotor damage is the most immediate consequence. Once the friction material is gone, the steel backing plate contacts the rotor directly. Within a few hundred miles, this metal-on-metal contact gouges deep grooves into the rotor surface. Rotors that could have been resurfaced for a modest fee now must be replaced entirely.
Caliper damage follows. The excessive heat generated by metal-on-metal braking can cause the caliper piston seals to fail. Brake fluid leaks past the damaged seals, and the caliper may seize either open or closed. A seized caliper means uneven braking, accelerated pad wear on the opposite side, and a repair bill that includes rebuilding or replacing the caliper assembly.
Increased stopping distance puts you and others at risk. Worn pads cannot generate sufficient friction, especially during emergency stops. At 60 mph, even a 10 percent increase in stopping distance adds roughly 12 extra feet before you come to a halt. In traffic, that gap can be the difference between stopping safely and a rear-end collision.
Complete brake failure is the worst-case scenario. While rare with modern dual-circuit brake systems, severely neglected brakes can lose hydraulic pressure or experience catastrophic pad disintegration. Forum users who pushed their brakes too far describe the terrifying experience of a pedal that sinks to the floor with almost no response.
The bottom line is simple. A set of brake pads costs a fraction of what you will pay for pads plus rotors plus calipers. Catching the signs you need to replace your brake pads early is the single most effective way to keep your maintenance costs reasonable.
FAQs
What is the 30 30 rule for brakes?
The 30-30 rule is not an official industry standard, but some drivers use it as a simplified reminder: check your brake pads around 30,000 miles, monitor closely when they reach 30 percent remaining material, and replace them before the thickness drops to 3mm. The key takeaway is to inspect proactively rather than waiting for grinding noises.
What is the average cost to replace brake pads?
Brake pad replacement typically costs between $150 and $300 per axle when done at a shop, including parts and labor. Premium ceramic pads or dealer service can push costs higher. If rotors also need replacement due to damage from worn pads, expect the total to double. DIY replacement costs roughly $40 to $100 per axle for the pads alone.
How do I tell if my brake pads are worn out?
The most reliable signs of worn brake pads include squealing or screeching noises, grinding metal sounds, visible pad thickness under 1/4 inch (about 3mm), longer stopping distances, brake pedal vibration, and the car pulling to one side during braking. You can visually inspect pad thickness through your wheel spokes using a flashlight.
How long do brake pads typically last?
Brake pads generally last between 25,000 and 60,000 miles. City driving with frequent stop-and-go traffic wears pads faster, often reaching the lower end of the range. Highway driving can extend pad life to 50,000 miles or more. Mountainous terrain, heavy towing, and aggressive braking habits all shorten brake pad lifespan.
Can I drive with 80% worn brake pads?
Driving with 80 percent worn brake pads is risky and not recommended for long distances. At that wear level, you have very little friction material remaining, and braking performance is significantly reduced. If you must drive, keep distances short and avoid highway speeds. Schedule a replacement immediately, as pads at this level can deteriorate to metal-on-metal contact very quickly.
Conclusion
Recognizing the signs you need to replace your brake pads is one of the most practical maintenance skills any driver can develop. From that first squealing noise to the more serious grinding sounds, your brake system communicates clearly before it fails. Learning to read those signals protects both your wallet and your safety.
Make a habit of visually inspecting your pad thickness through your wheel spokes every month or two. It takes just a few minutes and gives you early warning long before sounds or vibrations start. When you do hear the squeal or feel the grinding, act quickly. Every mile you delay increases the damage and the cost.
Whether you handle the replacement yourself or take it to a trusted shop, staying informed about your brake system ensures you make the right call at the right time. Safe driving starts with brakes you can trust.