
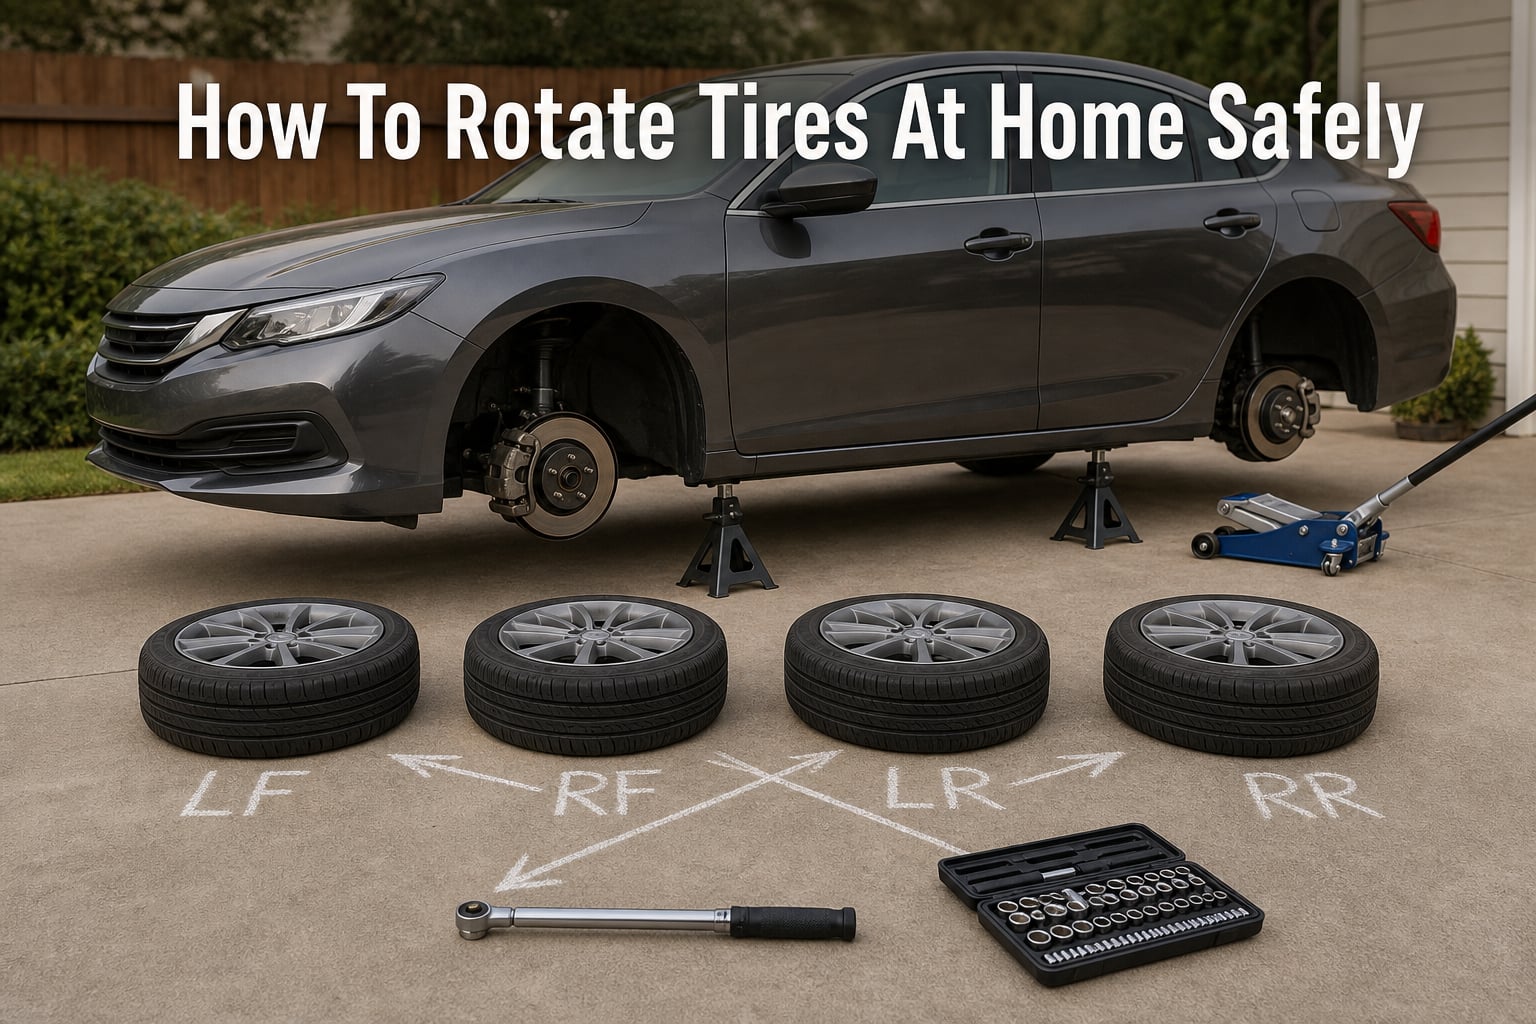
Learning how to rotate tires at home safely can save you $50 to $100 per visit and add thousands of miles to your tire life. The process is straightforward, but safety comes first — you are lifting a two-ton vehicle and working underneath it. This guide walks you through every step, from choosing the right rotation pattern for your drivetrain to properly torquing your lug nuts. By the end, you will have the confidence to rotate tires at home with basic tools you may already own.
Why Tire Rotation Matters
Tire rotation is the practice of moving each tire to a different wheel position so they wear evenly over time. Front tires on a front-wheel-drive car carry the engine’s weight, handle steering, and deliver power — so they wear much faster than rear tires. Without rotation, your front tires might need replacement at 30,000 miles while the rears still have 50,000 miles of tread left.
Even tread wear gives you consistent traction in all four corners, which matters most during emergency stops and wet conditions. It also saves you money. A set of four tires wearing evenly lasts far longer than replacing two at a time because the fronts burned out early.
Our team has talked with dozens of home mechanics on forums like r/MechanicAdvice, and the consensus is clear: rotation is the single highest-impact maintenance task you can do yourself. It requires no special training, just the right tools and a methodical approach.
Tools and Safety Equipment You Need
Before you start, gather everything in one place. Running back to the garage with a wheel off the car is dangerous and frustrating.
Essential Tools Checklist
Floor jack or bottle jack: A hydraulic floor jack rated for your vehicle’s gross vehicle weight rating is the safest choice. Scissor jacks that come with most cars work in emergencies but are less stable for routine maintenance.
Jack stands (minimum two, four preferred): These are non-negotiable. Jack stands are what hold the car up while you work — the jack is only for lifting. Most experienced mechanics recommend four jack stands so you can raise all four corners at once, making the rotation much faster.
Torque wrench: This is the tool most DIYers skip, and it is the one that matters most. Every vehicle has a specific lug nut torque specification, usually between 75 and 100 lb-ft. Guessing by feel leads to over-tightened studs, warped brake rotors, or wheels that come loose.
Socket and breaker bar: A lug wrench or socket set that fits your lug nuts (most are 19mm, 21mm, or 22mm). A breaker bar gives you extra leverage for stubborn nuts.
Wheel chocks: Wood blocks or dedicated chocks to prevent the car from rolling. Place these behind or in front of the wheels that stay on the ground.
Tire pressure gauge: Check and adjust pressure while the tires are off the car for easy access to the valve stems.
Chalk or tape: To mark each tire’s current position before removing them. This prevents confusion once the wheels are off.
Critical Safety Warning
Never work under a vehicle supported only by a hydraulic jack. Jacks can fail, leak hydraulic pressure, or slip off jacking points. Jack stands are the only safe way to support a raised vehicle. If you do not have jack stands, do not attempt this job — schedule a shop visit instead.
Other safety basics: always work on flat, solid ground (concrete is ideal, never dirt or gravel). Engage the parking brake fully. If you are working on a slope at all, stop and find level ground. Remove the key from the ignition so nobody accidentally starts the car while you are underneath.
Tire Rotation Patterns Explained
The rotation pattern you use depends entirely on your drivetrain. Using the wrong pattern can actually accelerate uneven wear, so it is worth getting this right.
Front-Wheel Drive: Forward Cross Pattern
Front-wheel-drive vehicles put the most stress on their front tires because those wheels handle steering, braking, and power delivery. The forward cross pattern moves the rear tires straight forward and crosses the front tires to the rear.
Here is the pattern: move the rear tires straight forward to the front (left rear goes to left front, right rear goes to right front). Then cross the front tires to the rear (left front goes to right rear, right front goes to left rear). This forward cross brings the less-worn rear tires to the high-stress front positions and evens out wear.
Rear-Wheel Drive: Rearward Cross Pattern
Rear-wheel-drive vehicles wear their rear tires faster because those wheels deliver power to the road. The rearward cross is the mirror of the forward cross.
Move the front tires straight back (left front to left rear, right front to right rear). Then cross the rear tires forward (left rear to right front, right rear to left front). This brings the less-worn front tires back to the power-delivering rear axle.
All-Wheel Drive and 4×4: X-Pattern
All-wheel-drive and four-wheel-drive vehicles distribute power to all four wheels, so wear is more even — but rotation is still important. The X-pattern is the most common recommendation.
Each tire moves diagonally: left front goes to right rear, right front goes to left rear, left rear goes to right front, and right rear goes to left front. Every tire changes position, ensuring no tire stays in one spot long enough to develop a wear pattern. Some AWD manufacturers specify a simple front-to-back swap instead, so check your owner’s manual.
Directional Tires: Same-Side Swap Only
Directional tires have a tread pattern designed to rotate in one direction for optimal water evacuation and traction. You can identify them by the arrow molded into the sidewall or a V-shaped tread design.
Directional tires can only move front to back on the same side. Never cross them to the other side of the car, because they would be rotating the wrong way. Left front goes to left rear and vice versa; same for the right side.
Staggered Tire Setups: No Rotation Possible
If your vehicle has different tire sizes on the front and rear (common on sports cars like BMWs, Porsches, and Corvettes), you cannot rotate tires at all. The wider rear tires simply will not fit on the front wheels. In this case, your only option is to replace tires individually as they wear.
How To Rotate Tires At Home Safely: Step-by-Step
Now for the main event. Follow these steps in order, and take your time — especially on your first rotation. A careful first attempt might take 90 minutes. After a few rotations, you will finish in 30 to 45 minutes.
Step 1: Prepare the Vehicle
Park on a flat, solid surface — concrete driveways or garage floors are ideal. Never work on hot asphalt (it can soften and cause jack stands to sink) or on dirt, gravel, or a slope. Engage the parking brake fully.
Place wheel chocks behind the rear wheels if you are lifting the front first, or in front of the front wheels if you are starting at the rear. The chocks prevent any rolling once the car is lifted.
Open your owner’s manual and locate the recommended jacking points. Most vehicles have reinforced pinch welds or frame rails designed to support the jack. Using the wrong spot can dent your floor pan or cause the jack to slip.
Step 2: Break Loose the Lug Nuts (While Car Is on the Ground)
Before lifting anything, use your breaker bar or lug wrench to loosen each lug nut about one-half turn. Do not remove them completely — just break them loose. The weight of the car on the ground keeps the wheel from spinning while you apply force.
Trying to loosen lug nuts on a lifted wheel is a common beginner mistake. The wheel just spins freely, and you cannot get enough leverage. Loosen them on the ground, then finish removing them after the car is lifted.
Step 3: Lift the Vehicle and Place Jack Stands
Position your floor jack at the designated jacking point and pump until the tire is about two inches off the ground. If you have four jack stands, repeat this for all four corners, working front to back or side to side.
Once the vehicle is at the desired height, slide a jack stand under the frame rail or subframe near each wheel. Lower the jack slowly so the vehicle rests on the jack stands, not on the jack itself. Give the car a gentle shake to confirm it is stable before you put any body part underneath.
If you only have two jack stands, lift one end of the car at a time. Lift the front, place stands, swap the front and rear tires on that side, then lower and repeat for the back. This takes longer but is entirely safe.
Step 4: Remove the Wheels and Mark Positions
Finish unscrewing the loosened lug nuts by hand and pull each wheel straight toward you. Heavy wheels can be awkward, so grip the tire at the 9 o’clock and 3 o’clock positions for the best leverage.
Before you set each wheel down, mark its original position with chalk or masking tape. Write “LF” for left front, “RF” for right front, “LR” for left rear, and “RR” for right rear. Lay the wheels out in a row in their current positions so you can see the plan.
Step 5: Rotate Wheels to Their New Positions
Using the rotation pattern for your drivetrain (described above), move each wheel to its new position. Double-check your pattern before installing — it is very easy to mix up left and right when all four wheels are off.
Slide each wheel onto the hub, aligning the bolt holes or studs. Thread each lug nut on by hand first to avoid cross-threading. Once all nuts are finger-tight, you are ready for the most important step.
Step 6: Torque the Lug Nuts in a Star Pattern
Lower the jack slightly so the tire touches the ground and bears some weight but is not fully loaded. This keeps the wheel from spinning while you torque. Set your torque wrench to the specification in your owner’s manual.
Tighten the lug nuts in a star or crisscross pattern — not in a circle. For a five-lug wheel, go to nut 1, then skip to the one roughly opposite (nut 3), then skip again (nut 5), then (nut 2), then (nut 4). This star pattern pulls the wheel evenly against the hub, preventing vibration and ensuring the wheel sits perfectly flat.
Tighten each nut until the wrench clicks, then move to the next. Do not go back and over-tighten — the click means you have reached the correct torque. Over-tightening stretches the studs and can cause them to fail later.
Step 7: Lower the Vehicle Fully
Jack the car up just enough to remove the jack stands, then lower it completely to the ground. Remove the chocks. Now do a final torque pass on all lug nuts with the car’s full weight on the wheels, again using the star pattern.
Step 8: Check Tire Pressure
Use your tire pressure gauge to check each tire, including the spare if you have one. The recommended pressure is printed on a sticker inside the driver’s door jamb — not on the tire sidewall, which shows the maximum pressure. Adjust as needed.
This is also a good time to inspect each tire for damage. Look for nails, screws, cuts, bulges, or uneven wear patterns that might indicate an alignment problem.
Step 9: Test Drive
Take a slow drive around the block, listening for any clicking, vibration, or unusual sounds. If everything feels normal, you are done. If you feel a vibration at speed, re-check your lug nut torque — a wheel may not be seated properly.
One-Jack Alternative Method (No Jack Stands)
Many DIYers on r/Cartalk and r/MechanicAdvice ask how to rotate tires with just one jack and no stands. We want to be clear: you should never get under a car held up only by a jack. But you can still rotate tires with a single jack by doing one wheel at a time.
Here is the method: loosen all lug nuts on the ground, then lift one corner of the car with your jack. Remove that single wheel, set it aside, and do what you need to do. The key limitation is that with only one wheel off the ground at a time, you cannot swap wheels directly — you need a temporary holding spot.
The workaround is to use your spare tire as a placeholder. Remove wheel A, put the spare on that hub and hand-tighten. Move your jack to the next corner, remove wheel B, install wheel A in that spot. Continue around the car, swapping each wheel to its new position using the spare as a temporary stand-in.
This method takes longer and requires a matching spare, but it works if jack stands are not in your budget yet. That said, a pair of jack stands costs less than a single tank of gas, and we strongly recommend investing in them before attempting tire rotation.
How Often Should You Rotate Your Tires?
The general rule is every 5,000 to 7,500 miles. Many drivers tie rotation to their oil change interval as an easy reminder. If you change oil every 5,000 miles, rotate at every oil change.
AWD vehicles benefit from more frequent rotation — every 5,000 miles is ideal because all four tires wear at similar rates, and even small differences in tread depth can stress the differential over time.
Signs your tires are overdue for rotation include visible cupping or scalloped wear on individual tires, a steering wheel that vibrates at highway speeds, or front tires that look noticeably balder than the rears. If you can see a clear difference in tread depth between front and rear by looking at the car, you have waited too long.
For specific vehicles like a Toyota Highlander, the manufacturer recommends rotation every 5,000 miles. Always defer to your owner’s manual for the exact interval — some vehicles have unique requirements.
Pro Tips for Better Tire Rotation
Re-Torque After 25 to 50 Miles
This is the step most guides forget. After driving 25 to 50 miles following your rotation, re-check the lug nut torque on all four wheels. Wheels can settle slightly after installation, and a lug nut that was properly torqued in your driveway may loosen after a few heat cycles and bumps. Experienced mechanics on forums consistently recommend this step, and skipping it is the most common cause of wheel vibration after a DIY rotation.
Keep a Rotation Log
Write down the date, mileage, and pattern you used each time you rotate. A simple notebook in your glove box works fine. This helps you track whether tires are wearing evenly over their lifetime and gives you proof of maintenance if you sell the car or file a tire warranty claim.
Reset Your TPMS If Needed
Some vehicles with direct tire pressure monitoring systems need a TPMS reset after rotation because each sensor is tied to a specific wheel position. Without resetting, your dashboard display may show incorrect pressure readings for each corner. Check your owner’s manual — the reset procedure is usually a sequence of button presses or a menu option in the infotainment system.
Check Alignment If Wear Is Uneven
If your tires show feathering (tread ribs that feel smooth one way and rough the other), excessive inner or outer edge wear, or cupping after regular rotation, your alignment is likely off. Rotation cannot fix alignment-related wear. You will need a professional alignment to correct camber, toe, or caster issues.
Consider a Full-Size Spare
If your vehicle came with a compact donut spare, you cannot include it in the rotation. But if you have a full-size matching spare, some rotation patterns (like the 5-tire rotation for trucks and SUVs) include the spare to extend the life of all five tires equally.
Use Anti-Seize Sparingly or Not at All
Some mechanics apply anti-seize to wheel studs to prevent rust. However, anti-seize changes the friction characteristics of the thread, which means your torque wrench reading will be inaccurate. Most vehicle manufacturers advise against it. If your studs are rusting, clean them with a wire brush instead.
FAQs
What is the easiest way to rotate tires at home?
The easiest way is to use four jack stands so all four wheels come off at once. Break loose all lug nuts while the car is on the ground, lift each corner, support with jack stands, then swap the wheels according to your drivetrain pattern. Torque all lug nuts in a star pattern to the specification in your owner’s manual.
Is it safe to rotate tires yourself?
Yes, tire rotation is safe to do at home as long as you use jack stands to support the vehicle. Never work under a car held up only by a hydraulic jack. Work on flat, solid ground, engage the parking brake, use wheel chocks, and torque lug nuts to specification with a torque wrench.
How often should Toyota Highlander tires be rotated?
Toyota recommends rotating Highlander tires every 5,000 miles. This aligns with most oil change intervals for the vehicle, making it easy to remember. Following this schedule helps maintain even tread wear and is required to keep your tire warranty valid.
What not to do when rotating tires?
Never work under a vehicle supported only by a jack. Do not guess lug nut torque by feel — always use a torque wrench. Do not tighten lug nuts in a circle pattern; use a star pattern instead. Never loosen lug nuts on a lifted wheel (loosen while the car is on the ground). Do not rotate directional tires to the opposite side of the vehicle.
Conclusion
Knowing how to rotate tires at home safely gives you control over one of the most impactful maintenance tasks for your vehicle. The process comes down to five core principles: use jack stands, match the rotation pattern to your drivetrain, torque lug nuts in a star pattern to specification, re-torque after 50 miles, and rotate every 5,000 to 7,500 miles. Grab your tools, double-check your owner’s manual for jacking points and torque specs, and take it slow on your first attempt. Once you have done it a few times, tire rotation becomes a 30-minute job that saves you hundreds of dollars and keeps your tires wearing evenly for their full lifespan.