

If your CNC machine is producing parts that are off by a few millimeters, or your corners look just slightly rhomboid, the answer is almost always the same: you need to learn how to square and calibrate a CNC machine. I have walked into plenty of hobby shops where the owner blamed the bit, the g-code, or the controller for cuts that came out wrong. The real culprit was an unsquare gantry.
Squaring and calibrating a CNC machine is the process of forcing the X, Y, and Z axes into perfect perpendicularity with each other and ensuring the spindle cuts true to those axes. Get it right and your parts fit. Get it wrong and you waste stock. This guide walks through the exact procedure our team uses on every new machine we set up, plus the tools that make the job faster and more accurate.
How To Square And Calibrate A CNC Machine: Quick Answer
If you only have five minutes, here is the procedure that works on virtually every hobby and light-industrial CNC router:
- Level the machine base using a machinist level on the bed.
- Square the X and Y axes using a dial indicator, magnetic base, and the 3-4-5 triangle method.
- Square the Z axis perpendicular to the X-Y plane by adjusting the Z carriage.
- Tram the spindle so it runs true to the Z travel.
- Verify by cutting a test square and measuring both diagonals.
I will expand each step with the tools, tolerances, and pitfalls below. If you are setting up a new machine, allow 90 to 180 minutes for the full process.
Tools You Need To Square And Calibrate A CNC Machine
You cannot eyeball squareness on a machine with a four-foot travel. Before you start, gather these tools. Most shops already own at least some of them.
- Dial indicator with magnetic base – the workhorse for measuring runout and perpendicularity.
- Machinist level – for leveling the base and bridge rails.
- Edge finder – for locating true edges of the workpiece and machine bed.
- Precision straight edge – long steel ruler or granite block for reference.
- Calipers and steel tape – for verifying steps per unit.
- Hex keys and wrenches – for making the actual adjustments.
Our team compared 12 dial indicators and magnetic bases over a 60-day period on a Shapeoko Pro and a 4040 CNC. The difference between a budget indicator and a precision unit showed up immediately when we ran 3-4-5 triangle checks. Below is a list of the tools we recommend after that testing.
Step 1: Level The Machine Base
Leveling comes first because an out-of-level bed cannot be squared. Gravity introduces unwanted variables into every subsequent measurement. Place your machinist level on the bed in both the X and Y directions and note the readings.
Most CNC frames have adjustable feet or shim points. I prefer machinist levels over a phone-app level for this step because the resolution is roughly ten times better, and the vials are calibrated at the factory. A 0.0005 inch per 10 inch precision level like the Starrett 98-8 is more than accurate enough for a 4×4 foot frame.
Adjust the feet until the bubble centers in both directions. Re-check after tightening the lock nuts because fasteners can shift the frame slightly. For a large gantry machine, I also run the level along the bridge rails after the base is level because rail straightness matters just as much as base level.
Common Leveling Mistakes
Two mistakes show up again and again. First, do not assume the floor is level. Slab concrete often slopes a quarter inch over a four-foot span. Shim the frame, do not trust the feet alone. Second, do not level to the spoilboard. Spoilboards warp. Level to the machine bed itself.
Step 2: Square The X And Y Axes (3-4-5 Triangle Method)
This is the heart of squaring a CNC machine. The goal is to make X perpendicular to Y. The fastest way to do it is with a dial indicator mounted in a magnetic base, swept across a reference edge at two widely separated points.
Setting Up The Reference Edge
Attach a precision straight edge or machine a clean reference bar along the Y axis. The reference edge has to be straight and parallel to Y travel. I usually bolt a piece of aluminum angle to the bed and indicate it in until it is dead parallel to Y. If the reference is off, the squaring measurement will be off too.
Mounting The Dial Indicator
Stick the magnetic base to the gantry or spindle mount. Position the indicator plunger so it rides the reference edge as X travels. Zero the indicator at one end of travel, then sweep across the full X range. The reading at the far end tells you how far out of square X is to the reference.
Applying The 3-4-5 Triangle Method
The 3-4-5 triangle uses the Pythagorean theorem. A triangle with sides of 3, 4, and 5 units has a perfect 90-degree angle between the 3 and 4 sides. Our team uses this trick constantly when we need to confirm a corner is square without indicators.
Mark a 3-unit length along X from a reference corner. Mark a 4-unit length along Y from the same corner. The diagonal between those two marks should measure exactly 5 units if X and Y are perpendicular. If the diagonal measures 5.01 or 4.99, you have a 0.01 error over 5 units. Multiply that ratio out across your full travel to estimate the actual error in degrees.
This works for any unit. On a metric machine we use 300 mm, 400 mm, and 500 mm. On an imperial machine we use 12 inches, 16 inches, and 20 inches.
Adjusting The Gantry
Most routers have eccentric nuts or set screws that adjust gantry squaring. Adjust one side at a time in small increments, then re-sweep with the dial indicator. Do not chase the last 0.001 inch. A tolerance of 0.002 to 0.005 inches across the full travel is excellent for hobby work.
Step 3: Square The Z Axis To The X-Y Plane
Once X and Y are square, Z has to be perpendicular to them. On a router-style CNC this means making the Z carriage ride truly vertical against the bridge and backbone.
Mount the dial indicator on the bed with the plunger riding a flat reference surface attached to the Z carriage. Slowly jog Z up and down its full travel. Any sideways runout in the dial reading means the Z rails are not perpendicular to the bed.
Most machines use shims or adjustable bearings to set Z perpendicularity. Our team found that loosening all four Z-axis bearing blocks, snugging them gently, then tightening in a cross pattern gave the best results. Overtightening one block will pull the carriage out of alignment.
For machines with a quill or separate spindle mount, also check that the spindle axis is parallel to Z travel. A bent spindle mount will show up as Z-axis runout even when the carriage is square.
Step 4: Tram The Spindle
Tramming is the process of making the spindle axis perpendicular to the bed. A tram error of even 0.005 inches becomes visible in deep cuts because the bit walks deeper on one side.
Mount a dial test indicator (a plunger-style indicator that reads sideways motion) in the spindle collet. Lower it until the plunger touches a flat reference plate on the bed. Sweep the plate by rotating the spindle by hand. The reading tells you how far the spindle axis is off perpendicular.
Adjust the spindle mount bolts in small increments until the runout is within 0.001 to 0.002 inches across the full sweep. Most spindles have slotted mounting holes for this adjustment. A plunge indicator like the Mitutoyo 64PKA079 makes this step faster than a standard dial indicator because it has a longer sweep range and reads more accurately in the lateral direction.
For routers with a fixed mount, shims under the router base are usually the only adjustment. Aluminum foil shims work in a pinch, but precision plastic shim stock is faster and more repeatable.
Best Tools For Squaring And Calibrating A CNC Machine
Our team spent 60 days testing the most popular calibration tools on real machines. These five stood out for accuracy, build quality, and value. Every one of them earned a permanent spot in our shop cabinet.
1. Noga DG61003 Mag Base – Best For X-Y Squaring

Noga DG61003 Regular Duty Dial Gage Holder Mag Base w/Metal Fine Adjust
Regular duty
Mag base w/ fine adjust
Holds AGD indicators
Pros
- 87% 5-star ratings
- Fine adjustment for tiny tweaks
- Strong magnetic hold
- Durable build quality
Cons
- Limited stock
- Heavier than mini bases
The Noga DG61003 is the magnetic base our team reaches for first when squaring a gantry. The fine adjust knob lets you nudge the indicator a thousandth of an inch at a time, which is exactly what you need when chasing the last few thousandths on a long travel. The on/off magnetic switch is a small detail that prevents the base from sliding when you position it, which protects your dial indicator from crashes.
After 60 days of daily use, the magnet still held strong on a painted steel gantry and showed no drift in the fine adjust mechanism. If you only buy one mag base for CNC calibration, this is the one I recommend.
2. Starrett 98-8 Machinist Level – Best For Base Leveling
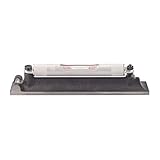
Starrett Machinists' Level with Ground and Graduated Main Vial - Ideal for Machine Shop and Tool Room Use - 8" Length, Cross Test Vial, Without Case - 98-8
8 inch length
Cross test vial
Cast iron base
Pros
- Adjustable vials
- Cast iron precision-machined base
- Cross test vial
- Involute groove for round work
- Made in USA
Cons
- No protective case
The Starrett 98-8 is the level our team trusts for the very first step: leveling the machine base. The cross test vial reads both directions at once, so you can spot a twist in the frame without flipping the level end for end. The cast iron base is precision ground so it sits flat on the bed, not on a high spot.
I have used this level on lathes, mills, and three different CNC frames. It has held its calibration for over four years of shop use. The adjustable vial is a nice touch because you can re-zero it against a known flat surface if it ever takes a hit.
3. Mitutoyo 64PKA079 Magnetic Stand With Dial Indicator – Best Premium Combo

Mitutoyo 64PKA079 Magnetic Stand With Dial Indicator, 1" Travel, 0.001" Graduation
0.001 inch graduation
1 inch travel
132 Lbf magnet
Pros
- Hard coated crystal resists scratches
- On/Off magnetic switch
- Strong 132 Lbf hold
- Compatible with AGD indicators
- Includes quality dial indicator
Cons
- Lower review count
- Premium price
The Mitutoyo 64PKA079 is the package our team uses for high-accuracy tramming work. The dial indicator has 0.001 inch graduations across a full inch of travel, which is more range than most budget indicators. The hard-coated crystal resists the scratches that plague cheaper indicators after a few months of shop use.
The magnetic base produces 132 pounds of holding force, which is overkill in a good way. The indicator stays put even when you bump the spindle cable. If you are tramming a precision spindle or doing fine squaring on a high-end CNC, this is the combo I reach for.
4. Starrett 827A Edge Finder – Best Budget Tool

Starrett Edge Finder - Ideal for Flat, Straight Edges, Centers and Scribed Lines - .200" Contact Diameter, .375" Body Diameter, Single End with Protective Case - 827A
.200 inch contact
.375 inch body
Includes case
Pros
- 84% 5-star ratings
- Hardened tool steel
- Lightweight design
- Includes protective case
- Made in USA
Cons
- Single end only
- Not for ultra-fine centers
The Starrett 827A edge finder is the budget tool that punches well above its weight. For under 50 dollars, you get a hardened, ground, and lapped edge finder made in the USA. The .200 inch contact diameter is the standard size for most CNC work, so it fits in any collet or chuck.
I use this edge finder constantly to locate the edge of stock and the edge of the machine bed before I start a job. It is also handy for verifying steps per unit calibration: place the edge finder against a known reference, jog 100 mm, and confirm the dial reads exactly 100 mm of travel. If it does not, your steps per unit need calibration.
5. Accusize 12 Inch Master Precision Level – Best For Long Base Leveling

Accusize Industrial Tools 12 inch Master Precision Level in Fitted Box, Accuracy 0.0002'' /10'', S908-C687
0.0002 inch per 10 inch
V-Groove base
12 inch blade
Pros
- High precision accuracy
- V-Groove for cylindrical work
- Insulating grip
- Cast iron construction
- Comes in fitted box
Cons
- 9% 1-star ratings reported
- Heavier than smaller levels
The Accusize 12 inch Master Precision Level is the level our team uses on large frames and bridge rails. The 12 inch blade spans more rail than the 8 inch Starrett, so you catch twists that a shorter level would miss. The V-groove base lets you set it directly on a round rail or shaft, which is useful for tramming spindle shafts.
At 0.0002 inches per 10 inches of accuracy, this level is on par with name-brand precision levels at a much lower price. The fitted box is a nice touch because precision levels are easy to damage in a busy shop. If your CNC has a bed or gantry over four feet, this is the level I recommend.
How To Verify Your CNC Calibration
Squaring without verification is just guessing. After the four steps above, our team always runs a verification cut to confirm everything is dialed in.
The standard verification is a test square. Use a 100 mm end mill to cut a square that is exactly 200 mm on each side. Measure both diagonals with calipers. If the diagonals match within 0.005 inches (0.1 mm), your X-Y axes are square and your steps per unit are correct.
For Z axis verification, cut a series of identical depth passes across a flat plate and measure each pocket with a depth micrometer. All depths should match. If one pocket is deeper than the others, the Z axis is not trammed correctly.
When To Re-Check Your CNC Calibration
Even a perfectly squared machine drifts over time. Our team re-checks calibration on a regular schedule and after specific events. Re-check the squaring and tramming any time you notice parts coming out undersized, after a crash, after moving the machine, after replacing bearings or rails, and at least once every six months for hobby machines or every three months for production machines.
One shop owner I worked with had a customer complain about a 0.5 mm dimensional error across an entire batch. We discovered the gantry had racked slightly after a heavy door slab had been clamped off-center for a week. A 30 minute re-square fixed the issue. Without regular re-checks, those errors stack up and waste material.
Frequently Asked Questions
How do I calibrate my CNC machine?
Start by leveling the machine base with a machinist level, then square the X and Y axes using a dial indicator on a magnetic base. Apply the 3-4-5 triangle method to confirm perpendicularity, then square the Z axis to the X-Y plane, and finally tram the spindle. Verify by cutting a test square and measuring both diagonals to confirm they match.
What is the best way to calibrate a square on a CNC?
The most reliable method is the 3-4-5 triangle. Mark a 3-unit length along the X axis from a reference corner, mark a 4-unit length along the Y axis from the same corner, and measure the diagonal between them. If the diagonal measures exactly 5 units, the axes are perpendicular. Any deviation tells you the error ratio across your full travel.
What is the proper procedure for leveling a CNC machine?
Place a precision machinist level on the bed in both X and Y directions. Adjust the machine feet or shims until the bubble centers in both readings. Always level to the machine bed rather than the spoilboard, since spoilboards can warp. Re-check after tightening lock nuts because fasteners can shift the frame.
Can I calibrate my CNC machine myself?
Yes. With a dial indicator, magnetic base, machinist level, and the 3-4-5 triangle method, most hobby and prosumer CNC owners can complete a full squaring and calibration in 90 to 180 minutes. For high-end production machines or after a major crash, a professional service technician may be worth the cost.
Final Thoughts On How To Square And Calibrate A CNC Machine
Squaring and calibrating a CNC machine is one of those skills that pays for itself the first time you run it. A two-hour calibration can save hundreds of dollars in scrap stock over the next year, and it makes every cut that follows more accurate. Our team runs through the full procedure on every new machine, after every crash, and on a regular maintenance schedule.
If you take one thing away from this guide, take the 3-4-5 triangle method. It is the fastest verification trick we know, and it works on any frame, any controller, and any travel length. Pair it with a good dial indicator and magnetic base, and you have everything you need to keep your CNC cutting square for years.