
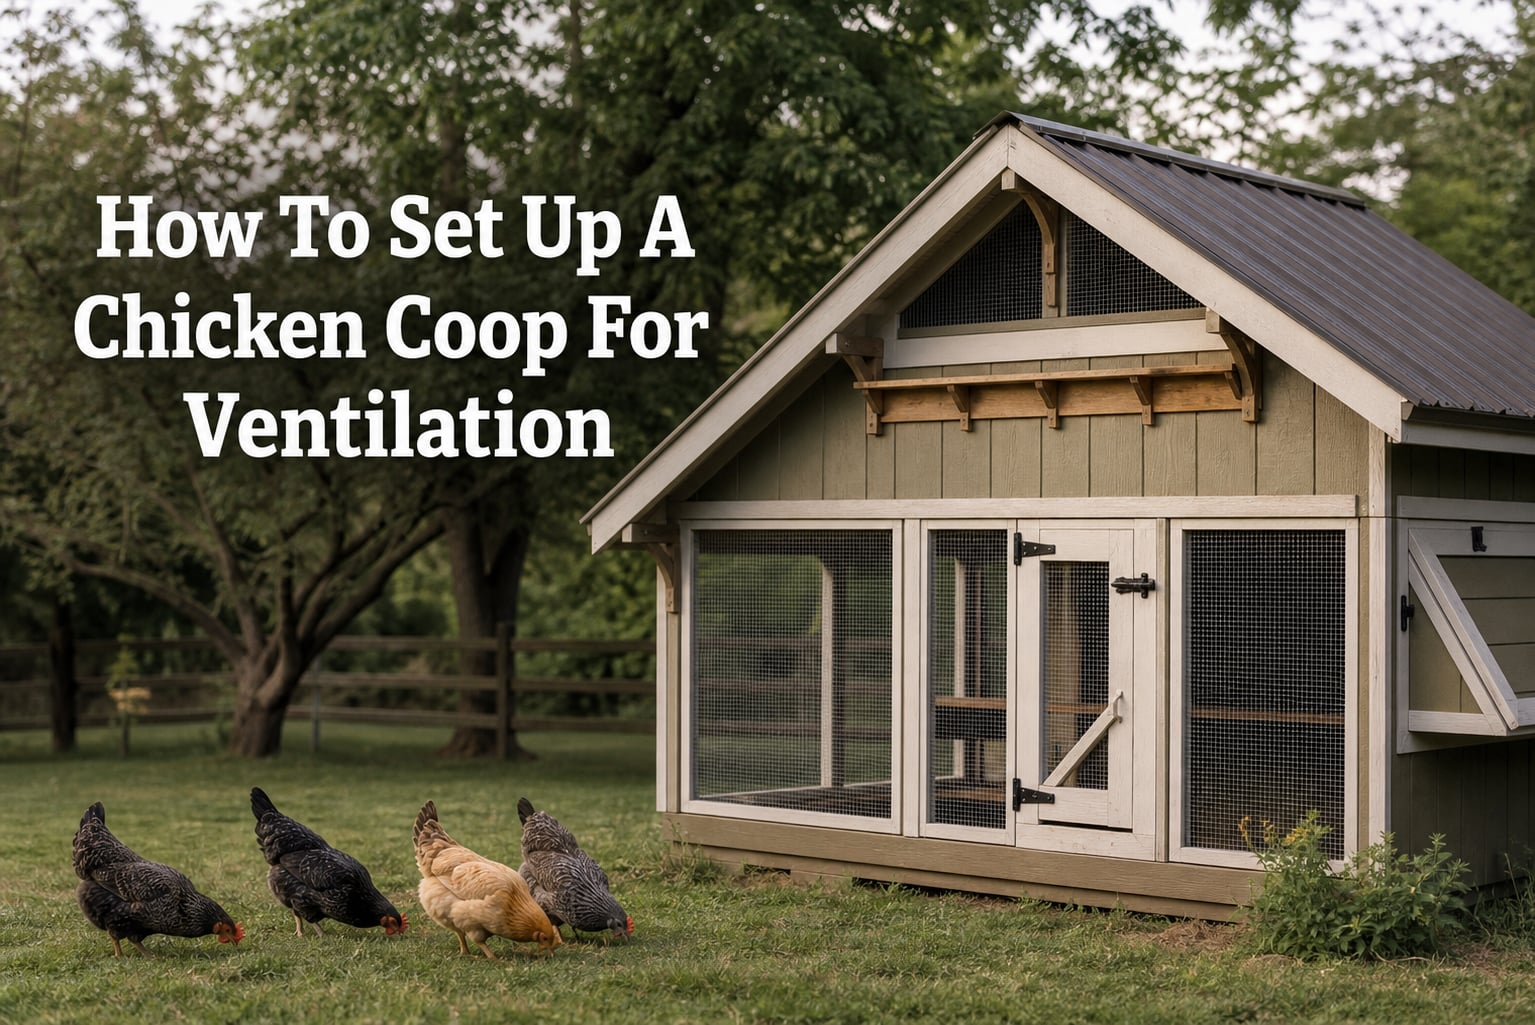
Chicken coop ventilation is the controlled exchange of stale, damp air for fresh outdoor air. It removes water vapor, ammonia fumes, and excess heat without putting a steady stream of cold air across resting chickens.
This guide explains how to set up a chicken coop for ventilation with measurements, placement rules, and checks you can do in an existing coop. The short version is simple: provide protected openings high above the birds, give air a path to move, and keep the litter dry.
Ventilation matters in every season. In warm weather, coop airflow releases trapped heat; in cold weather, it carries out the moisture that can leave combs damp and prone to frostbite.
I would not start by sealing every crack before winter or by cutting random holes at chicken height. Start with where the roost sits, where warm air collects, and where rain and prevailing wind reach the building.
How to set up a chicken coop for ventilation starts with high, protected openings
A workable chicken coop ventilation setup has an exhaust path near the roof and, where the design needs it, a sheltered intake that does not blow directly onto the roost. Follow these steps before deciding that you need a fan.
Step 1: Map the roost, floor area, doors, and wind exposure
Measure the coop’s interior length and width, then multiply them for the floor area. A coop that is 6 feet by 8 feet has 48 square feet of floor space.
Mark the roost position and the height of a chicken’s head when it is perched. Also note doors, windows, roof eaves, and the side that receives the strongest routine wind or driving rain.
Look at the ceiling or underside of the roof after the flock has spent a night inside. Dampness or a stale odor near the top tells you that warm, moisture-heavy air is not escaping well.
Step 2: Calculate a starting vent area before cutting
Use at least 1 square foot of permanent vent opening for each 10 square feet of coop floor area as a planning starting point. For that 48-square-foot coop, aim for roughly 4.8 square feet of total open vent area; round up to 5 square feet rather than down.
Backyard keepers also often use 1 square foot per bird as a conservative starting check, especially in a crowded or damp coop. These are opening-area guides, not promises that one number fits every climate, flock density, roof shape, and litter condition.
Count the clear opening, not the outer dimensions of a framed vent. Hardware cloth and louvers reduce the free passage of air, so leave room in the plan rather than treating a small decorative grille as a full square foot of ventilation.
Step 3: Put most permanent vent area above the roost
Place the main openings in gable ends, under roof eaves, at a ridge gap protected by a cap, or high in the wall just below the roofline. If the structure allows it, keep vents at least 18 inches above the roost so rising warm air can leave without crossing the birds.
Two high openings on opposite sides or ends give passive ventilation a useful route. A high opening on one side plus a high gable vent on the other can work well when roof framing or the coop’s position limits window placement.
A slanted-roof coop usually benefits from the largest exit opening on the high side. Add a protected opening toward the lower side only when it helps air enter without turning the roost into a wind tunnel.
Step 4: Add an intake only where its air path stays away from birds
Fresh air must replace air leaving through high vents, but an intake does not have to be a large hole at perch level. A lower opening can sit under a covered window, behind a baffle, or on the leeward side where it feeds air upward instead of straight across the roost.
For many small coops, cracks around a door and protected high vents provide enough replacement air. When the air feels stale, add a controllable lower intake gradually and inspect the roost at night before enlarging it.
Step 5: Screen every opening and direct rain away from it
Cover each opening with securely fastened hardware cloth sized to stop local predators. Hardware cloth is a protective mesh, not ordinary lightweight window screen, which can tear or be pulled loose.
Fit a roof overhang, vent hood, baffle, or outward-sloping cover above rain-facing openings. Air can pass beneath a properly sized cover while rain is less likely to soak bedding and defeat moisture control.
Step 6: Test the air path with the flock in the coop
Close the coop at night as you normally would, then check it early in the morning before the door is opened. The air should not smell sharply of ammonia, windows should not be wet with condensation, and birds on the roost should not be ruffled by a steady stream of air.
On a breezy day, use a light strip of tissue or a small piece of yarn near vents, never near a bird’s face. It should show movement at the openings, while the roost itself stays out of the direct air path.
Ventilation works when air moves above the flock rather than through it
Ventilation and drafts are not the same thing. Ventilation replaces the coop’s indoor air over time; a draft is a concentrated current that reaches chickens where they sleep or stand.
Warm air rises because it is less dense, carrying moisture and ammonia upward with it. High exhaust vents let that air leave, and the resulting pressure difference draws replacement air through other sheltered gaps or intake openings.
High exhaust vents protect the roost from the strongest airflow
Think of the coop in layers. The lowest layer holds litter, the middle layer is the birds’ living space, and the upper layer is the collection zone for heat and humid air.
Put the largest always-open ventilation area in that upper layer. This is why a gap below an eave, a protected ridge vent, or a gable vent is normally safer than a low wall vent facing the roost.
Cross ventilation cools a coop when the air path stays high
Cross ventilation means air can enter from one side and exit from another. In summer, two screened windows or high vents on opposite sides can move substantially more heat than a single opening, particularly when one side faces a regular breeze.
Do not confuse “opposite sides” with “same height as the chickens.” Raise the openings, use upper window sections, or set a solid panel below an open screened section to break a direct line across the roost.
Your coop needs a measured amount of open vent area, then observation
A practical chicken coop ventilation requirement is 1 square foot of open vent area per 10 square feet of floor space, with more capacity in hot, humid, crowded, or poorly shaded conditions. It is a useful first calculation because it connects airflow capacity to the building rather than guessing from the number of holes.
For example, a 4-by-6-foot coop has 24 square feet of floor space and needs about 2.4 square feet of vent opening as a starting point. That could be two 12-by-15-inch openings, since each has 180 square inches and together provide 360 square inches, or 2.5 square feet.
A 6-by-10-foot coop has 60 square feet of floor area, so plan on at least 6 square feet of permanent opening. Spread that area among high locations where possible rather than making one oversized hole that a storm can drive rain through.
More birds and wetter litter call for more air exchange
Each chicken adds respiration, manure, and activity to the air load. If the coop is stocked near its capacity, birds spend long periods inside, or drinkers spill regularly, use the higher end of the range and manage the cause of wet litter too.
Wet bedding cannot be fixed by vent area alone. Repair leaking roofs, keep waterers from dripping, remove saturated bedding, and give muddy runs drainage so chickens do not carry moisture indoors on their feet.
Adjustable covers help with rain, not with sealing the coop shut
Hinged flaps and sliding covers are helpful on storm-facing side vents. Keep high leeward vents open even when you reduce a rain-exposed opening, because the coop still produces moisture on cold, quiet nights.
When I assess a coop, I treat condensation as a stronger signal than the outdoor thermometer. Frosted windows, damp ceiling boards, or a musty smell show that indoor humidity needs an exit.
Passive vents suit most coops, while fans solve specific heat problems
Most backyard coops can rely on passive ventilation: high vents, windows, eave gaps, and roof openings use heat rise and natural breezes to exchange air. Passive setups have no power requirement and continue working when the design gives air a clear path.
Gable vents and eave gaps provide steady passive ventilation
Gable vents sit high in the triangular wall beneath a pitched roof, making them useful exhaust points. A continuous gap under protected eaves can add a broad, gentle outlet and is especially practical on a coop with generous roof overhangs.
Ridge vents work on roofs with a ridge and need a rain cap that does not block the gap. Their high position follows the natural upward route of warm air.
Screened windows add flexible cross ventilation in warm weather
Windows give you a large adjustable opening for summer cooling. Place at least two where practical, secure them with hardware cloth, and use a solid shutter or cover only when wind-driven rain or a direct draft requires it.
Open upper window sections first. If a window begins at chicken height, fit a solid lower panel or redirect the opening so birds can choose a calm part of the coop.
Wind turbines and mechanical fans are additions, not substitutes for vents
A wind turbine vent can increase exhaust when outdoor wind is available, but it does little during still weather. It also needs a weather-tight roof installation, so it makes more sense on larger, well-built coops than on a small movable tractor.
A mechanical fan can help during sustained hot weather, especially in a large coop with limited natural airflow. Position it to move hot air out or circulate air above bird level, protect its wiring from moisture and pecking, and retain permanent passive vents for times when the fan is off.
Winter ventilation stays open above the roost to remove moisture
Chicken coops need ventilation in winter. Cold air holds less moisture than warm indoor air, so the moisture from breathing and droppings readily shows up as condensation or frost when a coop is closed too tightly.
Keep high vents open, while using baffles, shutters, or exterior covers to stop snow and rain from entering. The aim is not to heat the coop like a house; it is to keep the birds dry, out of a direct breeze, and protected from weather.
Cold climates need upper openings and dry bedding every day
For winter ventilation in a cold climate, leave the high leeward vents open and limit only openings that put wind directly onto the birds. Check combs and wattles for dampness, inspect the ceiling for frost, and replace wet bedding promptly.
Do not cover every vent with plastic for the season. Plastic can block air exchange and trap water vapor, although a carefully placed exterior windbreak can shield a rain-facing wall while leaving the high outlet open.
Hot and humid climates need the largest open area and shade
Humid air makes it harder for chickens to cool themselves. Open screened windows and high vents widely, create cross ventilation, shade the roof and west-facing wall where possible, and give birds outdoor shade and water.
In this climate, more permanent open area and an upper-level fan may be justified during long heat spells. Watch for panting, wings held away from the body, and birds crowding the coolest part of the run.
Hot and dry climates need airflow without turning the coop into a dust box
Dry heat still causes heat stress, so wide high vents and shade remain useful. Keep dusty bedding managed because very fine dust can irritate respiratory passages even when the coop feels airy.
Use covers during dust storms or extreme wind, then reopen high vents after the event. Waterers should stay stable so extra drinking does not create a wet-litter problem.
Wet and windy climates need baffles and protected leeward outlets
Rainy regions call for deeper eaves, vent hoods, and a roof that sheds water away from openings. Put a dependable outlet on the leeward side, where wind pressure is less likely to drive rain inside.
Windy locations can still have plenty of ventilation but poor comfort if every opening faces the prevailing wind. A simple interior baffle lets air turn upward or across the ceiling before it reaches the roost.
Condensation and ammonia show that ventilation needs attention
The first signs of poor ventilation are usually visible or easy to smell. Do a quick inspection near dawn, when the coop has held its overnight air and the flock is still inside.
- Windows, walls, or the underside of the roof show condensation, frost, or damp streaks.
- The coop smells of ammonia or smells stale the moment you open the door.
- Litter stays wet, clumps quickly, or feels humid despite routine cleaning.
- Chickens sneeze, have irritated-looking respiratory passages, or avoid a damp corner.
- In summer, birds pant, hold wings away from their bodies, or gather at every opening.
Ammonia can irritate eyes and respiratory health, so do not wait for a severe smell. Increase protected high vent area, remove wet litter, clean spilled water, and then reassess the air the following morning.
A candle-free smell test reveals whether the coop needs changes
Stand at the door and take a normal breath rather than putting your face into the bedding. If your eyes sting or the ammonia odor is obvious, the air quality is not good enough for birds that spend the whole night in it.
Never use a candle, smoke source, or open flame to trace airflow in a coop. Dry litter, dust, feathers, and wooden framing do not belong near a flame.
Small changes make troubleshooting easier than a full rebuild
Change one item at a time when possible: open a high vent, add a baffle, dry the bedding, or redirect a waterer. Observe the next morning, because changing five things at once makes it hard to know which correction improved the coop airflow.
If a roof or wall repeatedly drips, repair that water entry before treating it as a ventilation issue. Good airflow works alongside a dry, sound coop shell.
Hardware cloth makes ventilation openings safer from predators and weather
Every vent is also an opening in the coop’s security. Cover it with hardware cloth attached with screws and washers or another strong fastening method that matches the wall material.
Use a mesh opening suitable for the predators in your area, and inspect corners where an animal could pry the covering away. Window screen alone keeps insects out but is not a dependable predator barrier.
Vent hoods block rain while keeping the outlet open
A small hood above a wall vent, a baffle set inside the opening, or an eave gap beneath a roof overhang can protect the opening from direct rain. Leave a clear path around the cover so it does not become a sealed decorative trim piece.
Angle exterior covers downward and away from the wall. Check after a heavy storm: dry litter and dry framing near the vent mean the cover is doing its job without stopping airflow.
Regular cleaning keeps screens from becoming airflow blockers
Feathers, cobwebs, dust, and chaff collect on mesh over time. Brush screens during routine coop cleaning and look for loose staples, bent mesh, or gaps around the frame.
Insect nests can also reduce an opening’s free area. Remove them carefully, then check that the vent cover still opens and closes as intended.
A short seasonal check keeps the ventilation setup working
Check chicken coop ventilation at the start of each season and after a major storm. Weather shifts, a larger flock, changed roost placement, or a new waterer can all change how much air exchange the coop needs.
- Measure or estimate the total clear high vent area again after any alteration.
- Confirm that the roost is below and out of the direct path between intake and exhaust.
- Look for damp litter, roof leaks, condensation, and ammonia at dawn.
- Clean hardware cloth and confirm that all covers still keep rain and predators out.
- Open more screened area for summer; retain high outlets while shielding winter wind and rain.
The most common mistake is closing all openings because the forecast turns cold. The next most common is placing a large open window directly beside the roost; both mistakes confuse dry-air ventilation with an uncomfortable draft.
Frequently asked questions give direct ventilation answers
How do I properly ventilate my chicken coop?
Ventilate a coop by creating protected high openings that let warm, moist, ammonia-filled air escape and by providing a sheltered route for fresh replacement air. Start with about 1 square foot of open vent area per 10 square feet of floor space, keep the main vents at least 18 inches above the roost where possible, screen them with hardware cloth, and inspect for ammonia or condensation at dawn.
Does a chicken coop need to be vented?
Yes. Every chicken coop needs year-round ventilation because chickens, droppings, waterers, and litter create moisture and ammonia. High vents remove damp air in winter and heat in summer, while protected placement prevents a direct draft across roosting birds.
How much ventilation does a chicken coop need in the winter?
Keep the permanent high vent area open in winter, using about 1 square foot of opening per 10 square feet of floor space as a starting point. Close or baffle only openings that drive rain, snow, or a steady current onto chickens; do not seal the coop because winter moisture can cause condensation and frostbite.
What are the symptoms of bad ventilation?
Poor ventilation often causes a sharp ammonia smell, condensation or frost on windows and roof surfaces, wet litter, stale air, and heat-stressed birds in summer. Sneezing or irritated respiratory passages can also signal poor air quality, though sick birds need appropriate veterinary advice.
How do you ventilate a chicken coop in cold climates?
Use high, predator-safe vents under eaves, in gables, or at the ridge, and keep them open above the roost. Add a hood, exterior windbreak, or interior baffle to block snow and direct wind, keep litter dry, and use condensation as a signal that more high-level air exchange is needed.
Where should vents be placed in a chicken coop?
Place the largest permanent vents high in the coop, such as beneath roof eaves, in gable ends, or beneath a protected ridge cap. Keep them above the roost and use a sheltered lower intake only if needed, so fresh air replaces exhausted air without blowing straight onto the flock.
High, dry, protected airflow is the goal of chicken coop ventilation
To set up a chicken coop for ventilation, calculate a starting amount of high open vent area, protect those openings with hardware cloth and rain covers, and keep the roost out of a direct air stream. Check at dawn for moisture and ammonia, then make small adjustments based on what the coop and flock show you.
The best next step is to measure the coop floor, locate the roost, and inspect the highest walls and roofline for a safe vent location. In 2026, that simple inspection is more useful than guessing whether a tightly closed coop feels warm enough.