
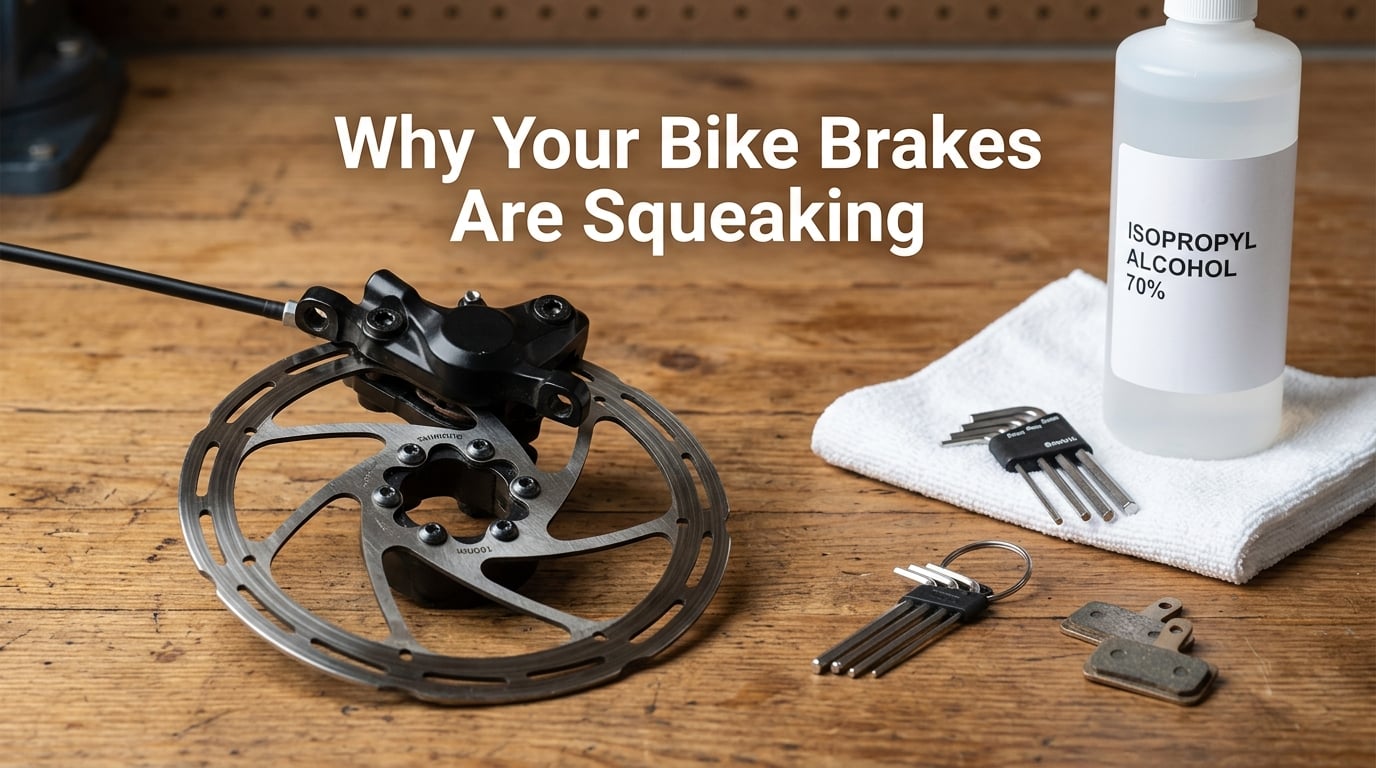
There is nothing quite like the sound of squeaky bike brakes when you are trying to stop at a red light with a line of cars behind you. That high-pitched squeal turns heads for all the wrong reasons. If your bike brakes squeaking has become a regular occurrence, you are not alone. Brake noise is one of the most common complaints cyclists have, and it affects everyone from daily commuters to weekend trail riders.
The good news is that squeaky bike brakes are almost always fixable at home with basic tools and a methodical approach. You do not need to be a professional mechanic to silence your brakes for good. But you do need to understand what is causing the noise before you can fix it.
In this guide, we will walk through exactly why your bike brakes are squeaking, how to diagnose the specific cause, and step-by-step instructions for fixing both rim and disc brakes. We will also cover what NOT to do, because some popular DIY fixes actually make the problem worse. By the end, you will have everything you need to stop the squeal and ride in peace.
Brake noise is not just annoying. It can signal reduced braking performance, which is a genuine safety concern. A brake that squeals may still stop you, but it will not stop you as quickly or as predictably as a quiet, properly maintained brake. That difference matters when a car door opens in your path or a child runs into the street.
Why Your Bike Brakes Are Squeaking: The Science Behind the Sound
Brake squeal is fundamentally a vibration problem. When your brake pads press against the braking surface, whether that is a metal rotor or a wheel rim, friction between the two surfaces creates high-frequency vibrations. Those vibrations travel through the brake caliper, the pads, and the mounting hardware. When the vibration frequency hits a specific range, it produces an audible squeal that you hear as bike brakes squeaking.
Think of it like a bow drawn across a violin string. The friction between the bow and the string creates vibrations, and the string amplifies them into sound. Your brakes work the same way, just at a much less pleasant frequency. Under perfect conditions, the friction between your pads and the braking surface is smooth and consistent, producing no audible sound. But when something disrupts that smooth friction, the vibrations intensify and the squeal begins.
Several things can disrupt that friction relationship. Contamination from oil or grease creates an uneven friction surface. Glazed pads have hardened surfaces that skitter across the rotor instead of gripping it. Misaligned pads contact the braking surface at the wrong angle, causing grab-and-release cycles that generate vibration. Warped rotors create uneven contact pressure with each wheel revolution. Any of these conditions can turn a quiet brake into a screaming one.
Understanding this vibration mechanism helps explain why some fixes work and others do not. Simply spraying a lubricant on the braking surface does not stop the vibration. It changes the friction characteristics temporarily, but it usually makes the underlying problem worse by adding contamination. The real fix is always to restore smooth, consistent friction between the pad and the braking surface.
Riders on cycling forums like Reddit’s r/bikewrench frequently report that the same brake can squeal one day and be silent the next. This inconsistency happens because vibration is sensitive to small changes in speed, pressure, temperature, and surface condition. A brake that squeals at low speed might be quiet during hard braking, or vice versa. This variability is normal, but it does not mean the underlying problem has gone away.
Top 6 Causes of Squeaky Bike Brakes
If your bike brakes are squeaking, one of these six causes is almost certainly to blame. We will cover each in detail so you can identify which one matches your situation.
1. Contamination (The Number One Culprit)
Contamination is the single most common cause of squeaky bike brakes, and it accounts for the majority of brake noise complaints. When oil, grease, brake fluid, chain lube, or even the natural oils from your fingers get on the braking surface or the pads, they create an invisible film that changes how the pads grip. Instead of clean, consistent friction, you get grabby, uneven contact that vibrates and squeals.
Contamination sources are everywhere on a bike. Chain lube overspray is a frequent offender, especially on rear brakes positioned near the drivetrain. Hydraulic brake fluid leaks from a failing caliper seal can contaminate pads in seconds. Even touching the rotor or pad face with bare fingers leaves enough skin oil to cause problems. Bike wash products that contain silicone or wax can also leave residue on braking surfaces.
The frustrating part about contamination is that it penetrates the pad material itself. You cannot just wipe it off the surface. The oil soaks into the porous pad compound, and every time you brake, heat draws more oil to the surface. This is why contaminated pads often squeal even after a thorough cleaning. Many riders report on forums that they cleaned everything perfectly, only to have the squeal return after a few rides because the contamination was still inside the pads.
2. Glazed Brake Pads
Glazing happens when brake pads overheat and the surface hardens into a smooth, glass-like layer. Instead of the pad compound gripping the rotor, the hardened surface skids and chatters, creating a squeal. Glazing is common on long descents where riders drag their brakes continuously, and it can happen surprisingly fast on steep mountain bike trails.
The glazed surface also reduces braking power. You might notice that your lever feels firmer but your stopping distance increases. This is because the hardened pad surface has a lower friction coefficient than fresh pad material. The pad is pressing against the rotor, but it is not gripping effectively.
You can usually identify glazing visually. The pad surface will look shiny, smooth, and dark instead of matte and textured. On metallic pads, the glaze may appear as a dark, mirror-like film. Running your finger across the surface should feel rough and grabby on a healthy pad. If it feels slick and smooth, the pad is glazed.
3. Brake Pad Misalignment
If your brake pads are not hitting the braking surface squarely, they can produce a loud squeal. Misalignment means one edge of the pad contacts the surface before the other, creating a grab-and-release effect that sets up vibrations. This is particularly common on rim brakes where the pad angle can shift from impacts, wheel removal, or simple settling over time.
The toe-in adjustment is the standard fix for misaligned rim brake pads. Toe-in means setting the pad so the leading edge contacts the rim fractionally before the trailing edge. This prevents the pad from chattering as it meets the rim. Without proper toe-in, the pad can vibrate against the rim like a reed in a woodwind instrument.
On disc brakes, misalignment usually means the caliper is not centered over the rotor. If one pad contacts the rotor before the other, or if the rotor rubs against one pad continuously, you get noise and drag. Many riders confuse this rubbing sound with squeaking, but the underlying cause is similar. The caliper needs to be centered so both pads contact the rotor simultaneously and evenly.
4. Worn Brake Pads
Brake pads do not last forever, and as they wear down, their friction properties change. Worn pads often have uneven surfaces, embedded debris, and hardened edges that all contribute to noise. When a pad gets thin enough, the metal backing plate can start contacting the rotor or rim directly. This produces a loud grinding sound that is far worse than a squeal, and it damages the braking surface.
Most brake pads have wear indicators built in. Some have a physical line or groove on the pad face that tells you when the compound is too thin. Others have a spring-loaded indicator that touches the rotor when the pad needs replacement. If your pads are past their wear indicators, replacement is the only option.
Riders often wonder why their brakes squeak when the pads still look thick. The answer is that pad compound degrades over time even without heavy use. Old pads can become hard and lose their grip, leading to glazing and noise. If your pads are more than two years old, their compound may have aged past its effective life even if they still have material left.
5. Wet Weather and Moisture
Water on your braking surfaces causes temporary squeaking that usually disappears once everything dries out. Moisture changes the friction characteristics between the pad and the braking surface, reducing grip and creating vibration. This is completely normal and does not indicate a problem with your brake system.
However, chronic wet-weather squeaking can indicate a deeper issue. If your brakes squeal every time it rains but your buddy’s bike stays quiet, your pads may be borderline contaminated. The moisture interacts with residual contamination that would not cause problems when dry, but becomes noisy when wet. In this case, a thorough cleaning and pad replacement may be needed.
Wet conditions also accelerate pad wear because water carries grit and debris into the braking interface. Road grime, sand, and mud act like sandpaper between your pads and rotors. After a wet ride, it is good practice to clean your braking surfaces before that debris has a chance to embed itself permanently.
6. New Brake Pads Not Bedded In
New brake pads need a break-in period called bedding-in. During this process, a thin, even layer of pad material transfers onto the rotor surface. This transfer layer is what creates smooth, quiet friction. If you skip the bedding-in process or do it incorrectly, the pads and rotor never develop that proper interface, and you get noise.
This is why many riders report that their new bicycle disc brakes start squeaking immediately after installation. The pads are fresh and clean, the rotor is new, but without bedding-in, the surfaces have not learned to work together. The fix is simple once you know the process, and we cover it in detail later in this guide.
Bedding-in is especially important for disc brakes. Rim brakes with rubber pads tend to self-bed over a few rides, but disc brake pads need a deliberate, controlled process. Skipping this step is one of the most common mistakes that leads to chronic brake noise.
How to Diagnose Your Brake Squeak: Contamination vs Glazing vs Wear
Before you start fixing anything, you need to know what you are fixing. The three most common causes of brake noise have distinct symptoms, and learning to tell them apart will save you hours of trial and error.
Start by removing your wheel and inspecting the pads visually. Contaminated pads often look dark and greasy, with a sheen that does not match the normal matte finish of brake compound. You might see visible oil spots or discoloration. Sniff the pad. If it smells like solvent or chain lube, contamination is your answer.
Glazed pads look different. The surface will be smooth and shiny, almost like it has been polished. On organic pads, the glaze appears as a dark, glassy film over the compound. On sintered metallic pads, the glaze looks like a dark rainbow sheen. The key test is texture. Run your thumb across the pad surface. A healthy pad feels like fine sandpaper. A glazed pad feels slick, like a polished stone.
Worn pads are the easiest to identify. Look at the pad thickness. Most pads start with 3 to 4 millimeters of usable compound. When you are down to 1 millimeter or less, the pad needs replacement. Check for the wear indicator line if your pads have one. Also look for uneven wear, where one side of the pad is significantly thinner than the other. This indicates a misalignment problem that should be corrected along with the pad replacement.
Check the rotor or rim surface too. A contaminated rotor will have visible smudges or a greasy film. A scored or grooved rotor indicates debris has been dragged through the braking interface. Blue or purple discoloration on a rotor indicates overheating, which often accompanies glazing and means both the rotor and pads may need attention.
Forum riders frequently ask why only their front brake squeaks. The front brake does more stopping work than the rear, so it generates more heat and wears faster. Front brakes are also more exposed to road spray and contamination. If only one brake is noisy, that is useful diagnostic information. Focus your troubleshooting on that brake’s specific pads, rotor, and alignment.
Tools You Need to Fix Squeaky Bike Brakes
You do not need a fully equipped bike shop to fix most brake noise problems. Here is what you should have on hand before you start.
For cleaning: isopropyl alcohol (90 percent or higher), clean lint-free rags or paper towels, and a dedicated brake cleaner spray if you want extra cleaning power. Avoid using general degreasers or household cleaners, as many leave residues that cause more contamination.
For mechanical adjustments: Allen keys (typically 4mm, 5mm, and 6mm), a Torx wrench if your rotor bolts use Torx heads, and a rotor truing tool or adjustable wrench for straightening bent rotors. A bike stand makes the job much easier, but you can work with the bike upside down if needed.
For pad work: a pick or small flathead screwdriver for removing pad retention pins and springs, sandpaper (medium grit around 220 to 400), and replacement pads if yours are worn out or badly contaminated. Keep a clean tray or bag for small parts like pad springs and retention hardware.
Optional but helpful: a brake bleed kit if you have hydraulic disc brakes and suspect air in the system, a torque wrench for precise caliper mounting, and nitrile gloves to prevent finger-oil contamination while handling pads and rotors.
How to Fix Squeaky Rim Brakes (Step by Step)
Rim brakes include V-brakes, cantilever brakes, and caliper brakes. They all use rubber-composite pads that squeeze the wheel rim to slow you down. The fixing process is similar across all types.
Step 1: Clean the rim braking surface. Remove the wheel and inspect the rim where the pads contact it. You will likely see a dark stripe of accumulated pad material and road grime. Scrub this surface thoroughly with isopropyl alcohol and a clean rag. For stubborn buildup, use fine steel wool or a Scotch-Brite pad. The braking surface should look clean and uniform when you are done.
Step 2: Clean or replace the pads. Remove the pads from the brake arms. Inspect them for contamination, glazing, and wear. If the pads are contaminated, you can try cleaning them with alcohol, but deeply soaked pads usually need replacement. If the pads are glazed, sand the surface with medium-grit sandpaper until you expose fresh, matte compound underneath. If the pads are worn past their indicators, replace them.
Step 3: Check and adjust pad alignment. Reinstall the pads and remount the wheel. Squeeze the brake lever and watch how the pads meet the rim. They should contact the rim flatly and squarely, with the entire pad face touching the rim at the same time. The pads should also be centered vertically on the braking surface, not hanging off the top edge or rubbing the tire.
Step 4: Set the toe-in. This is the critical step for eliminating rim brake squeal. Loosen the pad mounting bolt just enough to let you angle the pad. Adjust it so the leading edge, the front of the pad in the direction of wheel rotation, contacts the rim about 1 millimeter before the trailing edge. Think of the pad as slightly angled, like the front edge of a sled runner. Tighten the bolt and verify the angle by squeezing the lever and watching the contact pattern.
Step 5: Check for arm tension and pivot wear. On V-brakes and cantilevers, the brake arms should spring back firmly when you release the lever. If they are sluggish, clean and lubricate the pivot points. Most rim brake pivots can be lubricated with a single drop of light oil at the pivot bushing. Wipe off any excess immediately so it does not migrate to the pads or rim.
Step 6: Test ride and fine-tune. Take the bike for a slow test ride in a safe area. Apply the brakes gently at first, then progressively harder. Listen for any remaining squeal. If the noise persists, recheck the toe-in adjustment. Small angle changes can make a big difference. It may take two or three attempts to find the sweet spot where your brakes are silent.
How to Fix Squeaky Disc Brakes (Step by Step)
Disc brakes are more complex than rim brakes, but the troubleshooting process follows the same logic. Whether you have mechanical or hydraulic disc brakes, the same principles apply.
Step 1: Clean the rotors thoroughly. Remove the wheel and spray the rotor with isopropyl alcohol or a dedicated disc brake cleaner. Wipe it clean with a lint-free rag, turning to a fresh section of cloth for each pass. Clean both sides of the rotor completely. If the rotor looks contaminated with visible residue, repeat the process two or three times. Many riders on cycling forums report that 90-percent isopropyl alcohol is the single most effective cleaning agent for noisy disc brakes.
Step 2: Inspect the rotor for warping. Spin the wheel and watch the rotor as it passes through the caliper. A true rotor passes through with consistent, even spacing on both sides. A warped rotor wobbles, sometimes rubbing against one pad as it rotates. If you see visible wobble, you need to true the rotor. Use a rotor truing tool or an adjustable wrench to gently bend the rotor back into alignment. Work in small increments, checking progress frequently. This takes patience, but even a small warp can cause significant noise.
Step 3: Remove and inspect the pads. Take the pads out of the caliper. Look for contamination, glazing, and wear using the diagnostic criteria we covered earlier. If the pads are contaminated with oil, especially hydraulic fluid, replacement is usually the only reliable fix. Oil from a leaking caliper penetrates deep into the pad material and cannot be fully removed by cleaning.
Step 4: Clean or resurface the pads. If the pads are glazed but not contaminated, sand them back to fresh compound. Place medium-grit sandpaper on a flat surface and rub the pad face across it in a figure-eight pattern. Keep going until you see consistent, fresh compound across the entire pad face with no shiny spots. Clean the resurfaced pads with alcohol to remove sanding dust before reinstalling.
Step 5: Realign the caliper. This is the step most riders skip, and it is a common source of disc brake noise. With the wheel and pads reinstalled, loosen both caliper mounting bolts about a quarter turn. Squeeze the brake lever hard and hold it. This centers the caliper over the rotor. While holding the lever, tighten the mounting bolts evenly. Release the lever and spin the wheel. The rotor should pass through the caliper without rubbing.
Step 6: Bed in the pads. If you installed new pads or resurfaced old ones, you need to bed them in before the brakes will be quiet and effective. We cover the full bedding-in process in the next section. Skipping this step is the most common reason that freshly serviced disc brakes still squeal.
Step 7: Check for sticky pistons. On hydraulic disc brakes, the pistons that push the pads should retract fully when you release the lever. If a piston sticks in the extended position, the pad drags on the rotor continuously, causing heat, noise, and premature wear. Remove the wheel, insert a pad spacer, and pump the lever to observe piston movement. If one piston moves slower than the others, clean it with alcohol and apply a thin film of piston grease.
How to Bed In New Brake Pads Properly
Bedding-in is the process of transferring a thin, even layer of pad compound onto the rotor surface. This transfer layer creates the smooth, consistent friction interface that keeps your brakes quiet and powerful. Done correctly, bedding-in takes about 15 minutes and dramatically reduces the chance of future noise.
Find a safe, flat area where you can ride and stop repeatedly without traffic. A quiet parking lot or empty stretch of road is ideal. Accelerate to about 15 miles per hour, then brake firmly to a near-stop. You are not trying to skid or lock the wheel. You want controlled, firm braking from speed down to a walking pace. Repeat this process 15 to 20 times.
Between each stop, let the brakes cool for a few seconds by riding without braking. You want the pads and rotor to warm up and transfer material, but you do not want them to overheat and glaze. After 15 to 20 repetitions, you should feel the brake power increase noticeably as the transfer layer builds up on the rotor.
For mountain bike disc brakes used on steep descents, some mechanics recommend a more aggressive bedding-in protocol. Accelerate to 20 miles per hour and brake harder, getting closer to a complete stop each time. Do 10 hard stops, then ride around for five minutes without braking to let everything cool. This builds a more robust transfer layer that can handle the heat of steep trail descents.
If you hear squeaking during the bedding-in process, that is normal. The pads and rotor are learning each other, and noise during break-in is expected. The squeak should diminish and disappear by the 10th or 12th stop. If it persists after the full process, you may have an alignment or contamination issue that needs separate attention.
Brake Pad Compounds Explained: Organic vs Sintered vs Semi-Metallic
The compound of your brake pads affects braking power, durability, heat resistance, and yes, noise. Choosing the right compound for your riding style can prevent recurring squeak problems.
Organic, also called resin pads, are made from a mixture of fibers and binding resins without metal content. They offer excellent initial bite, meaning they grab quickly the moment you touch the lever. They are quietest when new and bed in quickly. However, they wear faster than metallic pads and are more prone to glazing on long descents. Organic pads are ideal for road cycling, commuting, and casual trail riding where heat buildup is moderate.
Sintered metallic pads are made from compressed metal particles fused together under heat and pressure. They handle high temperatures better than organic pads and resist fading on long descents. They last significantly longer in abrasive conditions like muddy mountain biking. The tradeoff is that they are noisier when new and take longer to bed in. Some sintered pads squeal more than organics even after break-in, especially in wet conditions. Sintered pads are best for aggressive mountain biking, heavy e-bikes, and riders who regularly tackle long, steep descents.
Semi-metallic pads split the difference. They combine organic materials with metal particles to offer better heat resistance than pure organic pads with less noise and faster bedding-in than full sintered pads. Many riders find that semi-metallic pads are the sweet spot for all-around riding. They provide solid power, reasonable durability, and acceptably low noise levels across a wide range of conditions.
If your current pads squeal regardless of cleaning and alignment, switching compounds might help. Riders on forums frequently report that switching from sintered to organic pads eliminated persistent noise on road bikes. Conversely, mountain bikers who switched from organic to semi-metallic solved glazing issues on steep trails. The right compound for your riding makes a bigger difference than many riders realize.
What NOT to Do: Common Mistakes That Make Brakes Worse
Some DIY brake fixes are worse than the original problem. Avoid these common mistakes that can turn a simple squeak into a full brake failure.
Never spray WD-40 on your brakes. This is the most common question on forums and the most dangerous shortcut. WD-40 is a light oil and solvent blend. Spraying it on your brake pads or rotors permanently contaminates them with oil. The squeak might stop for a day or two while the solvent acts as a temporary lubricant, but the oil will soak into the pad compound and make the problem far worse. You will need to replace the pads entirely. If you have already done this, remove and replace the contaminated pads, clean the rotors thoroughly with alcohol, and bed in the new pads properly.
Do not use petroleum-based cleaners on brake components. Degreasers, mineral spirits, and other petroleum solvents leave oily residues that contaminate pads. Stick with isopropyl alcohol or dedicated bicycle brake cleaners that evaporate completely without leaving residue.
Do not touch the rotor or pad face with bare fingers. The natural oils on your skin are enough to contaminate brake surfaces. Handle pads and rotors by their edges only. Wear nitrile gloves if you need to handle pad faces during installation.
Do not over-tighten caliper bolts. Excessive torque can distort the caliper body and cause uneven pad contact. Use a torque wrench and follow the manufacturer’s specifications, typically 6 to 8 Newton-meters for caliper mounting bolts.
Do not ignore a grinding sound. If your brakes start grinding instead of squeaking, stop riding immediately. Grinding usually means the pad compound is completely gone and the metal backing plate is contacting the rotor. Every revolution damages the rotor further, and a scored rotor will ruin new pads quickly. Replace the pads before riding again.
Do not mix pad compounds on the same brake. Using an organic pad on one side and a sintered pad on the other creates uneven braking forces and generates inconsistent heat. Always replace pads in pairs and use matching compounds on both sides of a single brake.
Preventing Brake Squeak: A Maintenance Schedule
The best fix for squeaky brakes is preventing them in the first place. A simple maintenance routine keeps your braking surfaces clean and your pads in good condition.
After every wet or dirty ride: Wipe down your rotors or rims with a clean rag. Inspect the pad faces for embedded debris. If you see grit or metal shavings in the pad surface, pick them out with a pointed tool. This prevents debris from scoring the braking surface on your next ride.
Weekly for regular riders: Clean the braking surfaces with isopropyl alcohol. Check pad alignment by squeezing the levers and observing the pad contact pattern. Look for uneven wear patterns that indicate developing alignment issues.
Monthly: Remove the wheels and do a thorough inspection. Measure pad thickness and compare to wear indicators. Check rotor true by spinning the wheel and watching for wobble. On hydraulic brakes, inspect hose connections and caliper seals for fluid leaks. Catching a slow leak early prevents contamination that would ruin your pads.
Seasonally: Consider your riding conditions. If you ride through winter with road salt and grime, plan on more frequent pad replacements. If you ride in dry summer conditions, pads will last longer. Swap pad compounds if your seasonal riding changes significantly. A mountain biker who switches to road riding in winter may find that sintered pads are unnecessarily noisy for road-only use.
Annually: Do a full brake system check. Replace pads proactively if they are more than 50 percent worn. Consider a professional brake bleed for hydraulic systems. Inspect cables and housings on mechanical systems. Replace rotors if they are significantly worn or deeply scored. An annual refresh prevents the gradual degradation that leads to chronic noise problems.
When to DIY vs Take Your Bike to a Shop
Most brake squeak fixes are well within the capabilities of a home mechanic with basic tools. Cleaning, pad replacement, toe-in adjustment, and caliper alignment are all straightforward procedures. If you are comfortable using Allen keys and following step-by-step instructions, you can handle the majority of brake noise issues yourself.
However, some situations call for professional help. If you suspect a hydraulic fluid leak from the caliper, a shop can replace the seals and properly bleed the system. Bleeding hydraulic brakes requires specialized kits and knowledge of the specific bleed procedure for your brake model. Doing it wrong can introduce air into the system and reduce braking power dangerously.
If your rotor is severely warped and you cannot true it yourself, a shop can do it quickly and accurately. Shops also have rotor-facing tools that can resurface a slightly scored rotor in minutes, a service that is difficult to replicate at home without specialized equipment.
A DIY pad and rotor replacement typically costs under $50 for parts. The same job at a bike shop might run $80 to $150 including labor. Cleaning and alignment adjustments cost only your time at home. For most riders, the cost savings and satisfaction of doing it yourself makes DIY the right choice for routine brake maintenance.
FAQs
How do I stop squeaky bike brakes?
To stop squeaky bike brakes, first clean the rotors or rims with isopropyl alcohol (90 percent or higher) and a lint-free rag. Then inspect the pads for contamination, glazing, or wear. Resurface glazed pads with medium-grit sandpaper, replace contaminated or worn pads, and realign the caliper or brake arms so pads contact the braking surface squarely. For rim brakes, set a slight toe-in angle so the leading edge of the pad contacts first. For disc brakes, center the caliper over the rotor by loosening the mounting bolts, squeezing the lever, and retightening. Finally, bed in the pads with 15 to 20 firm stops from 15 mph.
Can I spray WD-40 on my brakes to stop squeaking?
No. Never spray WD-40 on bike brakes. WD-40 is a light oil and solvent that permanently contaminates brake pads and rotors. The squeaking may stop temporarily as the solvent lubricates the surface, but the oil soaks into the pad compound and makes the problem worse. You will need to replace the contaminated pads entirely. Use isopropyl alcohol or a dedicated bicycle brake cleaner instead.
Can I fix squeaky brakes myself?
Yes, most brake squeak fixes are simple enough for a home mechanic with basic Allen keys and cleaning supplies. Cleaning braking surfaces with isopropyl alcohol, resurfacing glazed pads with sandpaper, adjusting pad alignment and toe-in, and replacing worn pads are all standard DIY procedures. The only jobs that typically require a shop are hydraulic brake bleeds, caliper seal replacements, and severe rotor truing.
Why are my bike brakes squeaking even after cleaning?
If your brakes still squeak after cleaning, the pads are likely contaminated internally. Oil and grease penetrate the porous pad compound and cannot be removed by surface cleaning alone. The heat from braking draws the contamination back to the surface each time you ride. In this case, replacing the pads is the only reliable fix. Other possible causes include glazing, caliper misalignment, or a warped rotor that requires truing.
How long does it take to bed in new brake pads?
Bedding in new brake pads takes about 15 minutes. Find a flat, traffic-free area and accelerate to roughly 15 miles per hour. Brake firmly to a near-stop without locking the wheel, then accelerate back to speed. Repeat this process 15 to 20 times with brief cooling periods between stops. You should feel braking power increase as the transfer layer builds on the rotor. Some noise during bedding-in is normal and should disappear by the 12th stop.
Conclusion
Understanding why your bike brakes are squeaking is the first step toward fixing them for good. The vast majority of brake noise comes down to six causes: contamination, glazing, misalignment, wear, moisture, and improper bedding-in. By following the diagnostic and repair steps in this guide, you can identify your specific problem and apply the right fix without guesswork.
The most important takeaway is that brake noise is always telling you something. A squeal is your brake system asking for attention, and ignoring it only makes the problem worse. Clean your braking surfaces regularly, inspect your pads before they wear out, and never reach for the WD-40 when your brakes start talking to you.
With the right tools, a bit of patience, and the step-by-step processes we have covered, you can silence your bike brakes squeaking and get back to enjoying quiet, confident stops on every ride. Your riding group, your neighbors, and everyone at that next red light will thank you.