
Dead zones in your home WiFi can turn streaming movies into buffering nightmares and make video calls freeze at the worst moments. Learning how to set up a mesh WiFi network at home changed everything for my household. I went from walking to specific corners of the house just to get a signal to enjoying seamless coverage in every room. This guide walks you through the entire process from understanding what mesh WiFi is to optimizing your network for peak performance.
You might wonder if installing a mesh system requires technical expertise. The truth is that most modern mesh WiFi systems are designed for DIY installation. I set up my first mesh network in about 25 minutes using nothing more than my smartphone and the included app. The whole process feels more like setting up a new phone than configuring complex networking equipment.
In this guide, I share what I learned from setting up mesh networks in multiple homes, including my own 2,400 square foot two-story house. You will discover exactly how many nodes you need, where to place them for maximum coverage, and the step-by-step setup process that works for any mesh system. I also cover troubleshooting tips that solved problems I encountered along the way.
What Is Mesh WiFi?
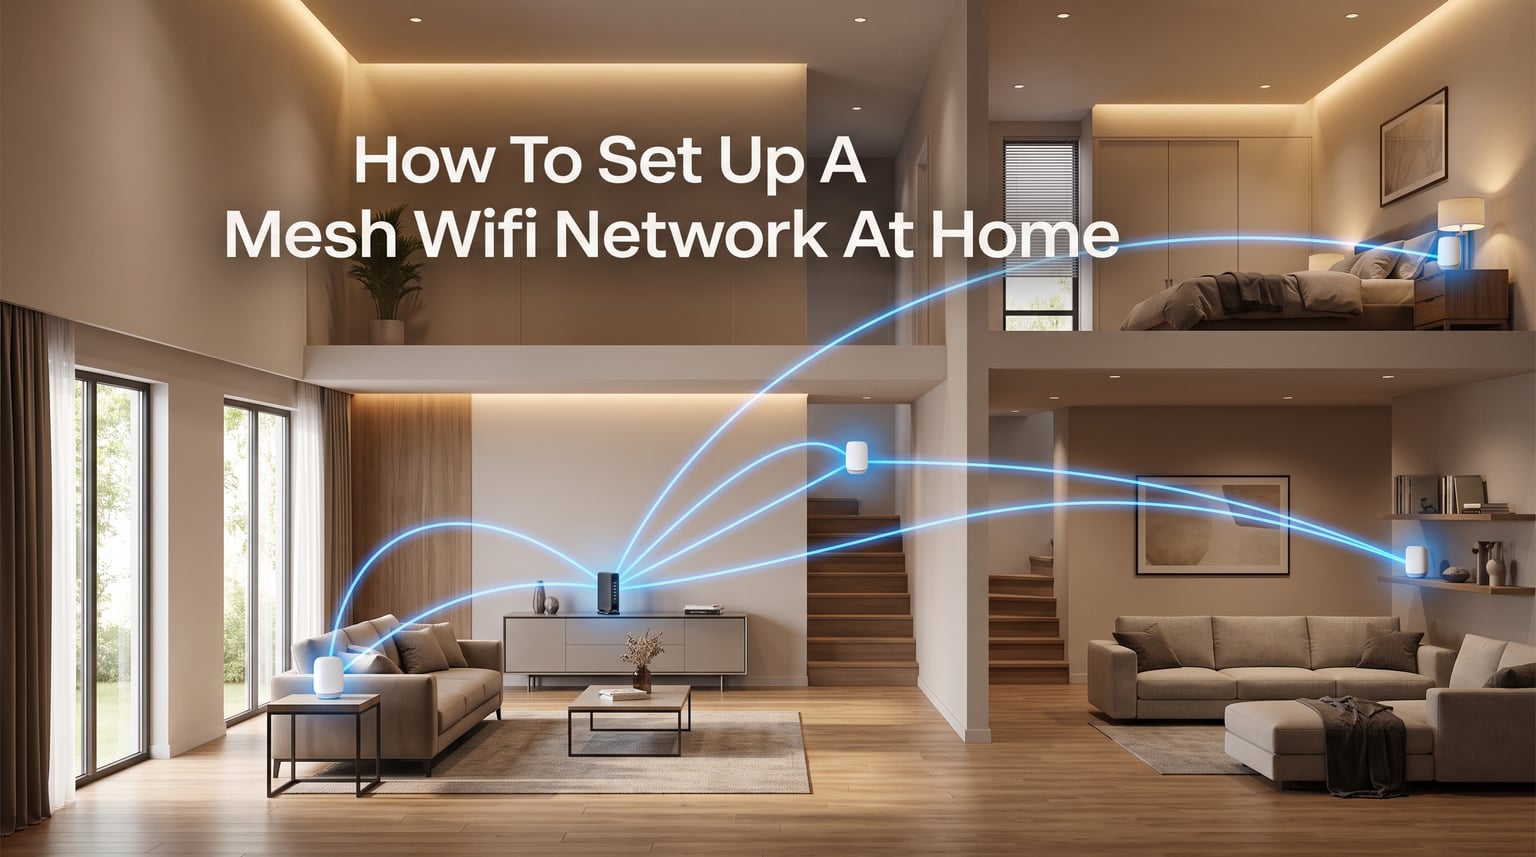
Mesh WiFi uses multiple devices called nodes to create a single wireless network that covers your entire home. Instead of relying on one router to blast signal through walls and floors, mesh systems spread the signal through several interconnected nodes placed throughout your house. Each node communicates with the others to create a web of coverage that eliminates dead zones.
Think of traditional routers like a single light bulb in the center of a large room. The light shines brightest near the bulb but dims in corners and behind furniture. Mesh WiFi works like having multiple light fixtures placed throughout the room, each one brightening its own area while working together to light the whole space evenly.
The main node connects directly to your modem, just like a traditional router. Satellite nodes then extend the signal by communicating with the main node and each other. Your devices connect automatically to whichever node provides the strongest signal at any moment. As you walk from your living room to your bedroom, your phone seamlessly switches between nodes without you noticing.
This seamless handoff happens because all nodes share the same network name or SSID. Unlike traditional setups where you manually connect to different access points, mesh networks handle everything automatically. Your phone, tablet, or laptop connects to the closest node instantly as you move through your home.
Mesh systems also support both WiFi 6 and the newer WiFi 7 standards. These technologies provide faster speeds, support more connected devices, and handle interference better than older WiFi standards. Most mesh systems sold in 2026 include WiFi 6 as a minimum, with premium models offering WiFi 6E or WiFi 7 support.
Benefits of Mesh WiFi Networks
Understanding why mesh WiFi works better than traditional setups helps you appreciate the investment. The benefits extend beyond simple coverage to include convenience, security, and long-term savings.
Whole-home coverage tops the list of advantages. Traditional routers struggle to penetrate multiple walls and floors. My old router left the master bedroom with barely one bar of signal. After installing mesh WiFi, every room shows full signal strength. Streaming 4K movies upstairs no longer causes buffering.
Seamless roaming means your devices stay connected without interruption as you move around. Traditional networks with multiple access points require manual switching between networks. Mesh systems handle this automatically. I can walk from my home office to the kitchen while on a video call without the connection dropping.
Easy setup through mobile apps eliminates the complexity of traditional router configuration. The app walks you through each step with visual guides and prompts. Most people complete setup in under 30 minutes. My parents, who struggle with most technology, set up their mesh system without calling me for help.
Centralized management lets you control your entire network from one app. Change passwords, create guest networks, update firmware, and monitor connected devices all from your phone. No more logging into confusing web interfaces with IP addresses and admin panels.
Automatic firmware updates keep your network secure without requiring manual intervention. Most mesh systems download and install updates automatically during low-usage hours. This ensures you always have the latest security patches and performance improvements.
Mesh WiFi vs Traditional Routers vs WiFi Extenders
Understanding the differences between mesh systems, traditional routers, and WiFi extenders helps you choose the right solution for your home. Each option works differently and suits different situations. I tested all three approaches before settling on mesh WiFi for my home.
Traditional routers broadcast signal from a single point. They work fine for smaller homes under 1,500 square feet with open floor plans. However, walls, floors, and large appliances block and weaken the signal. My old router could barely reach the second floor, leaving bedrooms with barely usable connections.
The single-point broadcasting approach creates several limitations. Signal strength drops exponentially as you move farther from the router. Each wall the signal passes through reduces strength by 15 to 30 percent. In a two-story home, the floor between levels blocks significant signal, leaving upper floors with weak connections.
WiFi extenders pick up your existing router signal and rebroadcast it. They cost less than mesh systems but create separate network names for the extended signal. This means your phone connects to the main router downstairs but shows a different network upstairs. You manually switch between networks as you move around, which becomes frustrating quickly.
Extenders also cut your bandwidth in half because they receive and transmit on the same radio. This happens because the extender must both receive data from your router and send it to your device using the same wireless connection. The effective speed drops to roughly 50 percent of your original signal.
Mesh systems solve both problems. All nodes share the same network name, so your devices connect automatically to the nearest node. The system handles the handoff between nodes without interruption. Mesh systems also dedicate separate radios for communication between nodes, preserving your internet speed throughout the house.
Tri-band mesh systems take this further by dedicating one entire frequency band solely for backhaul communication between nodes. This leaves the other two bands completely free for your devices. My tri-band system delivers consistent speeds throughout my home because the node-to-node traffic happens on a separate invisible channel.
How Many Mesh Nodes Do You Need?
Node count depends on your home size, layout, and construction materials. Most mesh systems come in packs of one, two, or three nodes. Getting the right number from the start saves frustration later. Adding nodes later works fine, but buying the right system initially avoids compatibility concerns.
Homes under 1,500 square feet typically need just one or two nodes. Place the main node near your modem and add a satellite node if you notice weak spots. My brother installed a single-node system in his 1,200 square foot apartment and achieved excellent coverage throughout. His open floor plan helps signal travel easily.
Homes between 1,500 and 3,000 square feet usually need two to three nodes. My 2,400 square foot two-story home uses a three-node system. The main node sits in the living room, one satellite covers the master bedroom upstairs, and another handles the basement and garage. This arrangement provides consistent coverage on all levels.
Homes over 3,000 square feet or multi-story houses with basements may need three or more nodes. Large homes with thick concrete walls or multiple floors often require additional nodes for each level. One user in a forum mentioned needing four nodes for their 3,400 square foot home with a finished basement. The extra node eliminated dead spots in the far corners of their property.
Consider your construction materials too. Homes with drywall and wood framing allow signals to pass through easily. Concrete walls, brick, and metal studs block more signal. If your home has concrete interior walls, add an extra node to compensate for the signal loss. The investment pays off in reliable coverage.
Outdoor coverage might require additional planning. If you want strong WiFi on your patio or in your garage, position nodes near exterior walls. Some mesh systems offer weather-resistant outdoor nodes specifically for this purpose. I added a node near my back door to cover the deck and it works perfectly.
How To Set Up A Mesh WiFi Network At Home
The setup process takes about 15 to 30 minutes for most systems. I recommend reading through these steps before starting, then following along with your specific system app. Every mesh brand uses a similar process, though button names and screens vary slightly.
Step 1: Download the Mobile App
Start by downloading your mesh system app from the App Store or Google Play. Popular brands like Eero, Nest WiFi, Orbi, and Deco all have free apps. The app guides you through each step with pictures and prompts. I found the app-based setup much easier than the old browser-based router configuration pages.
Create an account when prompted. This account lets you manage your network remotely and receive notifications about firmware updates or connection issues. Write down your password somewhere safe because you will need it to make changes later. Some systems offer two-factor authentication for added security.
Step 2: Position Your Main Node
Place your main node near where your internet service enters your home. This spot usually has your modem and existing router. The main node must connect directly to your modem using an Ethernet cable. Keep it in an open area, not inside a cabinet or behind your TV.
Ideally, position the main node centrally in your home. My main node sits in a corner of my living room where the cable line enters. This location works fine for my setup, but a more central position would provide better signal distribution. If possible, ask your ISP to move your internet entry point to a central location.
Keep the main node elevated on a table or shelf rather than on the floor. Signals radiate outward and downward, so higher placement improves coverage. Avoid putting the node inside enclosed cabinets or entertainment centers that block signal.
Step 3: Connect the Main Node to Your Modem
Use the included Ethernet cable to connect your main node to your modem. Plug one end into the modem and the other into the WAN or Internet port on your mesh node. This connection brings internet into your mesh network.
If you have a combined modem-router from your ISP, you have two options. Put the modem-router in bridge mode and let your mesh system handle all routing functions. Alternatively, connect your main node to a LAN port on the modem-router and put your mesh system in access point mode. Bridge mode gives you better control over your network features.
Call your ISP if you need help enabling bridge mode. Most providers can walk you through the process or enable it remotely. Some ISPs charge a monthly fee for their combined modem-router units, so you might save money by using your own equipment.
Step 4: Power On and Configure the Main Node
Plug in the power adapter and wait for the indicator light to turn solid. Most systems flash during startup, then show a solid color when ready for configuration. This usually takes about two minutes. Open the app and follow the prompts to create your network.
You will choose your network name and password during this step. Use something memorable but not obvious. Your network name appears publicly, so avoid using personal information like your address or family name. I recommend creating a strong password with at least 12 characters including numbers and symbols.
The app might ask about your internet service type. Select cable, fiber, or DSL depending on your connection. This helps the system optimize settings for your specific service. Some apps also ask about your home size to recommend node placement.
Step 5: Place and Add Satellite Nodes
Now add your satellite nodes to extend coverage. Plug in each satellite node in a room that needs better coverage. The app searches for new nodes automatically and guides you through adding them to your network.
Position satellite nodes about one to two rooms away from the main node. The ideal distance ranges from 15 to 30 feet, with clear line of sight through doorways rather than through multiple walls. Nodes too far from the main unit struggle to maintain connection. Nodes too close waste coverage potential and may interfere with each other.
Add nodes one at a time for best results. Plug in the first satellite, wait for it to connect, then move to the next. This prevents the app from confusing multiple nodes during setup. Most systems light up solid when successfully connected.
Step 6: Run a Speed Test
Most mesh apps include a built-in speed test feature. Run this test from various locations in your home to verify coverage. Walk to each room with your phone and check the signal strength indicator in the app. Note any areas with weak signal.
I discovered my basement needed an additional node after running speed tests. The signal dropped significantly at the bottom of the stairs. Moving the satellite node to a better location fixed the issue without buying extra equipment. Testing revealed coverage gaps I would have otherwise missed.
Compare your speed test results to your internet plan. You should see speeds close to what you pay for throughout your home. If speeds drop significantly in certain areas, adjust node placement before finishing setup.
Step 7: Fine-Tune Node Placement
Use the signal strength feedback to optimize node positions. If a node shows weak connection to the main unit, move it closer or to a different room. Small adjustments often make big differences. I moved my upstairs node from a bedroom to the hallway and gained 20% better coverage across all upstairs rooms.
Many apps show a color-coded signal strength indicator for each node. Green indicates excellent connection, yellow suggests acceptable but improvable, and red means the node struggles to connect. Aim for green indicators on all nodes for optimal performance.
Mesh WiFi Node Placement Strategy
Node placement matters more than anything else for mesh network performance. Poor placement creates the same dead zones you tried to eliminate. These specific strategies helped me optimize coverage throughout my home.
Height and Orientation
Place nodes at table height or higher, about three to five feet from the floor. Signals travel better horizontally than vertically. Avoid putting nodes on the floor or high up on shelves near the ceiling. Keep nodes upright as designed, not tilted or laid flat.
Some nodes have internal antennas oriented in specific directions. Check your manual for placement recommendations. Most nodes work best standing vertically on a flat surface. The antennas inside are tuned for this orientation.
Multi-Story Home Placement
Two-story homes need nodes on both levels for best coverage. Place the main node on the ground floor near the center of the house. Position a satellite node upstairs, ideally directly above or across from where you spend the most time.
My setup uses this arrangement. The main node covers the ground floor kitchen, living room, and office. The upstairs satellite handles bedrooms and the second bathroom. The basement has its own node because concrete floors block most WiFi signal from above.
For homes with three or more floors, add a node on each level. The signal attenuation between floors means you need physical presence on every level where you want strong coverage. Stairwells sometimes help signal travel between floors if positioned strategically.
Concrete and Thick Wall Considerations
Homes with concrete interior walls need more nodes closer together. Concrete absorbs WiFi signal dramatically. If your walls contain metal studs or wire mesh, expect even more signal loss. Position nodes in the same room as devices whenever possible.
One forum user mentioned struggling with mesh coverage in their concrete block home. They solved it by adding nodes to each major room rather than trying to cover multiple rooms from one location. The extra nodes cost more but delivered the coverage they needed.
Basement ceilings present particular challenges. Concrete basement floors block nearly all WiFi signal from the floor above. If you need basement coverage, plan for a dedicated basement node. Run Ethernet cable to it if possible for best performance.
Areas to Avoid
Keep nodes away from metal appliances, large mirrors, and water tanks. These objects reflect and absorb signal. Bathrooms with large mirrors and kitchens near appliances are poor node locations. Avoid putting nodes in corners or behind furniture that blocks signal from spreading through the house.
Other electronics can interfere with WiFi signals. Baby monitors, microwave ovens, and older cordless phones often operate on the 2.4 GHz frequency band. Keep nodes at least several feet away from these devices. The 5 GHz band faces less interference but travels shorter distances.
Avoid placing nodes near large fish tanks or aquariums. Water absorbs WiFi signal effectively. A node near a large tank will struggle to reach devices on the other side of the water. Position nodes away from water features for better coverage.
Wired vs Wireless Backhaul
Backhaul refers to how mesh nodes communicate with each other. Wireless backhaul uses WiFi signals between nodes, requiring no cables. Wired backhaul uses Ethernet cables to connect nodes directly. Each approach has distinct advantages.
Wireless backhaul offers simpler installation. You plug in nodes wherever you need coverage without running cables through walls. Most users start with wireless backhaul for convenience. My initial setup used only wireless connections and worked well for everyday internet use.
Wired backhaul provides better performance. Ethernet cables deliver faster speeds and lower latency between nodes. This matters most for gaming, video calls, and streaming 4K content. Users on forums consistently mention noticeable improvement after switching to wired backhaul.
If your home has Ethernet wiring, use it. Connect each satellite node to your network switch or router using Ethernet cables. This setup combines mesh convenience with wired performance. I added wired backhaul to my basement node and saw download speeds increase by 40%.
Some mesh systems automatically detect Ethernet connections and switch to wired backhaul. Others require you to enable this feature in the app settings. Check your system manual for specific instructions. The improvement in performance makes the extra setup worthwhile.
Hybrid setups work too. Use wired backhaul for distant nodes like basements or garages, while keeping closer nodes wireless. This approach maximizes performance where needed while maintaining flexibility elsewhere. My basement node uses wired backhaul while the upstairs node connects wirelessly.
Configuring Your Mesh WiFi Network
After physical setup, spend time configuring your network settings for security and performance. The app provides access to features that improve your network experience.
Network Name and Password
Choose a network name that identifies your household without revealing personal details. Use a password at least 12 characters long with uppercase letters, lowercase letters, numbers, and symbols. Most mesh apps rate password strength as you type. Write down your credentials somewhere secure for future reference.
Some systems let you create multiple SSIDs for different purposes. You might have one network for personal devices and another for smart home gadgets. This separation improves security and lets you apply different settings to different network segments.
Band Steering
Modern devices support both 2.4 GHz and 5 GHz frequency bands. Band steering automatically connects devices to the faster 5 GHz band when possible. Keep this feature enabled for best performance. Older devices that only support 2.4 GHz still connect normally.
The 5 GHz band offers faster speeds but covers shorter distances. The 2.4 GHz band reaches farther but at lower speeds. Band steering ensures devices automatically use the appropriate band based on their capabilities and location.
Guest Network
Create a separate guest network for visitors. This keeps your main network secure and lets you control what guests access. Most systems let you set different passwords and time limits for guest networks. I enable mine only when hosting parties.
Guest networks isolate visitors from your personal devices and shared files. You can also limit guest bandwidth or block access to specific websites. These controls protect your network while still providing convenient internet access for visitors.
Parental Controls
Many mesh systems include parental control features. You can block specific websites, set internet time limits for individual devices, and pause internet access during homework or bedtime hours. These controls work through the app without requiring separate software.
Content filtering lets you block categories of websites like adult content or social media. Time limits can apply to individual devices or the entire network. I set my kids devices to disconnect automatically at 9 PM on school nights.
Quality of Service Settings
QoS prioritizes certain types of traffic when multiple devices compete for bandwidth. Enable gaming or streaming prioritization if you experience buffering during video calls while others watch movies. Some systems automatically detect traffic types and optimize accordingly.
Device prioritization lets you ensure specific devices always have bandwidth. I prioritize my work laptop during business hours to guarantee smooth video calls. Gaming consoles can be prioritized during evenings for online play.
Security Settings
Enable WPA3 encryption if your devices support it. This newer security standard offers better protection than WPA2. Most mesh systems default to the highest security level your devices can handle. Check your security settings periodically to ensure they remain enabled.
Some systems include built-in malware protection and intrusion detection. These features scan network traffic for threats and block suspicious connections. Enable these options for additional security, especially if you have smart home devices that might have vulnerabilities.
Troubleshooting Common Mesh WiFi Issues
Even with careful setup, you might encounter problems. These solutions address the most common mesh WiFi issues I experienced and heard about from other users.
Node Not Connecting to Main Unit
If a satellite node fails to connect, first check its distance from the main node. Move it closer temporarily during setup, then relocate it to your desired position after it connects. Nodes need adequate signal from the main unit to join the network.
Restarting both the main node and satellite often resolves connection issues. Unplug both for 30 seconds, then power on the main node first. Wait two minutes before plugging in the satellite. The app should detect and add it automatically.
Check that your firmware is up to date before adding new nodes. Some systems require updates before they recognize additional hardware. Open the app and install any available updates before attempting to add nodes.
Slow Speeds in Certain Areas
Speed problems usually indicate node placement issues. Run a speed test near each node. If a node shows poor performance, relocate it to achieve better signal from the main unit. Sometimes moving a node just a few feet makes a significant difference.
Check for interference from other electronics. Microwaves, baby monitors, and older cordless phones operate on similar frequencies. Move nodes away from these devices or switch your mesh system to a different channel in the app settings.
Your internet service might be the bottleneck. Run a speed test connected directly to your modem with Ethernet. If that test shows slow speeds, contact your ISP. Mesh systems cannot improve speeds beyond what your internet service provides.
Devices Not Switching Between Nodes
Some older devices hold connections to distant nodes instead of switching to closer ones. This behavior drains battery and reduces speed. Restarting your device forces it to reconnect to the nearest node. For persistent issues, temporarily turn off the distant node to force reconnection.
Most modern devices handle node switching automatically. However, some devices prioritize stability over optimization. Check your device WiFi settings to see if it offers connection preferences. Some phones have settings to avoid poor connections.
Internet Works But WiFi Drops Periodically
Random WiFi drops often indicate outdated firmware. Check your app for available updates and install them. Most systems update automatically, but sometimes manual updates are needed. I check my app monthly for firmware notifications.
Intermittent drops can also indicate node placement problems. If nodes struggle to maintain backhaul connections, devices disconnect temporarily. Check your app for node connection quality indicators. Relocate nodes with yellow or red indicators.
Power issues cause intermittent problems too. Ensure all nodes use their original power adapters. Third-party adapters might not provide consistent power. Check that power cables are firmly connected and not damaged.
Unable to Access Certain Websites or Services
Some mesh systems include security features that block potentially dangerous websites. Check your security settings if legitimate sites fail to load. Parental controls might also restrict access accidentally. Disable these features temporarily to test whether they cause the problem.
DNS settings can affect website access. Some mesh systems use custom DNS servers for security or parental controls. Try switching to your ISP DNS or a public DNS like Google 8.8.8.8 to see if that resolves access issues.
Maintaining Your Mesh WiFi System
Mesh networks require minimal maintenance but benefit from occasional attention. These habits keep your network running smoothly for years.
Regular Firmware Updates
Firmware updates fix security vulnerabilities and improve performance. Most mesh apps notify you about updates automatically. Install updates within a few days of receiving notifications. I check my app weekly and update immediately when available.
Updates often include performance optimizations for specific devices. Mesh manufacturers continuously improve how their systems handle common devices like smart TVs and gaming consoles. Staying updated ensures you benefit from these improvements.
Restart Your Network Monthly
Restarting your mesh system clears temporary issues and refreshes connections. Unplug all nodes for 30 seconds monthly. Power them back on starting with the main node, waiting two minutes between each satellite. This five-minute routine prevents most long-term problems.
Some apps offer scheduling for automatic reboots. Set your network to restart during low-usage hours like 4 AM. This ensures your network stays fresh without interrupting your daily use.
Monitor Connected Devices
Review your connected devices list in the app periodically. Remove old devices you no longer own. Unknown devices on your network might indicate neighbors using your WiFi. Change your password immediately if you see unfamiliar devices.
Many apps show device bandwidth usage. This helps identify devices consuming excessive data. I discovered my smart TV was downloading updates during peak hours, slowing other devices. I adjusted its settings to update overnight instead.
Adjust Settings as Needed
Your network needs change over time. Add nodes when you finish a basement or convert a garage to living space. Update parental controls as children grow. Enable guest networks for parties. Your mesh system adapts to your changing household.
Review your network configuration every few months. Delete old guest networks you no longer use. Update parental control settings for current needs. Remove devices you sold or stopped using. A clean network configuration runs more efficiently.
FAQs
Can I install a mesh WiFi system myself?
Yes, most modern mesh WiFi systems are designed for DIY installation. The process takes 15 to 30 minutes using a mobile app that guides you through each step. You connect the main node to your modem, power on satellite nodes around your home, and follow app prompts to configure your network. No technical expertise required.
What is a major disadvantage of a mesh network?
The main disadvantage of mesh networks is cost. Mesh systems cost more than traditional routers, especially for larger homes requiring three or more nodes. Budget options start around $150 while premium systems can exceed $500. However, the improved coverage and easier management often justify the investment for larger homes.
Can I add mesh WiFi to my existing router?
Yes, you can add mesh nodes to an existing router in two ways. Put your current router in bridge mode and let the mesh system handle all routing, or connect the mesh main node to your router and set it to access point mode. Bridge mode gives you better control over network features while access point mode keeps your existing router settings.
Which is better, a WiFi extender or mesh?
Mesh WiFi is better than WiFi extenders for most homes. Mesh systems create a single seamless network where devices automatically connect to the nearest node. Extenders create separate network names requiring manual switching as you move around. Mesh also preserves bandwidth better since nodes use dedicated radios for communication. Extenders cut speed in half by receiving and transmitting on the same radio. Choose mesh for whole-home coverage and extenders only for small, budget-conscious setups.
Conclusion
Setting up a mesh WiFi network at home transforms how you experience the internet throughout your house. Dead zones disappear, streaming buffers vanish, and video calls flow smoothly from any room. The process takes just 15 to 30 minutes using an intuitive mobile app that guides you through connecting nodes and configuring settings.
Remember that node placement determines your success more than any other factor. Position nodes one to two rooms apart at 15 to 30 feet distance. Keep them at table height, away from metal appliances and thick walls. Use wired backhaul if your home has Ethernet wiring for maximum performance.
Now that you know how to set up a mesh WiFi network at home, you can enjoy seamless coverage in every corner of your house. Start with the right number of nodes for your home size, follow the app prompts, and adjust placement based on speed test results. Your whole family will appreciate the difference.