
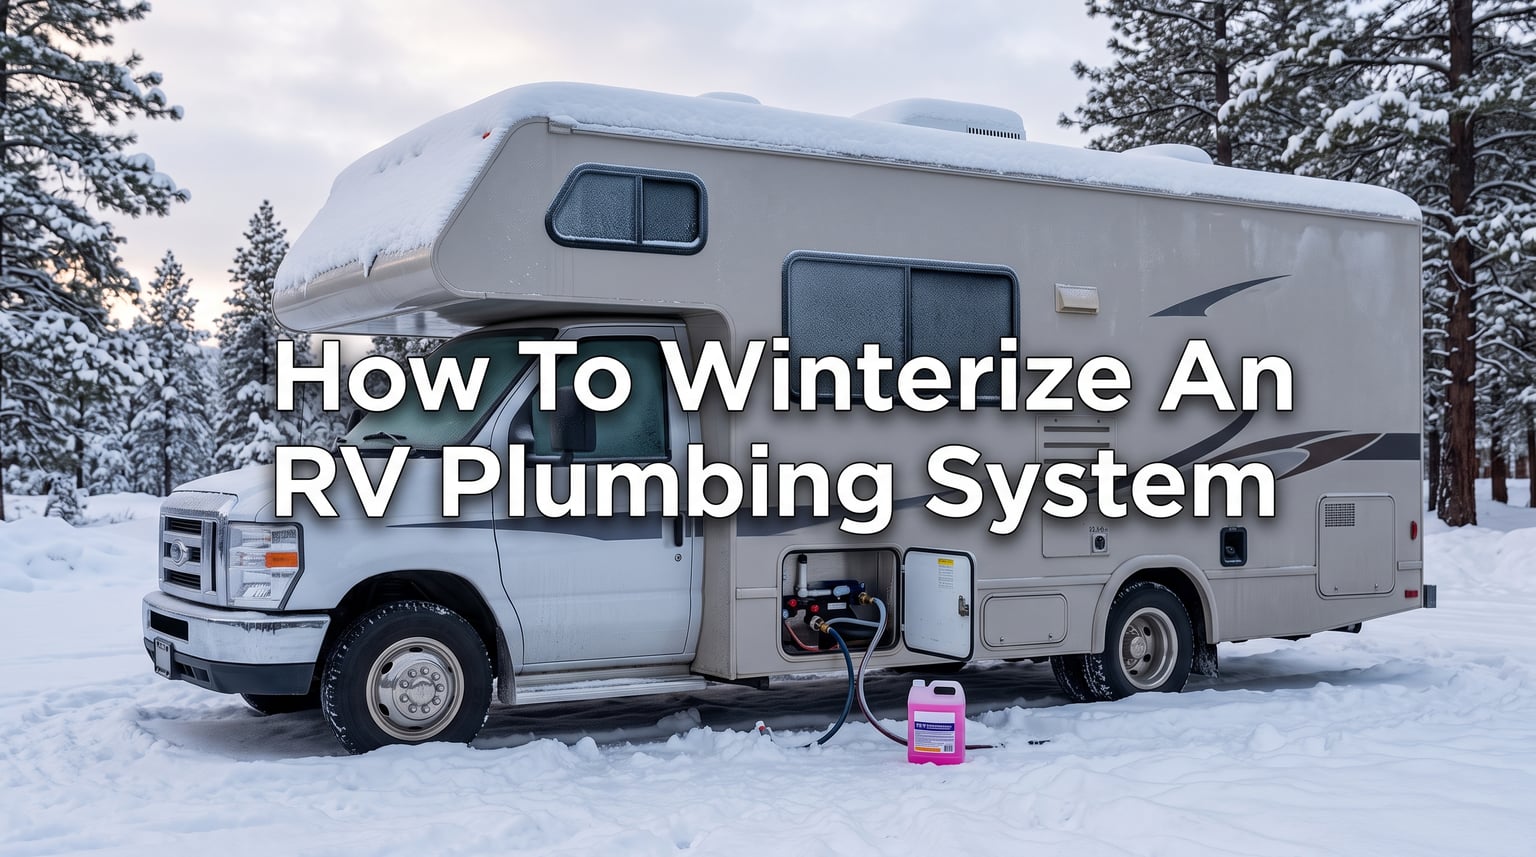
When temperatures drop below 20F, water inside your RV pipes can freeze and cause thousands of dollars in damage. Learning how to winterize an RV plumbing system properly protects your investment and prevents costly repairs when spring arrives. This guide walks you through every step, from draining your water heater to protecting P-traps, whether you use compressed air or RV antifreeze.
I have winterized dozens of RVs over the years and made plenty of mistakes along the way. One year, I forgot to drain the water heater completely and ended up with a cracked tank that cost me $800 to replace. Since then, I developed a checklist that covers every component, and I am sharing that exact process with you here.
The entire winterization process takes about two hours if you have your supplies ready. You will need between 2-4 gallons of non-toxic RV antifreeze, depending on your rig size, or an air compressor if you prefer the blowout method. Both approaches work well, but I recommend using antifreeze for complete protection in harsh winter climates where temperatures stay below freezing for days or weeks.
Before diving into the steps, understand that winterization is not just about adding antifreeze to your system. The process involves systematically draining every water-holding component, clearing supply lines, and protecting drain systems. Missing any single step can result in freeze damage that becomes apparent only when you de-winterize in spring and find leaks.
Why Winterization Matters
Water expands about 9% when it freezes, creating tremendous pressure inside enclosed spaces. Your RV plumbing system contains dozens of fittings, elbows, and joints that cannot handle this expansion. Even a small amount of trapped water can crack pipes, burst fittings, and destroy your water heater tank.
The average cost to repair frozen plumbing damage ranges from $500 to over $3,000 depending on what breaks. Water heaters alone cost $400 to $1,200 to replace. Water pumps run $100 to $300. A single cracked PEX fitting might cost only $5 for the part, but accessing it behind a wall or under flooring requires hours of labor and potentially professional help.
I have seen RVs with split PEX tubing running through walls, requiring extensive demolition to access and repair. Other owners discover cracked water heater tanks only when they turn on the water in spring and find water pouring from the exterior compartment. Prevention is always cheaper than repair.
Beyond the financial cost, dealing with plumbing failures can ruin your camping season. If your rig needs repairs, you might wait weeks for parts during peak season when everyone else discovers their winterization failures too. Mobile RV technicians book up quickly in spring with emergency calls.
Consider also that freeze damage often affects multiple components simultaneously. A hard freeze can crack the water heater, split several fittings, and destroy the water pump all at once. The combined repair costs and labor time make winterization one of the most important maintenance tasks for any RV owner in cold climates.
When to Winterize Your RV
You should winterize your RV before temperatures consistently drop below freezing, which is 32F. However, most experienced RVers recommend winterizing when nighttime lows reach 20F to 25F because a brief freeze overnight typically does not cause damage. The real danger comes when temperatures stay below freezing for more than a few hours.
In northern climates, this means winterizing in late October or early November. Watch for the first hard freeze warnings in your area. In southern regions with occasional freezes, you might wait until December or use a heated hose instead of full winterization. Some RVers in mild climates use the air blowout method alone for occasional freeze protection.
If you live in your RV full-time in a cold climate, you face different challenges than seasonal owners. Parked RVs lose heat through the floor, and plumbing in unheated compartments freezes faster than you might expect. Full-timers often use heated hoses, skirting around the RV bottom, and tank heaters to avoid full winterization while maintaining water access through winter.
For part-time RVers who store their rigs, timing matters. Winterize too early and you miss late-season camping opportunities. Winterize too late and you risk an unexpected early freeze catching you off guard. I recommend having supplies on hand by early October so you can winterize quickly when the forecast turns cold.
Tools and Supplies Needed
Before starting the winterization process, gather everything you need. Having supplies ready makes the job faster and prevents mid-process trips to the hardware store. Most supplies are reusable for multiple winterizations.
Essential Supplies
RV Antifreeze: You need 2-4 gallons of non-toxic, propylene glycol-based antifreeze specifically labeled for RV use. Never use automotive antifreeze, which contains ethylene glycol and is toxic if ingested. RV antifreeze is pink and safe for potable water systems. Expect to pay $4-6 per gallon at camping supply stores or online retailers.
Air Compressor (Optional): If you choose the air blowout method, you need a compressor capable of delivering 30 PSI steadily. Higher pressure risks damaging your plumbing components. Use a regulator to maintain consistent pressure throughout the blowout process. Small portable compressors work fine for this task.
Water Heater Bypass Kit: Many RVs come with a factory-installed bypass valve system. If yours does not, you can purchase an inline bypass kit for $15-30 that allows you to isolate the water heater during winterization. This prevents filling your water heater with antifreeze and wasting 6-10 gallons. Installation requires basic tools and takes about 30 minutes.
Blowout Plug: For the air method, you need a blowout plug that threads into your city water inlet and connects to your air hose. These cost $10-15 and are essential for directing compressed air into your plumbing system safely.
Water Pump Converter Kit: This kit allows you to draw antifreeze directly from jugs through your water pump. Some RVs have a built-in winterization valve for this purpose. If not, the converter kit installs inline with the pump and costs $15-25.
Other Tools: You will need an adjustable wrench for drain plugs, screwdriver for accessing panels, and a funnel for adding antifreeze. A bucket catches water when draining low point drains indoors.
Safety Items: Wear gloves when handling drain plugs and valves. Keep paper towels or rags nearby for cleanup. A flashlight helps you locate low point drains and bypass valves in dim compartments under your RV.
How to Winterize An RV Plumbing System
Follow these steps in order for complete winterization. Take your time with each step, and do not rush the process. Missing a single component can result in freeze damage that you discover only months later. Work methodically and check off each step as you complete it.
Step 1: Drain the Water Heater
Turn off your water heater and let it cool completely before draining. Attempting to drain a hot water heater creates steam and scalding risks. Turn off the propane supply at the tank and switch off the electric heating element at the breaker if your unit has one. Allow at least 30 minutes for cooling.
Locate the drain plug on your water heater. The location varies by brand and model. Furrion tankless water heaters have a drain valve near the bottom of the unit that opens with a quarter turn. Suburban tanked heaters use an anode rod that doubles as a drain plug, located near the bottom of the tank. Dometic units have a dedicated drain plug separate from the anode rod. Truma water heaters have specific drain procedures outlined in the owner manual.
Remove the drain plug or anode rod and let all water drain out. Open the pressure relief valve near the top of the tank to allow air in and speed drainage. Water should flow freely until the tank is empty. Inspect your anode rod for wear and replace if the core wire is exposed or the rod is more than 75% depleted.
Leave the drain plug out until spring. This ensures any residual water can expand without cracking the tank if temperatures drop extremely low. Store the plug in a plastic bag with your other winterization supplies so you can find it easily when de-winterizing.
Step 2: Bypass the Water Heater
Your water heater bypass system prevents antifreeze from filling the heater tank during the winterization process. Without a bypass, you waste antifreeze and potentially damage heating elements by leaving them dry. Locate your bypass valves near the water heater, typically in an adjacent compartment or behind an access panel.
Most bypass systems use three valves: one on the cold water inlet, one on the hot water outlet, and one on the bypass line connecting them. Close the inlet and outlet valves while opening the bypass valve. This routes antifreeze around the heater instead of through it. Valve handles parallel to the pipe typically indicate open, while perpendicular indicates closed.
If your RV lacks a factory bypass system, you can install a winterization kit. These kits connect inline with the water heater plumbing and include valves for easy bypass. Installation takes about 30 minutes with basic tools. This investment pays for itself in antifreeze savings after just a few winterizations.
Double-check your valve positions before moving to the next step. Incorrect valve settings either fill your water heater with antifreeze, wasting gallons, or prevent antifreeze from reaching your hot water lines entirely. Trace the pipes visually to confirm flow direction.
Step 3: Drain the Fresh Water Tank
Locate your fresh water tank drain, typically found underneath the RV near the tank. Some drains have a valve you turn to open, while others require removing a plug. Open the drain and let all water flow out. This can take 10-20 minutes depending on tank size.
If your tank has a low point drain, open it as well. Low point drains are the lowest points in your plumbing system where water naturally collects. Your RV may have one or two low point drains, usually located outside near the frame rail or in a basement compartment. Open both the hot and cold low point drains.
While the tank drains, open all faucets inside the RV to allow air into the lines. Start with the highest faucet and work down. Open hot and cold handles on every fixture, including the bathroom sink, kitchen sink, shower, and outside shower if equipped. Removing aerators from faucet spouts helps water drain completely.
Leave all faucets open during the next several steps. This ensures water can flow freely and no air locks prevent complete drainage. Air locks trap water in high spots that later freeze and cause damage.
Step 4: Empty the Holding Tanks
Drain your black and gray tanks completely at a dump station before winterization. Never leave waste water in tanks over winter. Even with antifreeze added, solid waste can create problems in spring and residual water can freeze and damage tank valves.
After dumping, rinse your black tank using the tank flush system if equipped. Many newer RVs include a black tank flush connection that sprays the interior walls with high-pressure water. Run this for several minutes until water flows clear from the drain valve. This removes built-up waste that could dry and harden over winter.
Leave the tank valves open during winterization to ensure no water pools in the valve mechanism. Some RVers add a gallon of antifreeze to each tank after draining to protect the valve seals and prevent rubber from drying out. This also protects any remaining liquid in the tank bottom.
If your RV has a black tank flush system, check the check valve near the flush inlet on the exterior of the RV. Water trapped in this valve can freeze and crack the valve body. Disconnect the flush inlet and let any residual water drain, or pump antifreeze through the flush line.
Step 5: Blow Out Lines with Compressed Air (Air Method)
If you choose the air blowout method, you skip adding antifreeze to the water lines. This works well for mild climates or when you plan to use the RV occasionally through winter and can re-winterize if needed. The air method removes most water but may leave small amounts in low spots and horizontal runs.
Connect your air compressor to the city water inlet using a blowout plug. These plugs thread into the inlet and have an air hose connection on the back. Set your compressor regulator to 30 PSI maximum before connecting. Higher pressure can damage your plumbing components, blow fittings apart, and destroy your water pump internals.
With the compressor running, work through each faucet one at a time. Close all faucets except one, then run both hot and cold until no water sprays from the spout. Start with the highest faucet and work down to the lowest point drains. Open low point drains while blowing air through the system.
Do not forget the toilet. Flush it several times while blowing air to clear water from the supply line that runs to the toilet. Also blow out the outside shower and any other water fixtures. Run air through both the shower head and the faucet at the utility connection.
After blowing out all lines, release air pressure and disconnect the compressor. Close the low point drains and faucets. This method alone does not protect P-traps, so you still need to add antifreeze to drains even if you use air for the supply lines.
Step 6: Add Antifreeze Through the System (Antifreeze Method)
Most RVers prefer the antifreeze method for complete protection. This approach leaves antifreeze in all lines, ensuring no water remains to freeze. It takes longer than the air method but provides better peace of mind for long-term storage in cold climates.
Locate your water pump winterization port or install a winterization T-valve inline with the pump. This port allows you to draw antifreeze directly from jugs instead of pumping from the fresh water tank. If your RV has a built-in winterization valve, simply turn it to the winterize position.
Place the suction hose into a gallon jug of RV antifreeze. Turn on the water pump and let it draw antifreeze through the system. Watch the clear hose to see pink antifreeze flowing through. The pump may run for a minute before antifreeze reaches the faucets.
Go inside and open faucets one at a time, starting with the closest to the pump. Run cold water first until pink antifreeze flows steadily, then switch to hot until antifreeze appears. Close each faucet after antifreeze appears. Work through every faucet including the bathroom sink, kitchen sink, shower, and outside fixtures.
Flush the toilet until antifreeze appears in the bowl. This ensures the supply line and flush valve mechanism are protected. Pour additional antifreeze directly into the toilet bowl to protect the P-trap below the toilet. Some toilets have a water valve that needs manual cycling to ensure antifreeze reaches all internals.
Continue until you have run antifreeze through every water fixture in the RV. Do not forget the ice maker line if you have a residential refrigerator. Check your refrigerator manual for winterization instructions. Some require disconnecting the water line and draining it separately.
Step 7: Protect P-Traps and Drains
P-traps are the curved sections of drain pipe under your sinks and shower. They hold water to block sewer gases from entering your RV. This water freezes and cracks the trap if not protected. P-trap protection is one of the most commonly forgotten winterization steps.
Pour one cup of RV antifreeze down each drain. This includes the kitchen sink, bathroom sink, shower, bathtub, and any other floor drains. The antifreeze displaces water in the trap and prevents freezing. Run a small amount of water first to ensure the trap is full, then add antifreeze.
For extra protection, some RVers pour antifreeze into the black and gray tank drains through the toilet and sink drains. This protects the valve mechanisms where small amounts of water collect and cannot drain completely. A cup in each tank provides adequate protection.
Do not skip this step. Frozen P-traps are a common winterization failure point I see frequently. The repair requires cutting out the cracked trap and installing new fittings, a messy job in tight spaces under sinks and behind shower walls. Prevention takes two minutes.
Step 8: Winterize the Toilet
Your toilet needs special attention during winterization beyond simply running antifreeze through the supply line. The flush valve mechanism contains rubber seals that can dry out and crack if water freezes around them. These seals are expensive to replace and require toilet disassembly.
After pumping antifreeze through the toilet supply line, pour antifreeze directly into the toilet bowl. Flush the toilet to cycle antifreeze through the flush valve mechanism. This lubricates the seals and ensures complete coverage throughout the valve body.
Some RVers also add antifreeze to the black tank to protect the seal at the bottom of the toilet where it connects to the tank. Pour a cup down the toilet after flushing with antifreeze. This creates a protective layer on the seal.
If your RV has a macerator toilet, check the manufacturer instructions for specific winterization steps. Macerator toilets have additional components including a grinding pump that requires protection. Failure to winterize a macerator properly can result in a frozen and cracked pump housing.
Step 9: Handle Outside Shower and Utility Faucets
Outside showers and utility faucets are easy to forget during winterization because they are not inside your living space. These fixtures often have longer supply lines running through unheated compartments where they freeze first. Outside showers are a common source of freeze damage.
Open the outside shower faucet and run both hot and cold until antifreeze appears from the shower head. Disconnect any hoses attached to utility faucets and run antifreeze through them as well. If you used the air method, blow out these lines separately to remove all water.
Drain any water filters or filtration systems completely. Remove filter cartridges and store them in a dry place away from freezing temperatures. Water trapped in filter housings freezes and cracks the plastic housing, requiring replacement. Leave the housing loose so any residual water can expand without cracking.
Check for any other water connections you might have added to your RV. Washer-dryer hookups, extra exterior faucets, and aftermarket additions all need winterization. Trace your water lines and ensure every fixture receives antifreeze.
De-winterizing Your RV
When spring arrives and temperatures stay consistently above freezing day and night, you need to de-winterize your RV before using the water system. This process flushes antifreeze from the system and sanitizes the fresh water tank for safe use. Rush through this step and you may taste antifreeze in your water or miss developing leaks.
Close all drains and reinstall the water heater drain plug or anode rod. Hand-tighten only, then give an extra quarter turn with a wrench. Turn the water heater bypass valves back to normal operating position, opening the inlet and outlet valves while closing the bypass valve. Close low point drains and all faucet handles.
Fill your fresh water tank about half full with clean water. Turn on the water pump and run water through all faucets until the pink color disappears and water runs clear. This may take several minutes per faucet as the antifreeze flushes out. Start with cold water lines, then flush hot water lines.
After flushing antifreeze, sanitize your fresh water system to ensure safe drinking water. Add 1/4 cup of unscented household bleach per 15 gallons of tank capacity. Fill the tank completely with water and run chlorinated water through all faucets until you smell bleach. Let it sit for at least four hours or overnight.
Drain the sanitizing solution and rinse thoroughly. Fill and drain the tank at least twice until the bleach smell disappears. Some RVers add a cup of white vinegar to the final rinse to neutralize any remaining bleach odor.
Check all connections for leaks before your first trip. Pressurize the system and inspect visible fittings, the water heater compartment, and under-sink connections. Look for drips or wet spots. Fix any leaks before they become bigger problems on the road.
Common Mistakes to Avoid
Even experienced RVers make winterization mistakes that result in spring repairs. Learn from these common errors to protect your investment and ensure your RV is ready for the next camping season.
Using Automotive Antifreeze
Never use automotive antifreeze in your RV plumbing system under any circumstances. Automotive antifreeze contains ethylene glycol, which is toxic if ingested. Even small amounts remaining in your system can contaminate drinking water. RV antifreeze is propylene glycol-based and safe for potable water systems. The pink color distinguishes it from toxic green automotive antifreeze.
Exceeding 30 PSI Air Pressure
When blowing out lines with compressed air, higher pressure does not mean better results. Exceeding 30 PSI risks blowing fittings apart, cracking valve bodies, and damaging water pump internals. The rubber impeller inside your water pump can be destroyed by excessive air pressure. Use a regulator and check pressure frequently during the blowout process.
Forgetting P-Traps
P-traps hold water by design, and this water freezes in cold weather. Pouring antifreeze down drains takes two minutes and prevents cracked traps. I learned this lesson the hard way after replacing two bathroom sink traps one spring. The repair required cutting out the damaged sections and installing new fittings in a cramped space under the vanity.
Not Draining the Water Heater Completely
Bypassing the water heater without draining it leaves water in the tank that can freeze and crack. Always remove the drain plug and let the tank empty before setting bypass valves. This takes extra time but prevents expensive repairs. A cracked water heater tank cannot be repaired and must be replaced entirely.
Leaving the Water Filter Installed
Water filters trap debris and hold moisture in the housing. A saturated filter can freeze and crack the plastic housing, requiring replacement. Remove filter cartridges and store them in a dry place. Leave the housing loose so residual water can expand without cracking the unit.
Missing the Ice Maker Line
Residential refrigerators with ice makers have a dedicated water line that many RVers forget. This line holds water that freezes and cracks the fitting at the refrigerator connection. Disconnect the line from the water supply and run antifreeze through it, or disconnect it completely and drain it manually.
FAQs
At what temperature will my water freeze in my RV pipes?
Water in RV pipes begins to freeze at 32F (0C), but significant damage typically occurs when temperatures drop below 20F and stay there for several hours. Brief overnight freezes above 20F rarely cause damage because pipes retain some heat. The real danger comes from extended cold snaps where temperatures do not rise above freezing during the day.
Can you leave water in your black tank over winter?
You should not leave water in your black tank over winter. Even a partially filled tank can freeze and crack, especially around the valve mechanism where water collects. Always dump and rinse your black tank completely before winterization. Adding a small amount of RV antifreeze after draining helps protect the valve seals.
Do you leave faucets open when winterizing RV?
Yes, leave faucets open during the winterization process to allow air into the lines and water to drain freely. After completing winterization with antifreeze, you can close faucets. If using the air blowout method only, some RVers leave faucets slightly open to prevent any residual water from creating pressure during freezes.
Should you put antifreeze in trailer pipes for winter?
Yes, adding RV antifreeze to your plumbing lines provides the most reliable protection against freeze damage. The antifreeze method ensures complete coverage of all lines, valves, and fixtures. While the air blowout method works in mild climates, antifreeze offers backup protection if temperatures drop lower than expected or an unexpected cold snap hits.
What is the average cost to winterize a RV?
Professional RV winterization costs between $150 and $300 depending on your location and rig size. DIY winterization costs much less, typically $25-40 for antifreeze and basic supplies. If you need to purchase a bypass kit or winterization valve, add $15-30 to your initial investment. These supplies last for multiple winterizations.
Can I use the toilet in a winterized RV?
You cannot use the toilet normally in a winterized RV because antifreeze replaces water in the supply lines. However, you can add water to the toilet bowl for occasional use if you also add antifreeze afterward. For extended use, you would need to de-winterize and restore normal water system operation.
Conclusion
Learning how to winterize an RV plumbing system takes the guesswork out of protecting your investment through cold weather months. The process involves draining all water from tanks and lines, bypassing the water heater, adding antifreeze to supply lines and traps, and protecting every fixture from freeze damage.
Take your time with each step and double-check your work before storing your RV for the season. The $25-40 you spend on supplies prevents hundreds or thousands in repairs that can ruin your spring camping plans. Mark your calendar to de-winterize before your first spring trip so your RV is ready when camping season arrives.
Whether you choose the antifreeze method for complete protection or the air blowout approach for milder climates, following this guide ensures your plumbing survives the winter intact. Print this checklist and keep it with your RV supplies for reference each fall. After a few seasons, winterization becomes second nature and takes less than an hour to complete.