
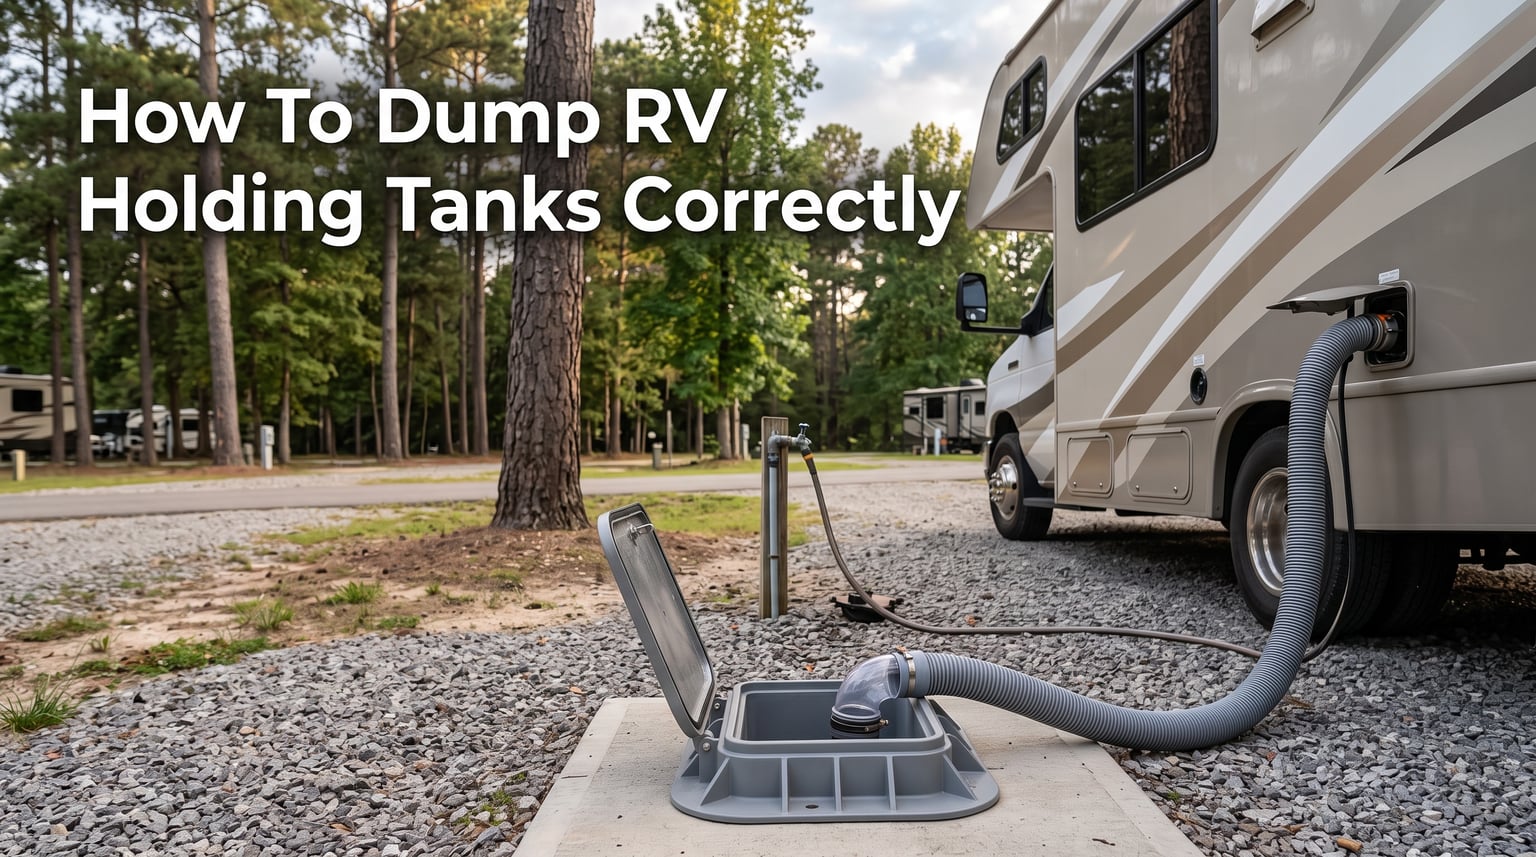
Learning how to dump RV holding tanks correctly is one of the most important skills every RVer needs to master. Whether you are a weekend camper or a full-time nomad, the dumping process keeps your RV plumbing system functioning, odor-free, and ready for the next adventure.
If you are feeling nervous about your first dump station visit, you are not alone. Practically every new RVer feels the same way before their first time. The good news? Once you understand the process, the entire routine takes about 10 to 15 minutes from start to finish.
This guide walks you through every detail of how to dump RV holding tanks the right way. We cover the correct dump order, the equipment you need, step-by-step instructions, flushing techniques, common mistakes, and troubleshooting for stubborn clogs.
By the end, you will have the confidence to handle any dump station like someone who has been doing it for years. Let us start with the basics.
Understanding Your RV Holding Tanks
Most modern RVs have two or three holding tanks that store wastewater until you can dispose of it at an approved dump station. Understanding what each tank does helps you manage your RV plumbing system properly.
The Black Water Tank
The black tank collects waste from your RV toilet only. Everything that goes down the toilet — human waste and toilet paper — ends up here. This tank is sealed to contain odors and uses a gate valve at the bottom for controlled draining.
Black tanks come in various sizes, typically ranging from 15 to 50 gallons depending on your RV type. A larger black tank means fewer trips to the dump station, which matters when you are boondocking far from civilization.
The black tank valve must stay closed except when you are actively dumping. We will explain why this matters later, but it is one of the most common mistakes new RVers make.
The Gray Water Tank
The gray tank collects wastewater from your RV kitchen sink, bathroom sink, and shower. This water contains soap, food particles, grease, and hair — but no solid waste.
Gray tanks fill faster than most people expect because every shower, dish wash, and hand rinse adds to it. Most RVs have gray tanks ranging from 25 to 65 gallons.
Gray water is less unpleasant to deal with than black water, but neglecting gray tank maintenance leads to slow drainage, grease buildup, and unpleasant odors that creep into your RV.
Some RVs Have a Galley Tank
Larger RVs and fifth wheels sometimes have a third tank called a galley tank. This tank handles kitchen wastewater separately from the bathroom gray tank. If your rig has three tanks, the galley tank typically dumps through the same valve system.
Tank Sensors and Why They Lie
Your RV monitor panel shows tank levels using sensor probes mounted inside each tank. These probes can accumulate residue and give false readings over time.
If your panel shows the black tank as full right after dumping, the sensors likely have buildup. Regular flushing and cleaning helps keep sensors reading accurately.
Which RV Tank Do You Dump First?
Always dump the black tank first and the gray tank second. Here is the correct procedure:
Pull the black tank valve first — let all solid and liquid waste drain completely.
Close the black tank valve and run the black tank flush if your RV has one.
Pull the gray tank valve second — the soapy gray water rinses the sewer hose clean.
Close both valves and disconnect your equipment.
Dumping in this order matters because gray water is relatively clean and soapy. When it flows through the hose after the black tank drains, it washes away residual waste and keeps your sewer hose cleaner between uses.
If you reversed the order, your hose would carry black water last, leaving solids and bacteria behind. This creates odor problems and makes equipment cleaning much harder.
Equipment Checklist for Dumping RV Tanks
Having the right equipment makes the dumping process cleaner, faster, and far less stressful. Here is what you need before heading to a dump station.
Essential Equipment
Heavy-duty sewer hose: This is the most important piece of gear. Look for a quality hose with thick walls and secure fittings. Cheap hoses split, leak, and create messes that ruin your day.
Disposable gloves: Always wear gloves when handling dump equipment. Disposable nitrile gloves work best because they resist tears and provide good grip on wet valve handles.
Clear sewer elbow or adapter: A clear 45-degree or 90-degree elbow connects your sewer hose to the RV outlet and lets you see when the water runs clear. This visual confirmation tells you the tank is fully drained.
Hose support: A sloped hose support or ramp keeps your sewer hose elevated and angled downward. This helps waste flow freely and prevents waste from pooling inside the hose.
Recommended Add-Ons
Black tank flush hose: Keep a dedicated hose for black tank flushing that is clearly marked and never used for drinking water. Many RVers use a different color to avoid mix-ups.
Tank treatment: Enzyme-based or bacteria-based treatments break down waste and control odor. Add treatment after each dump to keep your black tank fresh between uses.
Paper towels and hand sanitizer: Keep these within reach for quick cleanup. You will appreciate having them when a fitting drips or a valve handle is sticky.
Sewer hose cap: Cap both ends of your hose before storing it. This prevents drips in your storage compartment and keeps the hose sealed between dumps.
How to Dump RV Holding Tanks: Step-by-Step Procedure
Follow these steps in order every time you dump. The process becomes second nature after a few repetitions.
Step 1: Put On Gloves and Prepare Your Station
Put on your disposable gloves before touching anything. Lay out your sewer hose, clear elbow adapter, and hose support within easy reach. Check that your dump station has a working rinse hose and water connection if you plan to use a black tank flush.
Step 2: Connect the Sewer Hose to the Dump Station
Take one end of your sewer hose and insert it into the dump station receptacle. Most stations use a 4-inch threaded fitting or a bayonet connection. Secure the connection tightly and use a donut or ring seal if the station requires one.
Make sure the hose sits securely in the receptacle. A loose connection here means waste could back up and spill onto the ground — a situation nobody wants.
Step 3: Set Up Your Hose Support
Place your hose support under the sewer hose to create a downward slope from the RV to the dump station. Gravity does most of the work, so the hose needs a continuous downhill path with no dips where waste can collect.
Step 4: Connect the Other End to Your RV Waste Outlet
Attach the clear elbow adapter to your RV waste outlet first, then connect the sewer hose to the adapter. The clear section lets you monitor the flow and see when the water runs clear.
Double-check both connections before opening any valves. A secure connection at both ends prevents leaks when waste starts flowing.
Step 5: Pull the Black Tank Valve
Locate the black tank valve handle — it is typically the larger of the two handles and may be labeled. Pull the handle all the way out to open the valve fully.
You should immediately hear and see waste flowing through the clear elbow adapter. The initial flow is fast and dark, gradually lightening as the tank empties.
Step 6: Wait for the Black Tank to Fully Drain
Let the black tank drain completely. This usually takes 2 to 5 minutes depending on tank size and how full it is. Watch the clear elbow — when the flow stops or runs nearly clear, the tank is empty.
Resist the urge to rush this step. Patience here ensures you get as much waste out as possible before closing the valve.
Step 7: Close the Black Tank Valve and Run the Flush
Push the black tank valve handle back in to close it. If your RV has a built-in black tank flush system, connect your dedicated flush hose to the flush inlet and turn on the water.
Run the flush for 2 to 3 minutes with the valve closed. This fills the tank partially with clean water, then open the black valve again to drain the loosened debris. Repeat this process once or twice until the water runs clear.
Step 8: Pull the Gray Tank Valve
Once the black tank is done and the valve is closed, pull the gray tank valve handle. The gray water flows through the same hose, rinsing away residual black tank waste as it drains.
This is the genius of the dump order. That soapy gray water acts as a natural rinse cycle for your sewer hose.
Step 9: Wait for the Gray Tank to Fully Drain
Gray tanks typically drain faster than black tanks. Watch the clear elbow until the flow stops, then close the gray tank valve.
If your gray tank drains slowly, it may have grease buildup restricting flow. We cover gray tank maintenance and cleaning in the next section.
Step 10: Disconnect and Clean Up
Disconnect the sewer hose from your RV first, then disconnect from the dump station. Hold the hose with both ends up to let any remaining liquid drain into the receptacle.
Rinse the hose with the dump station’s rinse hose if available. Cap both ends and store the hose in its designated compartment, separate from your fresh water equipment.
Remove your gloves, use hand sanitizer, and wash your hands with soap and water as soon as possible. Your dump is complete.
How to Use a Black Tank Flush System
Many modern RVs include a built-in black tank flush system — a connection on the exterior of the RV that sprays pressurized water inside the black tank. This system breaks up solids, cleans the tank walls, and rinses sensor probes.
How the Flush System Works
The flush inlet connects to a series of spray nozzles inside the black tank. When you attach a water hose and turn on the pressure, these nozzles spray the tank interior in multiple directions, dislodging waste that simple gravity draining leaves behind.
Not every RV has this feature. If yours does not, you can achieve similar results using a rinser wand inserted through the toilet, or a flush king valve attached to your sewer outlet.
Step-by-Step Black Tank Flush Procedure
After the initial black tank drain, close the black tank valve. Connect your dedicated flush hose (never your drinking water hose) to the black tank flush inlet on the exterior of your RV.
Turn on the water supply and let the flush run for 2 to 3 minutes with the valve closed. The tank fills with clean water during this time. Then open the black tank valve to drain the loosened debris.
Repeat this fill-and-drain cycle 2 to 3 times until the water running through your clear elbow adapter appears clean. Close the black valve, disconnect the flush hose, and cap the inlet.
Critical Safety Warning
Never leave the black tank flush running unattended with the valve closed. The tank has no overflow protection, and excess pressure can damage seals, blow out fittings, or cause water to back up into your RV toilet. Always stay present and monitor the process.
Always use a dedicated hose for black tank flushing. Using your fresh water hose creates a cross-contamination risk that could make your family sick. Many RVers use a distinctly colored hose — typically green or black — to prevent accidental mix-ups.
How to Flush and Maintain Your Gray Tank
Gray tanks need regular maintenance too, though most RVers focus exclusively on the black tank. Over time, grease from dishwashing, soap scum, and food particles build up inside the gray tank and on the sensor probes.
Signs Your Gray Tank Needs Cleaning
If your gray tank drains slowly, smells like sewage, or your sensors show it as full right after dumping, you likely have grease buildup. Left untreated, this creates a biofilm layer that restricts flow and traps odors.
The Dish Soap Method
One popular maintenance approach uses dish soap to break down grease. After dumping your gray tank, add a cup of liquid dish soap through the sink drain, then fill the tank partially with hot water.
Drive your RV for a short distance to slosh the soapy water around inside the tank. The motion helps loosen buildup from the walls and sensor probes. Dump the tank at your next opportunity to flush out the dissolved grease.
Many RVers ask if they can put Dawn dish soap in their black tank. Dawn is safe for gray tanks in moderate amounts because it breaks down grease effectively. However, avoid using it in the black tank regularly — detergents can interfere with the enzyme treatments that break down solid waste.
Gray Tank Flush Procedure
Some RVs include a gray tank flush system similar to the black tank flush. If yours does, use it after every few dumps to keep sensors clean and prevent buildup.
For RVs without a built-in gray flush, the dish soap and hot water method works well as a regular maintenance routine. Do this every 3 to 4 dumps to keep your gray tank flowing freely.
When to Dump Your RV Holding Tanks
Knowing when to dump is just as important as knowing how. Dumping too frequently wastes water and reduces the effectiveness of your tank treatment. Waiting too long risks overflows and odors.
The Two-Thirds Rule for Black Tanks
The golden rule for black tanks is to dump when the tank reaches two-thirds full. This provides enough liquid volume to create a strong outward flow that carries solids out of the tank completely.
Dumping a nearly empty black tank leaves solids behind because there is not enough liquid flow to flush them out. Over time, these solids harden and form the dreaded poop pyramid — a solid mound directly beneath the toilet that blocks drainage.
If your black tank is not two-thirds full when you need to dump, add water through the toilet until it reaches that level before opening the valve.
Gray Tank Timing
Gray tanks can be dumped at any fill level since they contain only liquid waste. Most RVers dump the gray tank whenever it reaches full or whenever they dump the black tank.
If you are at a full hookup site with sewer connections, keep the gray tank valve closed and dump when it gets close to full. This builds up a reservoir of soapy water that cleans your sewer hose during the gray drain cycle.
How Often Should You Dump?
For two people using an RV normally, expect to dump the black tank every 4 to 7 days. Gray tanks fill faster and may need dumping every 2 to 3 days depending on shower and dish habits.
Full-time RVers typically establish a weekly dump schedule. Weekend warriors should dump at the end of each trip before heading home.
Never Leave the Black Tank Valve Open
This mistake causes more tank problems than any other. When parked at a full hookup site, you might be tempted to leave the black tank valve open so waste drains continuously.
This is a serious error. Liquid drains out immediately, but solids stay behind and accumulate. Within days, you will have a hardened waste pile that blocks the valve and requires professional removal. Always keep the black valve closed and dump only when the tank is sufficiently full.
Where to Find RV Dump Stations
Finding a dump station is straightforward once you know where to look. Hundreds of dump stations exist across the country, and several tools help you locate them.
Types of Dump Stations
Campgrounds and RV parks: Most campgrounds with full or partial hookups have a dump station for guests. Many allow non-guests to use the station for a small fee, typically $5 to $15.
Travel centers and truck stops: Some Pilot, Flying J, and Love’s locations have RV dump stations. These are convenient for travelers passing through.
Rest areas: Many highway rest areas include free or low-cost dump stations. These vary by state, so check ahead before relying on them.
Public lands: Some national parks, state parks, and Bureau of Land Management areas have dump stations. Availability is limited and seasonal.
Apps and Websites for Finding Dump Stations
Several dedicated tools help you locate dump stations anywhere in the country:
SaniDumps: One of the most comprehensive dump station directories, with listings across the US, Canada, and Mexico. The app shows fees, hours, and user reviews.
Campendium: Popular among boondockers, Campendium includes dump station locations along with cell coverage maps and free camping spots.
RVDumps.com: A free directory organized by state with details on fees and access.
Sanidumps and AllStays: Both offer mobile apps that show nearby dump stations with filters for free versus paid options.
Portable Waste Tanks for Boondockers
If you camp off-grid for extended periods, a portable waste tank (sometimes called a blue boy or tote tank) lets you transport waste from your RV to a distant dump station without moving the rig.
Portable tanks come in sizes from 5 to 35 gallons. You connect the tank to your RV waste outlet, fill it, then wheel or tow it to the nearest dump station. This is a practical solution for boondockers who want to stay in one location longer between dumps.
Can You Dump RV Tanks at Home?
Many RVers wonder if they can dump their tanks at home after a trip. The answer depends entirely on local regulations and your home’s plumbing setup.
Sewer Cleanout: The Legal Gray Area
In most municipalities, your home has a sewer cleanout — an access point to the main sewer line. Technically, RV waste going into a municipal sewer line is the same type of waste your home produces.
However, many cities specifically prohibit RV dumping at residential cleanouts. Some require permits. Others allow it with restrictions. The only way to know for certain is to call your local wastewater utility and ask.
Septic System Risks
If your home uses a septic system, dumping RV waste is risky. The chemical treatments and large volume of black tank waste can overwhelm your septic system, kill the beneficial bacteria that break down waste, and cause system failure.
Most septic professionals advise against dumping RV black tanks into residential septic systems. Gray water is generally safer in small quantities, but even that depends on your tank’s capacity and condition.
How to Check Local Regulations
Call your city or county wastewater department and ask about RV waste disposal rules. Some areas have explicit ordinances posted online. Others leave it to homeowner discretion.
If you do dump at home legally, use a proper sewer hose connection and never dump into a storm drain. Storm drains flow directly into local waterways without treatment, making this both illegal and environmentally harmful.
Common RV Tank Dumping Mistakes to Avoid
Avoiding these common mistakes saves you from costly repairs, terrible odors, and embarrassing messes at the dump station.
Mistake 1: Leaving the Black Tank Valve Open at Full Hookup Sites
This is the most damaging mistake in RV plumbing. Liquids drain out immediately while solids remain and harden into a pyramid. Within a week, your tank could be permanently blocked. Always keep the black valve closed and dump on purpose.
Mistake 2: Dumping in the Wrong Order
Dumping the gray tank first means your sewer hose stays coated with black waste residue after you finish. Always dump black first, then gray. The soapy gray water cleans the hose naturally.
Mistake 3: Not Using Enough Water
Water is the secret to a healthy black tank. Using too little water when flushing the toilet lets solids accumulate instead of staying suspended in liquid. Always use plenty of water with each flush, and add several gallons to the black tank after each dump.
Mistake 4: Using Regular Household Toilet Paper
Standard household toilet paper does not break down as quickly as RV-specific toilet paper. This contributes to clogs and pyramid formation. Test your toilet paper by placing a few sheets in a jar of water and shaking. If it dissolves quickly, it is safe for your RV.
Mistake 5: Skipping Tank Treatment
Tank treatments contain enzymes or bacteria that break down waste and control odor. Skipping treatment lets anaerobic bacteria take over, producing sulfur compounds that smell terrible. Add treatment after every dump.
Mistake 6: Neglecting the Flush Step
Many RVers simply drain the tank and move on without flushing. This leaves residue behind that builds up over time. Flush your black tank with the built-in system or a rinser wand after every 2 to 3 dumps minimum.
Mistake 7: Using the Wrong Hose for Flushing
Using your fresh water drinking hose to connect to the black tank flush inlet risks cross-contamination. Always use a separate, clearly marked hose for black tank flushing. This is a simple precaution that protects your health.
Mistake 8: Forgetting to Close the Valve After Flushing
After running the black tank flush, always close the valve before driving away. An open valve lets tank odors escape into your RV bay and can allow pests to enter the plumbing system.
Troubleshooting: Poop Pyramids and Stubborn Clogs
A poop pyramid is a hardened mound of solid waste that forms directly beneath the toilet flange inside the black tank. It blocks drainage and creates one of the most unpleasant problems in RV ownership.
What Causes Poop Pyramids
Pyramids form when the black tank valve is left open at full hookup sites, when insufficient water is used for flushing, or when the tank is dumped before reaching two-thirds full. Solids settle and harden instead of flowing out during drainage.
The result is a concrete-like mound that no amount of normal flushing will remove.
How to Break Up a Poop Pyramid
If you suspect a pyramid has formed, try these steps before calling a professional:
Step 1: Fill the black tank with several gallons of hot water through the toilet. Add a heavy-duty enzyme-based waste digester treatment designed for dissolving solids.
Step 2: Let the mixture sit for 24 to 48 hours. The enzymes need time to break down the hardened waste.
Step 3: Drive the RV around for 15 to 20 minutes to slosh the mixture inside the tank. This physical agitation helps break the pyramid apart.
Step 4: Dump the tank and run the black tank flush system for several cycles. Watch the clear elbow to see if solid chunks come out.
Step 5: If the pyramid persists after two treatment attempts, use a rinser wand inserted through the toilet to physically break up the obstruction.
When to Call a Professional
If enzyme treatments, hot water soaks, and physical agitation fail to resolve the clog, you need professional help. Mobile RV service technicians have specialized equipment — including high-pressure jetting tools and camera inspection systems — that can break up and remove severe blockages.
Professional tank cleaning typically costs between $100 and $300 depending on the severity and your location. It is worth the investment if DIY methods fail, because an untreated pyramid can permanently damage your tank and valves.
FAQs
Which RV tank do you dump first?
Always dump the black tank first and the gray tank second. The soapy gray water rinses the sewer hose clean after the black tank drains, reducing odors and keeping your equipment cleaner between uses.
How often should you dump your RV holding tanks?
For two people, dump the black tank every 4 to 7 days when it reaches two-thirds full. Gray tanks typically need dumping every 2 to 3 days. Weekend campers should dump at the end of each trip before heading home.
Should I flush my black tank every time I dump it?
You do not need to flush the black tank every single time, but you should flush it at least every 2 to 3 dumps. Regular flushing prevents solids buildup, keeps sensors accurate, and extends the life of your tank system.
Can I dump my RV black tank into my sewer cleanout?
It depends on your local regulations. Many municipalities prohibit RV dumping at residential sewer cleanouts, while others allow it. If your home uses a septic system, avoid dumping RV waste because it can overwhelm the system. Always check with your local wastewater utility first.
Can I put Dawn dish soap in my black tank?
Dawn dish soap is safe and effective for cleaning gray tanks because it breaks down grease. However, avoid using it regularly in the black tank because detergents can interfere with enzyme-based waste treatments. Stick to RV-specific black tank treatments for best results.
Why does my RV black tank smell after dumping?
Odor after dumping usually means waste residue remains inside the tank, the vent pipe is blocked, or the toilet seal is dry and letting gases escape. Add fresh water and enzyme treatment after each dump, check that your roof vent is clear, and keep your toilet bowl seal lubricated.
Conclusion: Master the Dump, Enjoy the Journey
Learning how to dump RV holding tanks correctly takes the anxiety out of one of the most essential RV maintenance tasks. The process comes down to a few key principles: dump black first, gray second, use plenty of water, flush regularly, and always add treatment after dumping.
With practice, the entire routine takes about 15 minutes and becomes as routine as filling your fuel tank. The confidence you gain from mastering this skill means you can camp anywhere — from full hookup resorts to remote boondocking spots — without worrying about your holding tanks.
Keep this guide handy for your next dump station visit, and remember that every experienced RVer started exactly where you are right now. Take your time, follow the steps, and you will be dumping like a pro before you know it.