
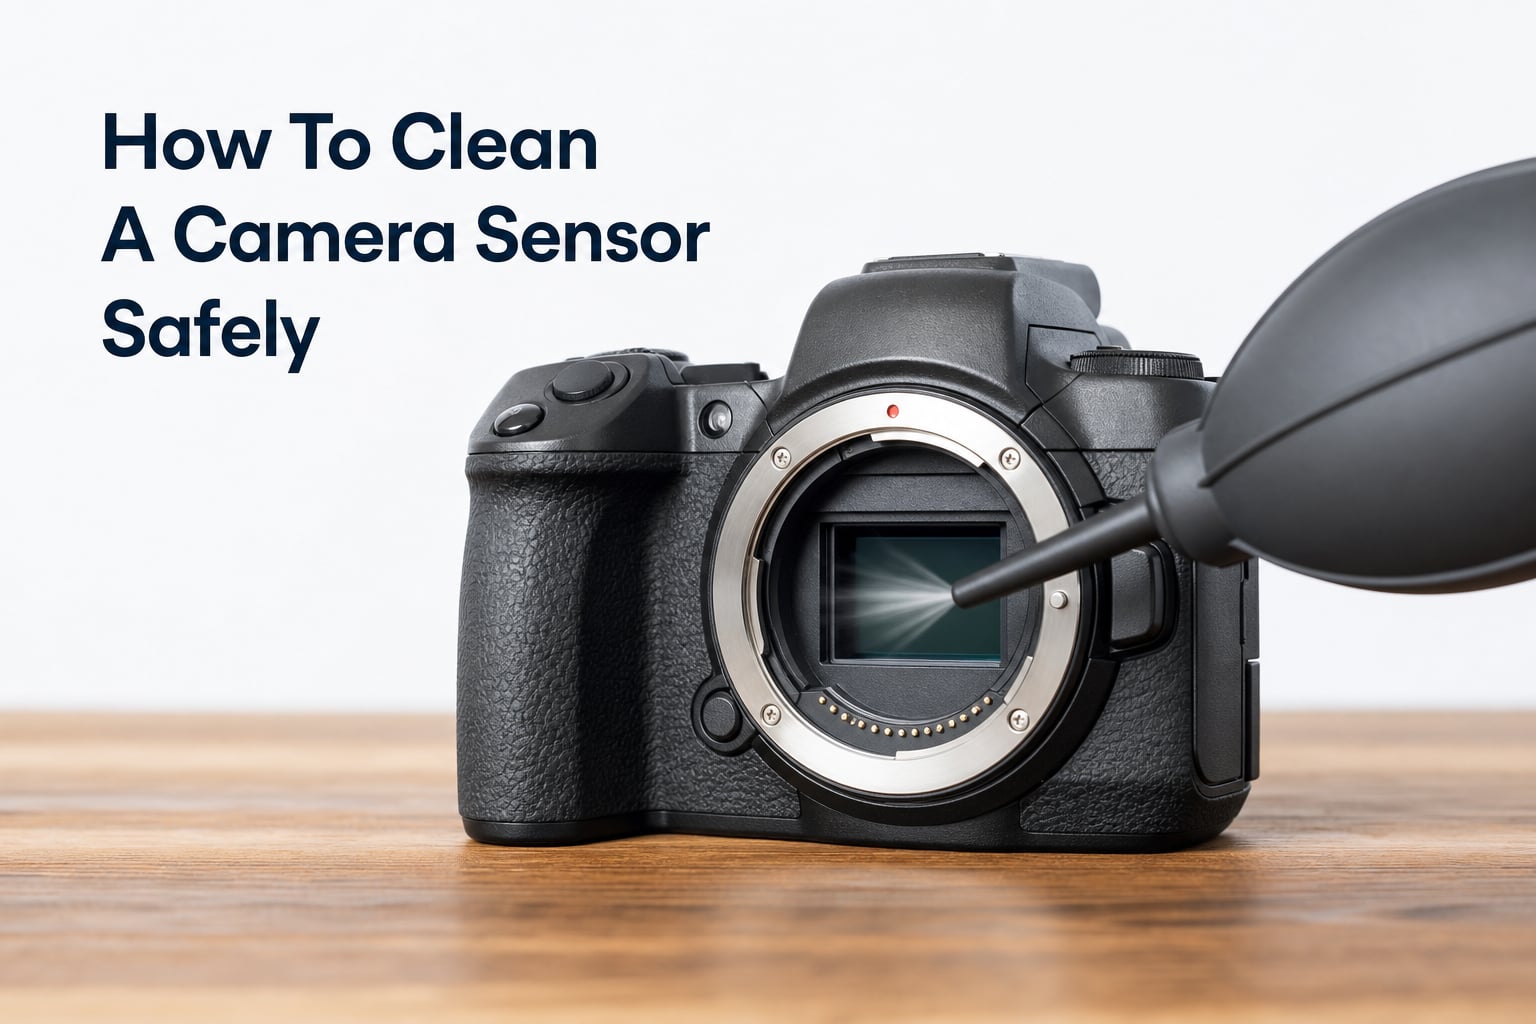
Learning how to clean a camera sensor safely saves you money and keeps your photos spot-free. I have cleaned my own DSLR sensor more than two dozen times over the past five years, and I will walk you through every method I have tested, including the mistakes I made early on. Dust on your sensor shows up as dark spots in every photo, especially against bright skies or smooth backgrounds. The good news is that you do not need a professional technician for most cleaning jobs if you follow the right steps.
Sensor dust is unavoidable once you start swapping lenses outdoors. Tiny particles sneak inside every time you remove a lens, and even your camera’s automatic cleaning cycles cannot remove them all. In this guide, I will share the exact techniques I use, from the safest first attempt to the wet cleaning method for stubborn spots. You will also learn which products to avoid completely, since some household items can permanently damage your sensor.
How to Tell If Your Camera Sensor Needs Cleaning
The fastest way to check for sensor dust is to photograph a plain white surface at a narrow aperture. I do this every few months as part of my regular camera maintenance routine. Set your camera to aperture priority mode, choose f/16 or f/22, and focus manually on infinity. Then take a photo of a white wall, a clear sky, or a piece of paper held about a foot from the lens.
Download the image to your computer and zoom in to 100 percent. Any dust on your sensor will appear as soft gray or dark spots in the same location on every photo. If you see one or two faint spots, you can probably ignore them or edit them out later. If you see clusters of dark dots scattered across the frame, your sensor definitely needs cleaning.
Another quick test is to look inside the lens mount with the camera powered off. Lock the mirror up (on a DSLR) or switch to sensor cleaning mode so the sensor is exposed. Shine a flashlight into the chamber and look for visible dust particles. I find this inspection helpful for confirming whether the spots in my images are actually on the sensor versus on the lens itself.
Start with Your Camera’s Built-In Sensor Cleaning Mode
Every modern interchangeable lens camera includes a built-in sensor cleaning function, and I always try this first before reaching for any tools. Most cameras vibrate the sensor at high frequency when you turn the camera on or off, shaking loose some dust particles in the process. On Sony, Nikon, Canon, and Fujifilm bodies, this feature runs automatically by default.
To activate manual cleaning mode, navigate to your setup menu and look for “Clean Image Sensor” or “Sensor Cleaning.” Select this option, and the camera will lock the mirror (on DSLRs) and expose the sensor. Do not touch anything inside the chamber while the camera is in this mode. Power the camera off when you are done, and the mirror or shutter will close automatically.
This method alone solves roughly 30 to 40 percent of sensor dust issues based on my experience. If you still see spots after running the cleaning cycle two or three times, it is time to move on to a bulb blower.
How to Clean a Camera Sensor Safely with a Bulb Blower
A bulb blower is the safest manual tool for sensor cleaning, and it should be your first physical cleaning attempt. I keep a Giottos Rocket Blaster in every camera bag because it works on both DSLR and mirrorless sensors without any risk of scratching. Avoid canned air at all costs, since the propellant can leave residue and the strong force can damage the sensor’s low-pass filter.
Here is the step-by-step process I follow for bulb blower cleaning:
Remove the lens from your camera and place the body on a flat, stable surface with the lens mount facing down.
Activate sensor cleaning mode so the sensor is exposed and the mirror is locked up.
Hold the camera so the lens mount points slightly downward, allowing gravity to help dust fall out.
Squeeze the bulb blower a few times away from the camera first to clear any dust inside the nozzle.
Insert the tip of the blower about an inch into the lens mount, being careful not to touch the sensor.
Squeeze the bulb gently two to three times to dislodge dust particles.
Power off the camera to close the shutter, reattach the lens, and take a test shot to check for remaining spots.
Never touch the sensor with the blower tip, and never use a brush attachment that contacts the sensor directly. The key is gentle, indirect air pressure that lifts dust without forcing it deeper into the chamber. I have cleaned countless sensors this way without ever causing damage.
Sensor Brush Dry Cleaning Method
When a bulb blower does not remove all the dust, a static-charged sensor brush is the next step in the cleaning progression. The Visible Dust Arctic Butterfly and the SensorKlear are two popular options I have used over the years. These brushes use a tiny motor to spin and create a static charge that lifts dust off the sensor surface.
The technique I use with a sensor brush is straightforward. First, charge the brush by spinning it for a few seconds or rotating the charging collar (depending on the model). Then turn the camera so the lens mount faces downward, expose the sensor, and make a single light pass across the sensor from one side to the other.
Do not press hard, and do not make multiple passes over the same area. One smooth pass is enough, and a properly charged brush will pick up particles without any scrubbing motion. After the pass, retract the brush, close the shutter, and test the result. I have found this method especially helpful for fine dust that a blower alone cannot dislodge.
Keep your sensor brush in a clean case when not in use, since the charged tip attracts ambient particles. Replace the brush every 100 to 200 uses, since the fibers wear down over time and become less effective.
Wet Cleaning Method for Stubborn Spots
Wet cleaning is the most effective method for oil spots, sticky residue, and dust that refuses to budge with dry methods. I only use this technique when dry cleaning has failed, since it carries slightly more risk if done incorrectly. You will need sensor swabs matched to your sensor size (full-frame, APS-C, or Micro Four Thirds) and a purpose-made sensor cleaning fluid such as Eclipse or Visible Dust Smear Away.
Do not substitute isopropyl alcohol from a drugstore for proper sensor cleaning fluid. Sensor fluid is specifically formulated to evaporate cleanly and leave no residue, while standard IPA can leave streaks or interact with the sensor’s coatings. This is one of the most common mistakes I see beginners make.
Follow these steps for a safe wet cleaning:
Apply one or two drops of sensor cleaning fluid to the swab, never directly to the sensor.
Remove the lens and engage sensor cleaning mode with the camera on a flat surface, lens mount facing down.
Touch the swab lightly to the sensor and drag it across in a single smooth motion from one side to the other.
Flip the swab and make a second pass in the opposite direction to pick up any loosened debris.
Allow the sensor to dry for a minute before powering off the camera.
Test the result with a white wall photo at f/16.
Use a fresh swab for each cleaning session, since reusing a swab can reintroduce dust and oils back onto the sensor. If you are nervous about wet cleaning, practice the motion on a flat mirror first to get a feel for the pressure and angle required.
What NOT to Use on Your Camera Sensor
This section covers the most important safety information, and I urge you to read it carefully before attempting any cleaning. Several common household products and tools can permanently damage your camera sensor, and the repair cost often exceeds the cost of professional cleaning.
Do not use these items on your sensor:
Q-tips or cotton swabs: Standard cotton swabs leave fibers behind and can scratch the sensor coating. Only use purpose-made sensor swabs.
Canned air or compressed gas: The propellant can leave oily residue and the pressure can damage the low-pass filter.
Household cleaners or Windex: These contain ammonia and other chemicals that strip anti-reflective coatings.
WD-40 or any lubricant: This is a petroleum product and has no place anywhere near your sensor.
Regular isopropyl alcohol from the drugstore: Use only purpose-made sensor cleaning fluid in the correct concentration.
Your breath or saliva: Moisture from your mouth leaves mineral deposits that are nearly impossible to remove.
T-shirt fabric or paper towels: These materials are abrasive and shed fibers that will scratch the sensor.
The sensor’s low-pass filter and anti-reflective coatings are delicate. Once damaged, they cannot be repaired, only replaced, which usually costs more than a new camera body. If you are ever unsure about a cleaning method, stop and consult your camera manufacturer’s support documentation.
Compact Camera and Mirrorless Considerations
Mirrorless cameras are more prone to sensor dust than DSLRs because the sensor is exposed every time you change lenses, with no mirror or shutter to act as a barrier. I have noticed significantly more dust accumulation on my Sony and Fujifilm mirrorless bodies compared to older DSLRs. If you shoot mirrorless, plan on cleaning the sensor more frequently and consider carrying a bulb blower in your bag.
Compact cameras with fixed lenses generally do not require sensor cleaning, since the lens and sensor are sealed together at the factory. If you see spots in photos from a compact camera, the issue is almost always on the front or rear lens element, not the sensor itself. Cleaning the lens with a microfiber cloth usually resolves the problem.
For older DSLR bodies with optical viewfinders, remember to lock the mirror up before accessing the sensor. The mirror sits directly in front of the sensor when down, and any contact with cleaning tools can damage both the mirror mechanism and the sensor beneath it.
When to Send Your Camera for Professional Cleaning
Some situations call for professional service rather than DIY cleaning. I send my cameras to a service center whenever the contamination is beyond my skill level or when the body is still under warranty. Most manufacturer service centers offer sensor cleaning for between $75 and $150, depending on the brand and turnaround time.
You should consider professional cleaning if you notice scratches on the sensor surface, if oil has spread to multiple areas of the sensor, if the camera has been exposed to salt spray or moisture, or if you simply do not feel confident performing the cleaning yourself. There is no shame in admitting that the risk feels too high, and a professional cleaning is cheaper than a sensor replacement.
Another reason to seek professional help is when your camera is still under warranty. Opening the sensor chamber yourself can void the warranty on some models, so check your documentation before attempting any cleaning beyond a simple bulb blower.
How Often Should You Clean Your Sensor
Most photographers only need to clean their sensor once or twice a year, but the exact frequency depends on your shooting environment. I clean mine roughly every four to six months because I frequently change lenses outdoors for landscape and wildlife photography. If you rarely swap lenses or shoot mostly in controlled indoor environments, you might only need cleaning once a year.
Certain situations call for more frequent cleaning. Shooting on beaches, in deserts, or in windy conditions introduces more dust than average. Construction sites, concerts with fog machines, and crowded events also increase the rate of contamination. I clean more often after these types of shoots, even if I do not see obvious spots in my images yet.
Climate also matters. Dry, static-prone environments cause dust to cling more aggressively to sensor surfaces, while humid climates can leave oily residue that requires wet cleaning. Adjust your cleaning schedule based on these factors rather than following a fixed calendar.
Editing Out Dust Spots as an Alternative
Sometimes the easiest fix is not cleaning at all, but editing out the spots in post-processing. Adobe Lightroom, Capture One, and Darktable all include spot removal tools that can eliminate dust marks in seconds. I use this approach for occasional spots that do not affect the artistic intent of my images, especially for personal projects where turnaround time matters more than perfection.
For professional or print work, editing is not a substitute for a clean sensor. Spotting dozens of dust marks in every image wastes hours of editing time and can reduce image quality if done aggressively. In those cases, cleaning the sensor saves time and produces better results than post-processing.
A smart workflow combines both approaches. I keep my sensor reasonably clean with regular bulb blower maintenance, edit out the occasional stubborn spot, and reserve wet cleaning for situations where editing would be too time-consuming.
DIY vs Professional Sensor Cleaning Cost Comparison
Building a DIY sensor cleaning kit costs between $50 and $120 for the basic tools you need. A quality bulb blower runs about $15, a sensor brush is around $40 to $60, and a pack of 10 sensor swabs with cleaning fluid costs roughly $30. The initial investment pays for itself after two or three professional cleanings.
Professional cleaning costs between $75 and $200 per service, depending on the camera brand, your location, and the turnaround time. Manufacturer-authorized service centers charge more than independent repair shops, but they typically use genuine parts and offer warranty on the work.
For photographers who shoot weekly and change lenses often, DIY cleaning is the most cost-effective option. For occasional shooters or those uncomfortable with the risk, professional cleaning offers peace of mind. I do a combination of both, handling routine dust myself and sending cameras in for service once every two years for a deep clean.
Climate and Environment Considerations
Your shooting environment plays a major role in how quickly your sensor accumulates dust. Beach photographers deal with fine sand and salt particles that are especially damaging. Desert shooters face similar issues with silica dust that scratches easily. Indoor photographers in clean, climate-controlled spaces see far less contamination.
To minimize dust exposure, change lenses quickly and with the camera pointed downward so falling particles do not enter the chamber. Keep a rocket blower in your bag for quick field cleanings between major shoots. Avoid changing lenses in windy conditions whenever possible, and consider using a rain cover or changing bag in extreme environments.
If you live in a particularly humid climate, store your camera in a sealed dry cabinet with silica gel packets. Moisture can attract dust particles and cause them to stick to the sensor surface, making cleaning more difficult. A dry cabinet costs around $80 and protects all your gear from humidity damage over the long term.
FAQs
What can you clean a camera sensor with?
You can clean a camera sensor with three main tools: a bulb blower for loose dust, a static-charged sensor brush for finer particles, and purpose-made sensor swabs with sensor cleaning fluid for stubborn spots. Always use products specifically designed for camera sensors, never household cleaners or Q-tips.
Can I use Q-tips to clean a camera sensor?
No, standard Q-tips and cotton swabs will leave fibers on your sensor and can scratch the delicate low-pass filter coating. Only use purpose-made sensor swabs that are designed to be lint-free and properly sized for your camera’s sensor. Sensor swabs are engineered specifically for this task and are the only safe option for direct contact cleaning.
Can I use WD-40 to clean a camera sensor?
Absolutely not. WD-40 is a petroleum-based lubricant and solvent that will permanently damage your sensor’s coatings and leave residue that is nearly impossible to remove. If WD-40 contacts your sensor, stop using the camera immediately and send it to a professional service center. Only purpose-made sensor cleaning fluids are safe for sensor contact.
Can I clean a camera sensor with isopropyl alcohol?
Standard isopropyl alcohol from a drugstore is not recommended for sensor cleaning. The concentration and purity vary, and it can leave streaks or damage the anti-reflective coating. Use only purpose-made sensor cleaning fluid such as Eclipse or Visible Dust Smear Away, which is formulated to evaporate cleanly and safely on sensor surfaces.
Final Thoughts on Cleaning Your Camera Sensor Safely
Learning how to clean a camera sensor safely is a skill every photographer should develop, but patience and caution are essential. Start with the least invasive method, your camera’s built-in cleaning cycle, then progress through bulb blower, sensor brush, and finally wet cleaning only when needed. Always avoid the household products that can permanently damage your sensor. With the right tools and techniques, you can keep your images spot-free and save money on professional service for years to come.