
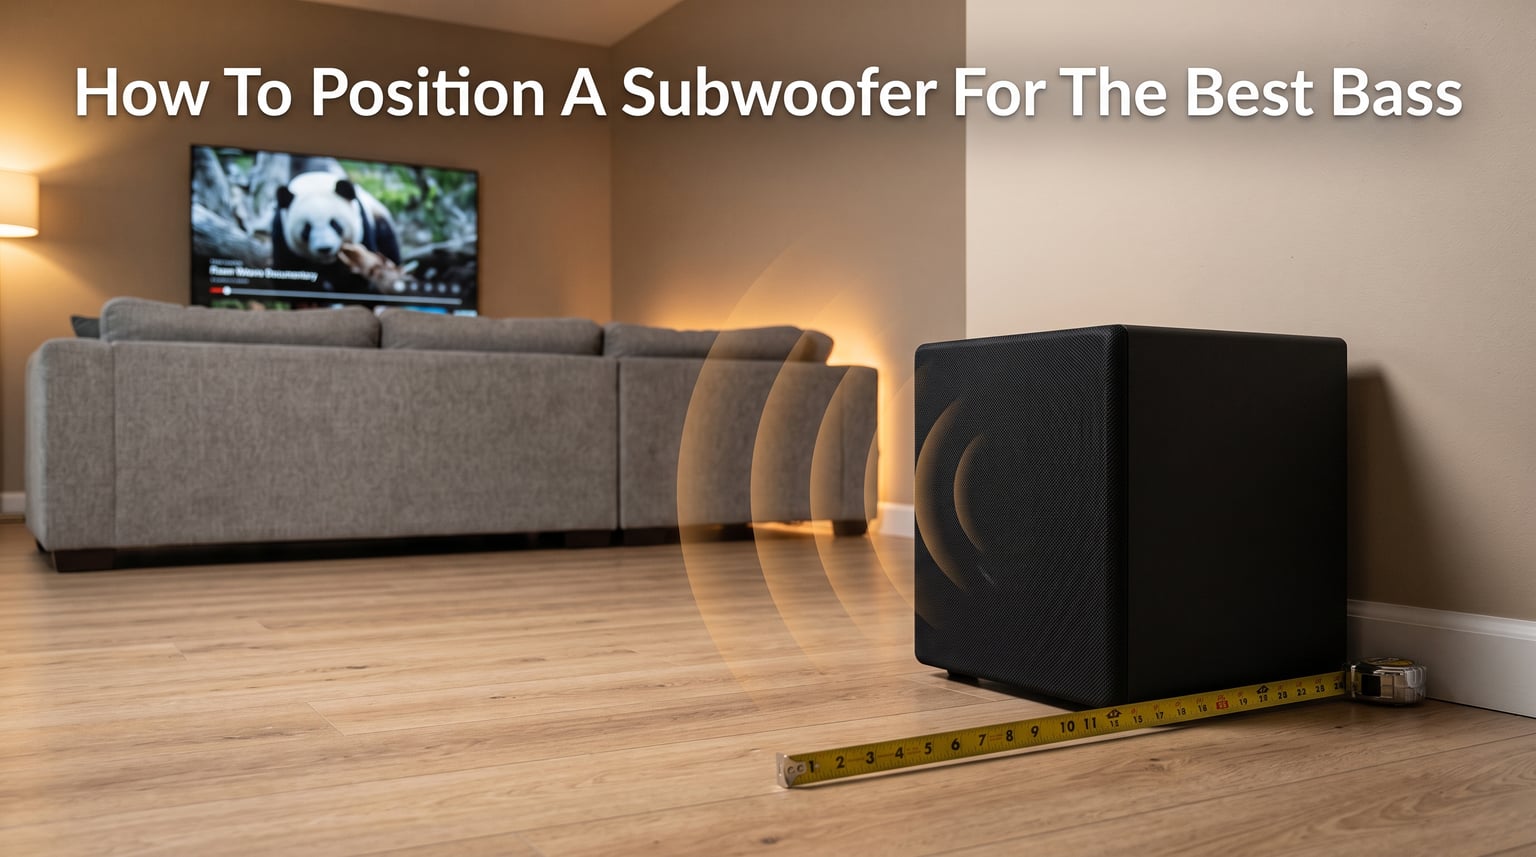
You can spend thousands on a premium subwoofer and still end up with muddy, boomy bass if it sits in the wrong spot. I learned this the hard way years ago when I upgraded from a budget 8-inch sub to a 12-inch model and somehow the bass got worse, not better. The problem was never the subwoofer itself. It was where I put it in the room.
Learning how to position a subwoofer for the best bass changes everything about your listening experience. The room itself is responsible for how low frequencies behave. Walls, ceilings, furniture, and even the shape of the space all interact with bass waves in ways that can amplify certain frequencies while completely canceling out others.
The best way to position a subwoofer is to place it at your main listening position, play bass-heavy content, then crawl around the room at floor level until you find the spot where the bass sounds fullest and smoothest. That spot becomes your subwoofer’s permanent home. This technique, called the subwoofer crawl, is the gold standard recommended by audio communities, manufacturers like SVS and Polk, and acoustic professionals alike.
In this guide, I will walk you through every proven subwoofer placement technique, including the subwoofer crawl method, corner versus wall placement, the rule of thirds, room acoustics fundamentals, dual subwoofer strategies, and EQ calibration tips. By the end, you will have everything you need to get tight, deep, accurate bass from your existing gear.
How To Position A Subwoofer For The Best Bass: Why Placement Matters More Than The Subwoofer
Here is something most people do not realize: your room has a bigger impact on bass quality than the subwoofer you buy. Low-frequency sound waves are long, often longer than your room itself. A 40 Hz bass note has a wavelength of about 28 feet. When a wave that long bounces between two walls, it creates standing waves, also called room modes.
Standing waves cause bass to pile up in certain areas of the room while disappearing entirely in others. You might have massive, thundering bass in one seat and almost nothing in the chair right next to it. Audio enthusiasts call these dead spots acoustic nulls, and the overloaded zones are called peaks. Every rectangular room has them, and no subwoofer, no matter how expensive, can eliminate them on its own.
This is why subwoofer placement matters so much. Where you put the subwoofer determines which frequencies get reinforced and which get canceled. Move the sub three feet in any direction and the entire bass response can change. I have tested this myself using measurement software, and the frequency response graphs look completely different from one position to the next. The subwoofer was identical in every test. Only its location changed.
The good news is that once you understand how bass interacts with your room, finding the right subwoofer position becomes a systematic process rather than guesswork. And that process starts with the single most effective technique in all of audio setup.
The Subwoofer Crawl Method: Step-by-Step
The subwoofer crawl is the most widely recommended subwoofer placement technique in the audio world. It works because of a simple acoustic principle: the relationship between a speaker and a listening position is reciprocal. The spot where a subwoofer sounds best at your seat is the same spot where your seat sounds best with the subwoofer in it. By reversing the positions temporarily, you can find the ideal location without moving heavy furniture a dozen times.
Community consensus across forums like r/BudgetAudiophile, r/hometheater, and AVS Forum points to the crawl method as the most reliable DIY technique. Users consistently report dramatic improvements in bass clarity and evenness after running through it. Here is how to do it properly.
Step 1: Prepare Your Room and Equipment
Clear as much floor space as possible around the perimeter of the room. You need enough room to crawl along walls and into corners without obstructions. Move lightweight furniture, rugs, and cables out of the way. Leave heavier pieces where they are since they will affect the acoustics during real listening too.
Set up your subwoofer at your primary listening position, also called the sweet spot. Place it on the seat where your head normally sits, aiming the driver forward. If your subwoofer is too large or heavy for the couch, you can build a temporary platform or just get it as close to seated head height as possible. The key is getting it at or near ear level at the listening position.
Step 2: Choose the Right Test Material
Select audio content with sustained, consistent low-frequency energy. Test tones swept from 20 Hz to 80 Hz work best because they reveal peaks and dips across the entire bass range. You can find free sweep tones on YouTube or use dedicated test discs. If you prefer music, pick tracks with repetitive, extended bass lines rather than punchy kick drums. Pink noise through a subwoofer crossover also works well.
Set the track to loop continuously so both hands stay free while crawling. The volume should be loud enough to clearly hear differences but not so loud that it distorts or bothers neighbors. I typically run my test tones at around 75 to 80 dB measured at the listening position.
Step 3: Get Down and Crawl
Start the test tone playing and get down on your hands and knees. Your ears need to be at roughly the same height where the subwoofer would sit on the floor, which is typically 12 to 18 inches high. This is why it is called a crawl. You are literally simulating the subwoofer sitting in different spots around the room while your ears do the listening.
Begin crawling slowly along the front wall, then move to each side wall, the back wall, and into each corner. Pause every two or three feet and listen carefully. Pay attention to two things: the overall volume or impact of the bass, and the smoothness or musicality. You are looking for spots where the bass feels full and even, not spots where it is just loud and boomy.
Step 4: Identify the Best-Sounding Spots
As you crawl, you will notice dramatic differences. Some spots will have overwhelming, muddy bass. Others will sound thin and anemic. A few spots will sound balanced, deep, and articulate. Mark these good spots with tape or take mental notes. Typically you will find two to four candidate locations that all sound noticeably better than the rest of the room.
I recommend testing each candidate spot from your actual listening position afterward. Move the subwoofer to each marked location one at a time, sit in your normal seat, and play the same test material. The crawl gives you great candidates, but the final decision should always be made from the listening position itself.
Step 5: Fine-Tune and Lock It In
Once you have chosen the best location, make small adjustments. Try moving the subwoofer six inches forward or backward from the wall. Rotate it slightly if it is a ported model. Each small change can shift the frequency response in meaningful ways. When you find the position that sounds best from your seat, you are done.
Remember that the crawl method prioritizes your single main listening position. If you have multiple seats, you may need to compromise or consider additional strategies like dual subwoofers, which we cover later in this guide.
Corner Placement vs Wall Placement: Pros and Cons
If you do not want to do the full subwoofer crawl, or you want a starting point before fine-tuning, corner and wall placement are the two most common strategies. Each comes with distinct trade-offs between bass output and bass quality.
Corner Placement: Maximum Output, Potential Boominess
Placing a subwoofer in a corner loads it against three room boundaries, which are the two walls and the floor. This boundary reinforcement can increase bass output by up to 9 dB compared to a free-standing position. For smaller subwoofers or large rooms, that is a significant advantage. You get more perceived bass from the same equipment.
However, corner placement tends to excite more room modes simultaneously. This means that while the bass is louder overall, it is also more likely to be uneven and boomy. Certain frequencies will be exaggerated while others dip. Many users on r/BudgetAudiophile report that corner placement gives the most bass but the least control over how it sounds.
Corner placement works best when you have a modest subwoofer that needs all the help it can get, or when you plan to use EQ to tame the peaks. It is also a practical choice when room layout leaves you with few alternatives.
Wall Placement: Balanced Compromise
Positioning the subwoofer along a wall but away from corners provides a more balanced compromise. You still get boundary reinforcement from the wall behind the subwoofer, which adds about 3 dB of output, but you avoid the extreme peaks that corners can produce. Bass tends to sound smoother and more articulate with this approach.
The front wall, behind or near your main left and right speakers, is the most popular wall placement position. This keeps the subwoofer acoustically close to the main speakers, which improves integration and reduces the chance that you can localize the subwoofer as a separate sound source.
A common question is how far from the wall a subwoofer should sit. As a general guideline, start with 12 to 18 inches of clearance behind the subwoofer. Ported models need enough room behind the port to breathe, so check your manual for minimum clearances. From there, adjust in small increments while listening from your seat.
Mid-Room Placement: Smoothest but Quietest
Placing a subwoofer away from all walls gives the smoothest bass response because it minimizes boundary reinforcement and room mode excitation. However, it also produces the lowest output level. You need a powerful subwoofer to make this work, and most people do not want a sub sitting in the middle of their living room. This option is primarily used in dedicated listening rooms where acoustics are the top priority.
The Rule of Thirds Placement Strategy
The rule of thirds is a mathematical approach to subwoofer placement that comes from acoustic theory. The idea is simple: instead of placing the subwoofer against a wall or in a corner, position it at one-third or two-thirds of the distance along a wall. For example, if your wall is 15 feet long, position the subwoofer 5 feet or 10 feet from the nearest corner.
This works because room modes create their strongest peaks and nulls at predictable fractions of room dimensions. The most severe peaks occur at the halfway points, and the deepest nulls cluster near the walls. By placing the subwoofer at the one-third or two-thirds mark, you avoid exciting the worst room modes and get a more even bass response across a wider listening area.
Polk Audio champions this method, and many acoustic engineers endorse it as the best starting point before doing a crawl test. The rule of thirds is especially effective in rectangular rooms with symmetrical dimensions. If your room is irregularly shaped or open-concept, the rule becomes less precise and the crawl method becomes more important.
You can apply the rule of thirds in both directions. Place the subwoofer at the one-third point along the front wall and also at the one-third point measured from the side wall. This dual application further minimizes room mode problems and tends to produce noticeably smoother bass than wall-adjacent or corner positions.
I have compared rule-of-thirds placement against corner placement using Room EQ Wizard measurements in my own room. The difference was eye-opening. Corner placement showed a massive 15 dB peak at 45 Hz. Rule-of-thirds placement flattened that peak by nearly 10 dB without needing any EQ correction. The subwoofer sounded tighter, faster, and more musical in the one-third position.
Room Acoustics and Standing Waves Explained
To truly understand subwoofer placement, you need to understand what bass frequencies do inside a room. Low frequencies behave differently than mid and high frequencies. Their wavelengths are extremely long, often comparable to or even longer than room dimensions. This creates unique acoustic problems that no amount of speaker quality can solve.
What Are Standing Waves and Room Modes?
When a bass wave travels from your subwoofer and hits a wall, it reflects back into the room. If the distance between two parallel walls happens to match a particular wavelength, the reflected wave aligns with the original wave and creates a standing wave. This standing wave has fixed points of maximum pressure, called antinodes or peaks, and fixed points of minimum pressure, called nodes or nulls.
Every room has multiple standing waves at different frequencies, determined by the room’s length, width, and height. These are collectively called room modes. A room mode calculator can tell you exactly which frequencies will be problematic in your space based on its dimensions. In a typical 15-by-12-by-8 foot room, you might have major mode issues at 38 Hz, 47 Hz, 71 Hz, and several other frequencies.
Standing waves do not decay quickly. They linger in the room, creating a muddy, indistinct bass character. You hear the peak frequencies as boomy or overwhelming and the null frequencies as missing or thin. Walking around the room while bass plays, you can physically feel these variations. The bass at the center of the room will sound completely different from the bass against a wall.
Modal Density and Why Larger Rooms Are Easier
In small rooms, room modes are spread far apart in frequency. This means there are large gaps between reinforced frequencies and large gaps between nulled frequencies. The result is very uneven bass with obvious peaks and valleys in the frequency response.
In larger rooms, modes pack closer together. This higher modal density means the peaks and nulls overlap and average out, producing a smoother overall response. This is why bass often sounds better in larger spaces and worse in small bedrooms or offices. If you have a small room, you face a steeper challenge and may need to rely more heavily on placement tricks, dual subwoofers, and EQ.
Bass Traps and Acoustic Treatment
Acoustic treatment can help tame standing waves. Bass traps are thick absorbers placed in room corners where low-frequency energy concentrates. They reduce the intensity of room modes by absorbing bass energy rather than letting it reflect back into the room.
Properly sized bass traps can make a noticeable difference, but they are not a replacement for good subwoofer placement. Think of them as a supplement. Place your subwoofer correctly first, then add bass traps if you still have room mode problems. Many home theater owners combine strategic placement, bass traps, and digital EQ for the flattest possible response.
Front Placement Near Main Speakers
Positioning your subwoofer near the front of the room, alongside or between your main left and right speakers, is one of the most natural and effective placement strategies. This approach creates what audio engineers call a unified front, where all the sound appears to come from the same general direction.
Human hearing has a hard time localizing bass frequencies below approximately 80 Hz. This is why you can place a subwoofer almost anywhere and not point to it as a sound source. But crossover frequencies, room reflections, and port noise can push audible subwoofer output above that threshold. When the subwoofer sits near the main speakers, any localization cues blend naturally with the rest of the system.
Front placement also simplifies phase alignment between the subwoofer and main speakers. Since the sound from both sources arrives at the listening position at roughly the same time, integration is smoother. You get a more cohesive soundstage with bass that feels connected to the music or movie rather than floating in from a separate part of the room.
Try positioning the subwoofer just inside the left or right main speaker, slightly behind the plane of the speakers. If you have two subwoofers, place one just inside each speaker for a symmetrical front stage. From this starting point, you can fine-tune the exact position using the crawl method or by making small adjustments and measuring the results.
Dual Subwoofer Placement Strategies
If you have the budget and space for two subwoofers, you can achieve dramatically better bass consistency across multiple listening positions. A single subwoofer always creates peaks and nulls based on room modes. Two subwoofers, positioned correctly, can fill in each other’s nulls and smooth out the response for every seat in the room.
Opposite Corner Placement
The most common dual subwoofer strategy is placing one subwoofer in each of the two diagonally opposite corners of the room. This excites room modes from both ends, which helps cancel out the most problematic nulls. Each listener, regardless of where they sit, experiences more consistent bass. SVS strongly recommends this configuration for home theater setups.
Mid-Wall Opposite Placement
Another effective strategy is placing one subwoofer at the midpoint of the front wall and the other at the midpoint of the back wall. This configuration is particularly good at smoothing out the length-wise room modes that cause bass to vary dramatically between the front and back of the room. It is ideal for longer rectangular rooms.
Front Left and Front Right Placement
For stereo music systems, placing a subwoofer near each main speaker creates an extremely coherent soundstage. This is essentially a 2.2 setup. Bass integrates seamlessly with the stereo image, and you avoid the localization issues that can arise when a single subwoofer sits off to one side. This approach is favored by audiophiles who prioritize musical accuracy over maximum output.
Regardless of which dual configuration you choose, the improvement over a single subwoofer is often the single biggest upgrade you can make to bass quality. Forum users across r/hometheater and AVS Forum consistently rate dual subwoofers as transformative, especially for rooms with multiple seating rows.
Common Subwoofer Placement Mistakes to Avoid
After years of helping friends and forum members troubleshoot their bass problems, I see the same placement mistakes over and over. Here are seven to avoid.
1. Stuffing the subwoofer inside a cabinet or shelf. Enclosed spaces create their own resonances and choke the subwoofer’s ability to move air. The bass becomes muddy and directional. Subwoofers need to breathe in the open room.
2. Placing the subwoofer directly behind a couch or chair. This blocks the sound waves from reaching the rest of the room and creates a massive bass hotspot at that single seat while starving everywhere else. The rest of the room will sound thin and lifeless.
3. Ignoring port clearance. Ported subwoofers need space behind the port to function correctly. If you shove a ported sub against a wall, the port noise increases and the bass extension suffers. Check your manual for minimum clearance recommendations.
4. Assuming louder is always better. The spot with the most bass is not always the spot with the best bass. Peak-heavy locations give you quantity but sacrifice clarity and evenness. Listen for smoothness, not just volume.
5. Never trying more than one position. Many people unbox their subwoofer, set it in the first available spot, and leave it there forever. Spending 30 minutes to try three or four positions can yield night-and-day improvements.
6. Forgetting about phase alignment. If your subwoofer and main speakers are out of phase, they will cancel each other out at the crossover frequency. Always experiment with the 0/180 degree phase switch, or better yet, use the continuously variable phase dial to find the setting that produces the strongest bass at your seat.
7. Neglecting the crossover setting. If your crossover is set too high, the subwoofer becomes localizable and sounds disconnected. Too low, and you get a gap between the main speakers and the sub. A crossover between 60 and 80 Hz works for most systems with full-size main speakers.
EQ and Calibration Tips
Even with perfect placement, virtually every room needs some level of equalization to achieve flat, accurate bass response. Modern AV receivers and processors include automated room correction systems that can make a significant difference. But to get the best results, you need to understand what these systems do and how to use them effectively.
Start With Placement, Then Apply EQ
This order matters. Room correction software can tame peaks but it cannot fill nulls. A null is a physical cancellation caused by room geometry. No amount of digital EQ can fix it because boosting the nulled frequency just excites more cancellation. So you must find a subwoofer position that avoids the worst nulls first, then use EQ to smooth out the remaining peaks.
Popular Room Correction Systems
Audyssey MultEQ comes standard with many Denon and Marantz receivers. It measures multiple positions and applies correction filters across the frequency range. For best results, use the mobile app version, which lets you limit the correction range and adjust target curves. Dirac Live is widely considered the most advanced room correction system, offering remarkable control over bass response if your processor supports it.
If your receiver lacks built-in room correction, you can still benefit from manual EQ. Some subwoofers include built-in parametric EQ controls. External DSP units like the miniDSP give you powerful equalization tools at a reasonable cost.
Measurement Tools: REW and Smartphone Apps
Room EQ Wizard, or REW, is a free acoustic measurement program trusted by audio professionals and enthusiasts worldwide. It requires a measurement microphone and a computer, but it provides incredibly detailed frequency response graphs that show exactly what your room is doing to your bass. If you want to get serious about subwoofer placement, REW is the gold standard tool.
For a quicker check, smartphone apps like Spectrum can give you a rough frequency analysis using your phone’s built-in microphone. These are not laboratory accurate, but they are useful for identifying major peaks and comparing relative differences between subwoofer positions. I always recommend starting with the crawl method and your ears, then confirming with measurements if you want to go deeper.
Phase, Distance, and Crossover Fine-Tuning
After placement and EQ, three settings have the biggest impact on bass quality. Phase alignment ensures the subwoofer and main speakers reinforce each other rather than canceling. The distance setting on your receiver tells the system when to expect sound from each speaker, which affects phase at the crossover. Set the subwoofer distance accurately, even though the physical distance and acoustic distance can differ.
The crossover frequency determines where the main speakers hand off to the subwoofer. For tower speakers, 60 to 80 Hz is typical. For small bookshelf speakers or satellites, 80 to 100 Hz may be necessary. Experiment with the crossover slope if your receiver allows it. A steeper slope, like 24 dB per octave, often produces cleaner integration than the default 12 dB per octave.
FAQs
Should a subwoofer be in front of you or behind you?
A subwoofer can go in front of or behind you because human hearing cannot localize frequencies below roughly 80 Hz. However, front placement near your main speakers generally provides better integration and a more cohesive soundstage. Rear placement works fine but can create localization cues if the crossover frequency is set too high.
How to get deeper bass from a subwoofer?
To get deeper bass, start with corner or near-wall placement to maximize boundary reinforcement. Ensure your crossover is set correctly, typically between 60 and 80 Hz. Check that the phase alignment is correct so the subwoofer and main speakers reinforce each other. Consider adding a second subwoofer, which increases headroom and smooths out room modes for fuller low-frequency extension.
Where not to place a subwoofer?
Avoid placing a subwoofer inside enclosed cabinets, directly behind large furniture that blocks sound waves, or hard against a wall if the subwoofer is ported and needs port clearance. Also avoid the exact center of the room, which is a common null for many room modes, and avoid any spot where the bass sounds thin or hollow from your listening position.
Do subs sound better facing front or back?
For front-firing subwoofers, the direction the driver faces rarely matters because low frequencies are omnidirectional. However, port noise and cabinet resonance can create subtle directional effects. If your subwoofer is ported, avoid pointing the port directly at a wall. Experiment with rotation in small increments and listen from your seat to determine which orientation sounds cleanest.
Putting It All Together
Getting great bass is not about buying the most expensive subwoofer. It is about understanding how low frequencies interact with your room and positioning your subwoofer accordingly. The subwoofer crawl method remains the single most effective technique for finding the ideal spot, and it costs nothing but 30 minutes of your time.
Start with the crawl. If that is not practical, begin with the rule of thirds or front placement near your main speakers and adjust from there. Remember that EQ can smooth peaks but cannot fix nulls, so get the placement right before reaching for the calibration tools. And if you want the biggest single upgrade to your bass quality, adding a second subwoofer transforms consistency across every seat in the room.
Learning how to position a subwoofer for the best bass is a process of experimentation and listening. Trust your ears, use measurement tools to confirm what you hear, and do not be afraid to try positions that seem unconventional. The best spot is the one that sounds right to you from your favorite seat.