
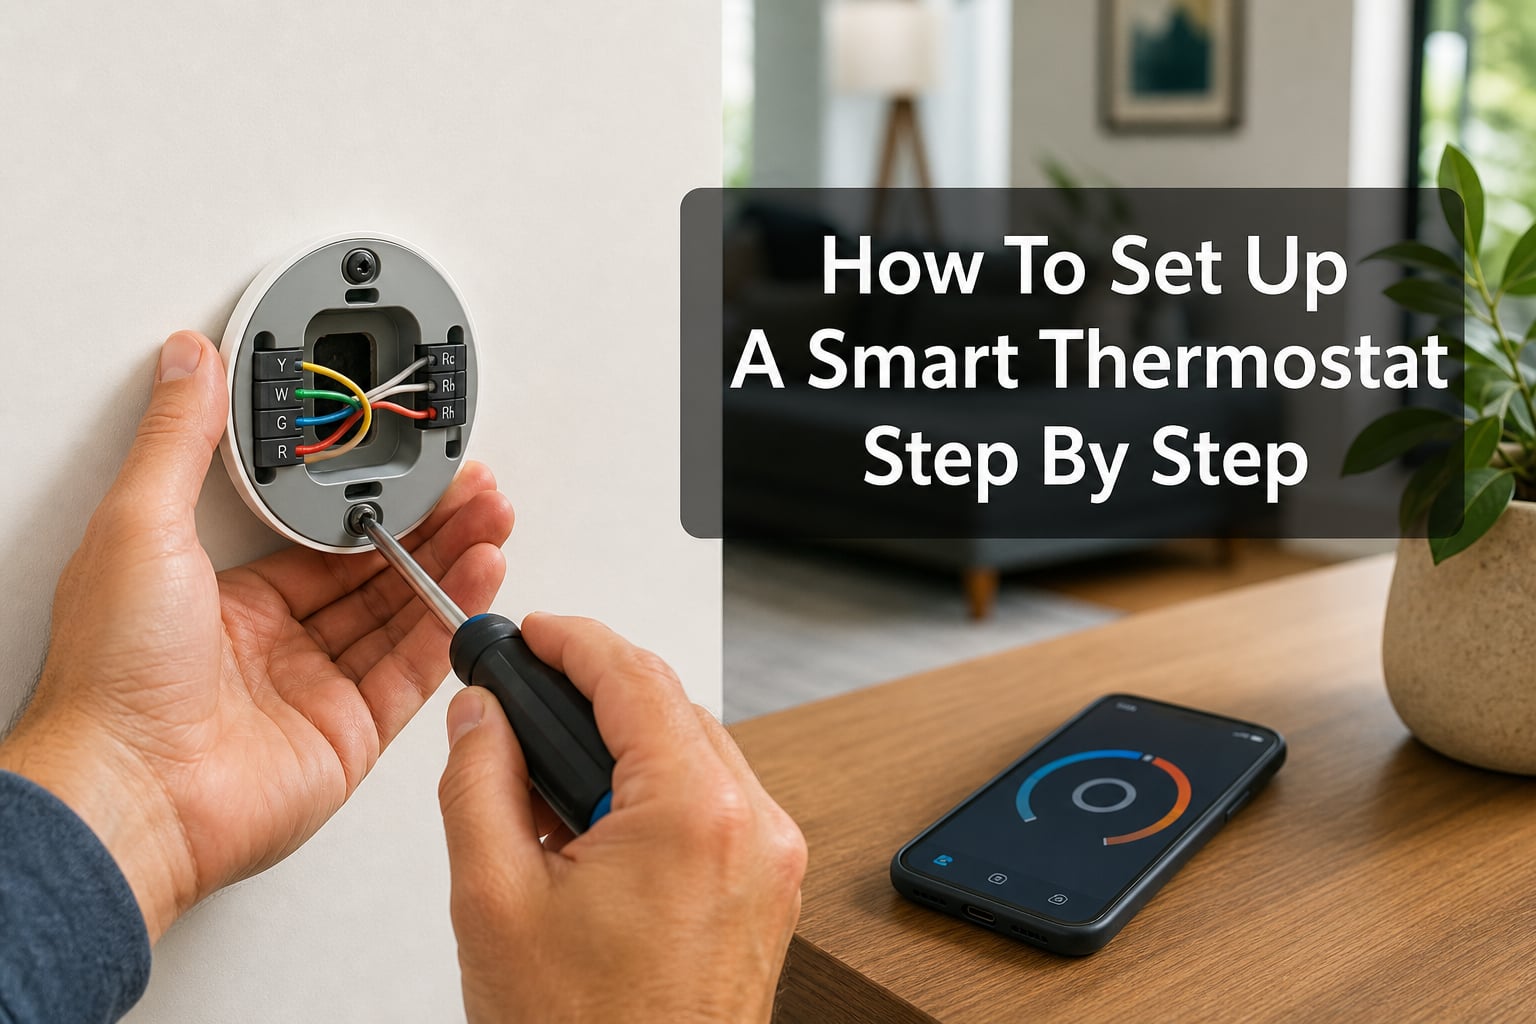
I installed my first smart thermostat on a Saturday morning with a single screwdriver, a smartphone, and about 40 minutes of patience. The total cost was the device itself, and the system worked on the first try.
If you’re reading this, you probably want the same result without the trial and error. Smart thermostat installation is one of those rare home upgrades that delivers real monthly savings, requires no professional help in 95% of homes, and can be completed before lunch. The U.S. Department of Energy estimates that homeowners can save 10% to 15% on heating and cooling bills just by setting a programmable thermostat properly. A smart thermostat takes that further by handling the scheduling for you.
This guide walks you through how to set up a smart thermostat step by step, from shutting off the breaker to programming your first schedule. I’ve included the steps competitors skip, like what to do when you only have two wires, how renters can install without landlord approval, and how to fix the WiFi pairing errors that stop most people cold.
Tools and Preparation Checklist
Before you touch a single wire, gather everything you need. A 30-minute installation becomes a two-hour ordeal when you’re hunting for a screwdriver with the breaker off.
What you’ll need:
- Small Phillips and flathead screwdrivers
- A drill with a quarter-inch bit (only if you need new mounting holes)
- A smartphone or tablet for app setup
- A pencil and the wire labels that came with your new thermostat
- A level (the one in your phone works)
- Masking tape and a marker
- A flashlight or headlamp
- Your home WiFi network name and password
Most smart thermostats ship with everything except the drill. If your kit includes a trim plate, have that ready too. A trim plate covers old paint lines and larger holes from previous thermostats, and skipping it makes even a perfect install look unfinished.
Check your HVAC compatibility first. Every major brand (Nest, ecobee, Honeywell, Amazon) runs an online compatibility checker. You answer five questions about your current wiring and heating type, and the tool tells you whether your system will work. This step takes three minutes and saves the heartbreak of unboxing a device that won’t fit your system.
You should also confirm that your heating and cooling system uses low-voltage control wires (the thin ones, usually 18 to 22 gauge). If you see thick wires resembling lamp cord or Romex cable, stop and call an HVAC technician. Smart thermostats only work with 24V AC low-voltage systems, which covers most central forced-air, heat pump, and boiler systems built after the 1980s.
How to Set Up a Smart Thermostat Step by Step: The Complete Walkthrough
This is the core installation sequence. Each step builds on the one before it, so don’t skip ahead. I’ll flag common mistakes at the end of each step based on what trips people up most.
Step 1: Turn Off Power to Your HVAC System
Go to your breaker panel and shut off the breaker labeled “Furnace,” “Air Handler,” or “HVAC.” Some homes have a separate breaker for the heating system and another for air conditioning. Flip both to be safe.
Don’t rely on just turning the thermostat to “Off.” The thermostat receives continuous 24V power from the furnace control board. That voltage is low, but it can short a thermostat’s circuit board if you disconnect wires while the system is live. The breaker protects both you and the new device.
Confirm power is off. Set your old thermostat to heat mode and bump the temperature up. If the system kicks on, you’ve flipped the wrong breaker. Try again before proceeding.
Step 2: Remove the Old Thermostat Faceplate
Most thermostats pull straight off the wall. Some have small screws at the bottom; others have a tab you press with a screwdriver. Pull gently. If it doesn’t budge, check for hidden clips or screws.
You’ll now see the wires connecting to terminals. This is the moment of truth for documentation. Take out your phone and photograph the wiring from three angles: straight on, slightly above, and from each side. These photos are your backup plan if anything goes wrong.
Pro tip: Photograph the terminal letters next to each wire. The standard low-voltage color code is red (R), white (W), yellow (Y), green (G), and blue or black (C). But real-world installations vary, especially in homes older than 1990. Trust the terminal labels, not the wire colors.
Step 3: Label Each Wire
Your new thermostat came with adhesive wire labels. Stick one to each wire that matches the terminal it’s connected to. For example, if a wire is in the “W” terminal, label it “W.”
If you didn’t get labels, masking tape and a marker work fine. Write the terminal letter on each piece of tape and wrap it around the wire an inch or two from the end.
Why this matters: The wire color tells you nothing definitive. In many homes, the orange wire is in the O terminal, but I’ve seen orange in W, blue in R, and every other combination you can imagine. Always label by terminal position, not by insulation color.
Step 4: Disconnect the Wires and Remove the Old Backplate
Each wire is held by a small screw or a press-release lever. For screw terminals, loosen the screw just enough to slide the wire out. For press-release terminals, push a small screwdriver into the slot to release the wire.
Critical warning: Some wires can fall back into the wall once released. To prevent this, wrap each wire around a pencil or tape it to the wall before fully detaching the backplate. A wire that disappears into a drywall cavity is one of the top causes of failed DIY installations.
Unscrew the old backplate from the wall and set it aside.
Step 5: Install the New Backplate
Thread the labeled wires through the center hole of the new backplate. Hold the backplate against the wall, using a level to make sure it’s straight.
If your existing screw holes line up, drive the included screws through them. If not, mark new hole positions with a pencil, drill pilot holes, and use the included drywall anchors. Don’t skip the anchors; a thermostat is heavier than its size suggests, and an unanchored mount will eventually pull away from the drywall.
Snap on the trim plate if you’re using one. It should sit flush against the wall and hide any gaps or old paint marks.
Step 6: Connect the Wires to the New Thermostat
Match each labeled wire to the corresponding terminal on the new backplate. Push each wire into its slot and tighten the screw or press the lever until the wire holds firm.
Give each wire a gentle tug to confirm it’s seated. A loose connection causes the most common post-install issue: the system works for a day, then randomly loses communication with the thermostat.
If your system has a C-wire (common wire), connect it now. The C-wire provides continuous 24V power to the thermostat. If you don’t have a C-wire, jump to the C-wire section below before continuing.
Step 7: Attach the New Faceplate
Most smart thermostats click or snap onto the backplate. Some screw in from below. Press firmly until you hear or feel a click.
At this point, your wiring is complete. Don’t turn the breaker back on yet; first, make sure the faceplate is fully seated and the wires aren’t pinched between the plate and the backplate.
Step 8: Restore Power and Power On the Thermostat
Return to the breaker panel and switch the HVAC breakers back on. Your new thermostat should light up within 30 seconds. If it doesn’t, the faceplate may not be properly seated, or a wire may have come loose. Power down again and check.
The thermostat will run through a brief startup sequence and prompt you to begin setup.
Step 9: Connect to WiFi and Set Up the App
The on-screen instructions will guide you through selecting your WiFi network and entering the password. Detailed WiFi setup steps follow in the next section.
Once connected, the thermostat may prompt a firmware update. Let it run; updates often include bug fixes and new features.
Step 10: Configure Your HVAC System Type
The app or on-screen menu will ask about your system: conventional furnace, heat pump, boiler, or dual-fuel. Choose the option that matches your home.
For heat pumps, you may be asked about the O/B terminal. The O wire reverses the valve for cooling; the B wire reverses it for heating. If you’re unsure, leave it on the default and adjust later if your heat pump runs backward (cooling when it should heat, or vice versa).
Set your heating and cooling preferences, including the temperature units (Fahrenheit or Celsius) and the swing setting (how far the temperature can drift before the system kicks on).
Step 11: Create Your Temperature Schedule
Most smart thermostats walk you through a default schedule: cooler at night, warmer during the day when nobody’s home, comfortable when you return. Use the default as a starting point, then customize.
The DOE recommends 68°F (20°C) during winter days when you’re home, 7 to 10 degrees lower when you’re away or sleeping. In summer, set 78°F (26°C) when home and 85°F (29°C) when away. Each degree of adjustment saves roughly 1% on your heating or cooling bill.
Step 12: Test Heating and Cooling
Set the temperature 5 degrees above the current room temperature to trigger heating. Listen for the furnace to kick on within a minute. Wait 10 minutes, then set the temperature below room temperature to test cooling. Confirm both systems respond and the thermostat reads the new temperature accurately.
If either system doesn’t respond, go to the troubleshooting section.
Understanding the C-Wire and Your Alternatives
The C-wire question trips up more DIY installers than any other part of the process. Here’s what’s actually happening.
What is a C-wire? The C-wire (common wire) delivers continuous 24V power from your furnace’s control board to the thermostat. Without it, the thermostat “steals” power by briefly turning on heating or cooling circuits. This works for old dumb thermostats but causes flickering, WiFi drops, and battery drain on smart thermostats.
Do I need a C-wire? If your thermostat has batteries and still powers on without a C-wire, it may work, but reliability suffers. Most HVAC professionals strongly recommend a C-wire for any smart thermostat. Reddit threads on r/hvacadvice are full of users who installed without a C-wire and now have a thermostat that loses WiFi every few days.
How to check if you have a C-wire. Remove your old thermostat faceplate and look at the wires connected to the backplate. If you see a wire in the “C” terminal, you have a C-wire. If there’s an unused wire tucked into the wall (common in homes built after 2010), you can often pull it out and connect it to the C terminal at both ends.
Three options if you don’t have a C-wire:
- Run a new wire. Pull a 5-conductor or 7-conductor thermostat wire from your furnace to the thermostat location. This requires running wire through walls and connecting it to the control board. It’s the most reliable fix but the most labor-intensive. An HVAC technician can usually do this in under an hour.
- Use a Power Extender Kit (PEK). ecobee includes a PEK with most of its thermostats. The kit installs at the furnace control board and at the thermostat, using the existing wires to simulate a C-wire connection. Installation is straightforward and takes about 15 minutes at the furnace end.
- Use the Nest Power Connector. Google’s Nest Power Connector (sold separately for around $25) does the same job as the PEK. It’s compatible with most 24V systems and installs in roughly the same way.
Both the PEK and Nest Power Connector work without running new wires. They reconfigure your existing wiring to provide constant power to the thermostat. I’ve used both, and the Nest Power Connector installs slightly faster, but the ecobee PEK is included free with most ecobee models.
A warning from real installers: Avoid any “C-wire adapter” that claims to work by simply adding a resistor to your existing wiring. These are unreliable, can damage control boards, and are not endorsed by major manufacturers. Stick with the PEK or Nest Power Connector if you don’t want to run new wire.
Connecting Your Smart Thermostat to WiFi and Setting Up the App
The WiFi setup step is where most people hit their first wall. Here’s how to get through it cleanly.
On the Thermostat Itself
Most thermostats walk you through WiFi setup on first boot. You’ll see a list of available networks. Select yours and enter the password using the on-screen keyboard.
If your network doesn’t appear, your WiFi may be on a 5GHz band that the thermostat doesn’t support. Almost all smart thermostats only connect to 2.4GHz networks because 2.4GHz reaches farther through walls. If your router broadcasts both bands under the same name, separate them in your router settings, then try again.
Some thermostats (notably Nest) use Bluetooth to pair with your phone first, then transfer the WiFi credentials over. This is faster than typing on the thermostat screen.
In the App
Download the manufacturer’s app (Google Home for Nest, ecobee for ecobee, Resideo for Honeywell). Create an account, then scan the QR code on the thermostat or enter the device’s setup code.
The app will ask for your home address. This isn’t just for the app; it’s used to pull local weather data, which the thermostat uses for features like humidity adjustment and outdoor temperature display.
Set your home’s WiFi priority (which network to use if you have multiple), enable location-based controls (geofencing), and decide whether to share usage data. Most manufacturers have stopped requiring data sharing, so opt out if you prefer.
Common WiFi Errors and Fixes
“Cannot connect to WiFi.” The password is wrong, or the thermostat is out of range. Move closer to your router or install a WiFi extender.
“Network not found.” Your network may be hidden. Manually enter the SSID and security type.
“Thermostat connected but app can’t find device.” The thermostat and your phone may be on different networks (e.g., your phone on cellular while the thermostat is on WiFi). Connect your phone to the same WiFi network and refresh.
“Connection drops frequently.” Either the signal is weak (add an extender) or there’s interference from a microwave, baby monitor, or other 2.4GHz device.
Apartment and Renter Installation Considerations
Most how-to guides assume you own your home. Renters face a different set of constraints: landlord approval, no permanent modifications, and uncertainty about HVAC ownership.
Can I install a smart thermostat in my apartment? In most U.S. states, yes, but with caveats. Smart thermostats are generally considered portable devices, similar to a smart light bulb. They’re not permanent modifications in the legal sense. That said, check your lease.
Many leases include clauses about modifying electrical systems or making any changes to the property. Some explicitly allow “smart home devices” while others prohibit anything that involves wiring. If your lease is silent, the safer move is to ask your landlord for written approval.
Will my landlord cover the cost? Some landlords will buy the thermostat for you if you agree to leave it when you move out. Others will cover the installation themselves. It never hurts to ask; the worst outcome is “no.”
Renter-Friendly Installation Tips
Use the existing wiring and backplate holes. Avoid drilling new holes unless absolutely necessary. A trim plate covers most cosmetic issues from the previous thermostat.
Take photos of every step, including the original thermostat and wiring. When you move out, you may need to reinstall the original thermostat to get your deposit back.
Save the original faceplate and any removed parts. If your landlord objects to a smart thermostat, reinstalling the old one usually takes less than 30 minutes.
If you have a PTAC unit (the wall-mounted heating and cooling unit common in hotels and many apartments), a standard smart thermostat won’t work. PTACs have proprietary controls. In that case, a smart AC controller like Sensibo or Cielo works with the existing remote-controlled unit.
If you’re in a building with a central HVAC system controlled by the property, you can’t install your own thermostat. Check with building management before buying anything.
Smart Thermostats for Renters Without C-Wires
If your rental doesn’t have a C-wire and you can’t run new wire, a PEK or Power Connector is your best option. They don’t require permanent modifications and can be removed if you move.
Some low-voltage thermostats (like the Mysa model for electric heat) work well in apartments because they’re designed to handle limited wiring configurations.
Troubleshooting Common Smart Thermostat Installation Issues
Even a perfect installation sometimes hits a snag. Here’s how to fix the problems that come up most often.
The Thermostat Won’t Turn On After Installation
The faceplate may not be seated properly. Remove it and reseat firmly. Check that the wires are still firmly in their terminals; a tug test confirms each connection.
If the thermostat still won’t power on, the breaker may not be fully on, or the wrong breaker was flipped. Verify both the furnace and AC breakers are on.
In rare cases, a wire was damaged during disconnection. Inspect each wire end for fraying or breaks. Trim and re-strip if needed.
Heating or Cooling Won’t Trigger
The system configuration may not match your HVAC setup. Go into the thermostat settings and confirm the system type (conventional, heat pump, etc.) is correct. The most common mistake is selecting “electric” instead of “gas” for a gas furnace, which prevents the system from turning on the blower.
The wires may be in the wrong terminals. Double-check against your photo from Step 2. Even one wrong wire can stop the whole system.
For heat pumps, the O/B setting may be reversed. Try switching it and retest.
WiFi Won’t Connect
Already covered in detail above. The short version: 2.4GHz only, check the password, and bring the thermostat closer to the router for the initial setup.
The Thermostat Loses WiFi Repeatedly
This is almost always a C-wire issue. The thermostat is drawing power from the WiFi radio, and when it can’t sustain that draw, it disconnects. Install a C-wire or use a PEK/Power Connector.
Some users report improvements by setting a static IP for the thermostat in their router settings. This prevents the device from losing its connection when the router refreshes DHCP leases.
The Thermostat Shows the Wrong Temperature
Most smart thermostats have a temperature offset setting in the advanced menu. If the thermostat reads 2 degrees higher than a separate thermometer in the same room, adjust the offset by minus 2 degrees.
Heat sources near the thermostat (lamps, electronics, direct sunlight) can throw off readings. If the thermostat is above a heat vent, it will read higher than the actual room temperature. Relocate it if possible, or use a remote temperature sensor if your thermostat supports one.
What If a Wire Falls Back Into the Wall?
Don’t panic. The wire is usually long enough that you can retrieve it with a pair of long needle-nose pliers or a wire retrieval tool. If the wire is lost, you’ll need to either fish it out through the wall cavity or run a new wire. A magnetic retrieval tool or a wire coat hanger with a small hook can help.
To prevent this in future installs, wrap each wire around a pencil or tape it to the wall before disconnecting.
Multi-Zone Systems
If your home has multiple thermostats controlling different zones, repeat this installation process for each thermostat. Most smart thermostats can be linked in the manufacturer’s app so all your zones are controlled from one screen.
For multi-zone heat pump systems, the wiring is more complex and may include additional accessory wires. Consult the manufacturer’s compatibility tool for your specific setup.
Programming Your Schedule for Maximum Energy Savings
Installing the thermostat is only half the job. Programming it properly saves the money that justified the purchase in the first place.
Start with these baseline settings:
- Winter: 68°F (20°C) when home, 60°F (15°C) when sleeping or away
- Summer: 78°F (26°C) when home, 85°F (29°C) when sleeping or away
- Geofencing: Set a 1-mile radius so the thermostat adjusts when you leave and approach home
- Sleep schedule: Drop temperature 5-10 degrees overnight for better sleep and lower bills
Use learning mode (if available). Nest and ecobee both have learning algorithms that observe your manual adjustments and build a schedule automatically. After two to three weeks of normal use, the thermostat often matches your preferences without programming.
Enable smart features gradually. Start with a simple schedule. Add geofencing after a week. Turn on learning mode after two weeks. Adding too many smart features at once can result in the thermostat fighting your habits rather than adapting to them.
Check your energy report monthly. Most apps show usage breakdowns by heating, cooling, and standby. If your heating usage spikes unexpectedly, check for HVAC issues like a dirty filter or leaking ductwork.
Vacation mode. When you travel, set the thermostat to extreme energy-saving temperatures (55°F in winter, 90°F in summer) to protect your home without running the system unnecessarily.
Smart home integration. If you use Alexa, Google Assistant, or Apple HomeKit, connect your thermostat for voice control and routines. Most smart thermostats integrate with all three platforms.
Frequently Asked Questions
Can I install a smart thermostat by myself?
Yes. In most homes, smart thermostat installation is a DIY-friendly project that requires only a screwdriver and about 30 to 45 minutes. The job involves low-voltage wiring (24V AC), which is safe to handle as long as you turn off the breaker first. If your system requires running a new C-wire through the wall, or if you have a high-voltage system, call a licensed HVAC technician.
What is the best setting for a smart thermostat?
The Department of Energy recommends 68°F (20°C) in winter when you’re home and 78°F (26°C) in summer. When you’re asleep or away, adjusting by 7 to 10 degrees saves the most energy. These are starting points; adjust based on your comfort preferences, humidity levels, and home insulation. Each degree of adjustment typically saves about 1% on heating or cooling costs.
Does a smart thermostat have to be connected to Wi-Fi?
A smart thermostat will still control your heating and cooling without WiFi, but you lose the smart features: remote control, scheduling, learning mode, and energy reports. Most manufacturers recommend connecting to WiFi during setup so the thermostat can receive firmware updates. Without WiFi, you control it manually like a traditional thermostat.
Can you just replace a thermostat with a smart thermostat?
Yes, in most cases. As long as your existing system uses low-voltage wiring (most do), you can swap the old thermostat for a smart one in under an hour. The main exception is if your current system lacks a C-wire and your new thermostat requires one. In that case, you may need to install a Power Extender Kit or run a new wire.
How long does it take to install a smart thermostat?
A typical DIY installation takes 30 to 45 minutes from breaker off to system running. The WiFi and app setup adds another 10 to 15 minutes. If you need to install a C-wire or troubleshoot an unusual wiring configuration, plan for 60 to 90 minutes total. Professional installation takes about an hour and costs $150 to $300 in most markets.
Why is my smart thermostat not connecting to WiFi?
The most common causes are: (1) the network password is incorrect, (2) the thermostat only supports 2.4GHz networks and your router is broadcasting 5GHz only, or (3) the thermostat is out of WiFi range. Try bringing the thermostat closer to the router for initial setup, confirm your network is on 2.4GHz, and double-check the password. Some routers have separate SSIDs for 2.4GHz and 5GHz bands; connect the thermostat to the 2.4GHz one.
Do I need an electrician to install a smart thermostat?
No. Smart thermostats use low-voltage 24V AC wiring, which is safe for homeowners to handle. You do not need an electrician unless your home has high-voltage line-voltage heating (like baseboard electric heaters) controlled by a thermostat. For low-voltage central HVAC systems, the install is a DIY-friendly project. If you’re uncomfortable with electrical work, an HVAC technician can install it for $150 to $300.
How do I install a smart thermostat without a C-wire?
Three options: (1) Use an unused wire in your existing cable as a C-wire by connecting it to the C terminal at both ends. (2) Install a Power Extender Kit (PEK), which comes with most ecobee models. (3) Install a Nest Power Connector (sold separately). Both PEK and Nest Power Connector reconfigure your existing wiring to provide continuous power without running new wire. Avoid third-party C-wire adapters that use resistors; they can damage your HVAC control board.
Conclusion
That’s the complete walkthrough on how to set up a smart thermostat step by step. From killing the breaker to programming your first schedule, the whole job fits comfortably inside a Saturday morning.
The most important takeaways: turn off the power before touching any wire, photograph your existing wiring before disconnecting, label every wire by terminal letter (not color), and invest in a C-wire solution if your system lacks one. Skip those basics, and you’ll spend the afternoon troubleshooting instead of saving money.
Once installed, give your thermostat two to three weeks to learn your habits. Check the energy report in the app after the first month. Most homeowners see a 10% to 15% drop in heating and cooling costs within the first billing cycle. That payback usually covers the device in under a year.
If you hit a wall during installation, the manufacturer’s support line and subreddit communities like r/hvacadvice and r/smarthome are excellent resources. Chances are someone has already solved the exact problem you’re facing.